Category Archives: Beans

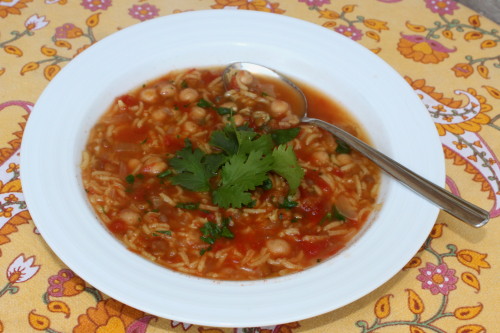
Harira (Moroccan Chick-Pea and Lentil Soup)

I love eating new foods and try to cook or bake a couple new things each week. People ask a lot about where I get all the new recipes. Usually I take a look in my pantry to see which ingredients are taking up the most shelf space, then check my fridge to see what produce is losing freshness the fastest. I can then search for recipes based on those ingredients. I use the Epicurious website and iPad app quite a bit. It allows me to pull up recipes by ingredients and gives me access to back issues of Gourmet as well as other cooking magazines like Bon Appétit. I first discovered this soup recipe when looking for a way to use up huge bags of bulk chickpeas, lentils and rice.  The saffron and fresh herbs brighten up these humble ingredients, making it one of my favorite “go to” recipes for winter.

I’m always on the lookout for new recipes. Feel free to send your favorites my way. I’d also love to know how you pick out new recipes.

harira

Harira

adapted from Gourmet, March 1994

The original Gourmet recipe is made with a whole chicken breast, which is simmered than shredded into the soup. I’ve adapted that recipe to make a vegetarian version.  Find the chicken-based recipe here.

4 cups (950 ml) broth (vegetable or chicken)
4 cups (950 ml) water
a 28-to 32-ounce (800-to 950 ml) can whole tomatoes, drained and puréed coarse
1/4 teaspoon crumbled saffron threads
2 medium onions, chopped fine
1 1/2 cups cooked dried chick-peas (recipe follows), or a 15-ounce (425 g) can, rinsed
1/2 cup (100 g) raw long-grain rice
3/4 cup (160 g) lentils
a large handful of fresh coriander (cilantro), finely chopped
a large handful of fresh parsley leaves, finely chopped

In a large heavy kettle with a lid bring the broth and water to a boil. Add to the kettle the tomatoes, saffron, onions, chickpeas, rice, and lentils and simmer, covered, 30 minutes, or until the lentils are tender. Season with salt and pepper to taste. Soup may be prepared up to 4 days ahead (cool uncovered before chilling covered). Just before serving, stir in the coriander and parsley.


To Cook Dried Chickpeas:

To make about 2 cups cooked chick-peas begin with a scant cup (180 g) dried.

In a bowl soak the chickpeas in water to cover by 2 inches overnight and then drain. In a saucepan combine the drained chickpeas and water to cover by 2 inches and simmer, covered partially, 1 to 1 1/2 hours, or until tender. Drain the chickpeas before using.

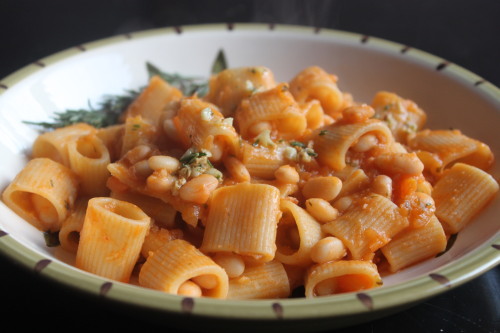
Pasta and White Beans with Sizzling Garlic-Rosemary Oil

Happy Spring dear readers! If you’ve had enough Easter ham, Passover brisket, or just want to try a tasty vegetarian main course, here’s one of our newest “Meatless Monday” faves. Good friend and reliable recipe sharer, Leah, sent this recipe to me a few weeks ago, remembering that my kids love beans. My kids do love beans and adored this dish. It is quite similar to their other favorite Pasta with Chickpeas but instead of chickpeas and ditalini, this recipe uses white beans and a larger pasta. The sizzling garlic-rosemary oil elevates this dish above the chickpea version, in my opinion. This may even be the dish to win over the bean-phobic in your life (Dad, I’m thinking of you…)

Pasta and White Beans with Sizzling Garlic-Rosemary Oil


Pasta and White Beans with Sizzling Garlic-Rosemary Oil
adapted from Bon Appétit

Like Leah, I use white beans that I  cook myself instead of canned beans. The Tuscan-style White Beans post gives some instructions on cooking dried white beans. Actually, the cooked Tuscan-style white beans would taste amazing in this recipe.

Serves 6

For the pasta with white beans:
1 medium onion, cut into big chunks
1 medium carrot, cut into big chunks
1 celery stalk, cut into big chunks
4 garlic cloves, peeled but left whole
1/2 cup (15 g) fresh flat-leaf parsley leaves
1/4 teaspoon crushed red pepper flakes (or to taste)
1/4 cup (50 ml) olive oil
salt and freshly ground black pepper
2 to 3 tablespoons tomato paste
3 1/2 cups (about 500 g) cooked, drained white beans (save cooking liquid for water in recipe, if desired) or 2 x 14 oz (400 g) cans of white beans, rinsed
1 lb (450 g) short tube pasta, such as ditalini, macaroni, penne or rigatoni

For the garlic-rosemary oil:
1/4 cup (50 ml) olive oil
2 garlic cloves, finely chopped
1 tablespoon minced fresh rosemary

Pulse the onion, carrot, celery, whole garlic cloves, parsley and red pepper flakes in a food processor until finely chopped.

Heat the oil in a large, heavy pot over a medium heat. Add the chopped vegetables and season with salt and pepper. Cook for 8 to 10 minutes, stirring often, until golden (wipe out the food processor bowl while the vegetables are cooking). Stir the tomato paste and 1 cup (250 ml) water in a small bowl to combine, then add to the pot. Scrape up any browned bits from the bottom of the pot and bring to a boil. Reduce the heat and simmer for 5 to 8 minutes, until the liquid has almost evaporated.

Add the chickpeas and 2 cups (500 ml) water to the pot and simmer for 15 minutes to let the flavors meld. Transfer 1 cup (250 ml) of the chickpea and vegetable mixture to the food processor. Purée until smooth, then stir back into the sauce to thicken it.

Meanwhile, cook the pasta in a large pot of boiling salted water, stirring occasionally, until al dente. Drain the pasta, reserving 1 1/2 cups (375 ml) of the pasta cooking liquid.

Add the pasta and 1/2 cup (125 ml) of the pasta cooking liquid to the sauce and stir to coat. Increase the heat to medium and continue stirring, adding more pasta cooking liquid as needed, until the sauce coats all the pasta.

To make the garlic-rosemary oil, heat the oil in a small sauce­pan over a medium-low heat. Add the chopped garlic and rosemary and cook for about 1 minute, until it stops sizzling. Divide the pasta among bowls and drizzle with the garlic-rosemary oil.

All Purpose Spice Rub & Rainbow Bean Soup Mix

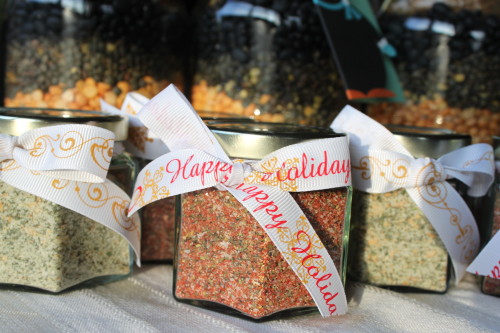
This year, I decided to forgo the store-bought, China-manufactured, last-minute purchased gifts that I usually give out at holidays. I had the bright idea (insert sarcasm here) to make homemade food gifts this year. I figured, why not? I like to hang out in the kitchen. I like buying ingredients. I like one-of-a-kind treats. Well, readers, here is why not. I have about 30 people who need gifts this year (my kids attend schools with lots of teachers in each room). Christmas is less than a week away and I’m still searching for packaging materials, running out of ingredients, and trying out new recipes with limited success.  On the upside, this weekend the kids and I made up a few batches of spice rub and a half dozen quart jars of soup mix and they turned out amazingly cute. I tried out a couple other gift ideas (salted caramel sauce and hand-chopped garlic herb salt) but the end products, though tasty, didn’t justify the the work involved in making them. So, if you are looking for a unique gift that you can make with minimal fuss, I highly recommend one of these instead.

All-purpose Spice Rub
from Everyday Food, July/August 2006

I found lovely little jars at a reasonable price at specialtybottle.com. This recipe easily double or triples so you can mix up a big batch and fill a dozen small jars at one go.

Makes about 1 1/4 cups

1/3 cup (75 g) coarse salt
1/4 cup (40 g) packed light-brown sugar
1/4 cup (30 g) paprika
2 tablespoons ground black pepper
2 tablespoons dried oregano
2 tablespoons dried thyme leaves
1 tablespoon cayenne pepper (optional, I used 1/2 teaspoon per batch)

In a small bowl, combine all the ingredients, using your hands to break up the sugar. Store in an airtight container, away from heat and light, up to 6 months.

***

Rainbow Bean Soup Mix
adapted from food.com

Makes 1 quart jar

3/4 cup (150 g) dried red beans
3/4 cup (150 g) dried great northern beans
2/3 cup (125 g) dried split peas (yellow or green)
2/3 cup (115 g) lentils (brown, green, or red)
2/3 cup (130 g) dried black beans

Seasoning bag:
2 tablespoons dried onion flakes
2 tablespoons beef or chicken bouillon granules (sold in soup section)
2 tablespoons dried parsley flakes
2 teaspoons dried basil
2 teaspoons sweetened lemonade drink mix
1 1/2 teaspoons chili powder
1/2 teaspoon garlic powder
1/2 teaspoon pepper
1 teaspoon dried oregano

Use a quart jar that has a wide mouth, but if you can’t find one any quart jar will work. Place each type of bean in jar in the order listed above.

Mix the seasoning ingredients and seal in a small baggie. Place the seasoning bag on top of the beans, gently flattened so it can be seen from all sides.

Seal the jar, decorate, and attach the soup directions (below).

DIRECTIONS TO MAKE RAINBOW BEAN SOUP:.

Remove seasoning packet from the jar and set to the side. Rinse beans and place beans in large microwave-safe dish. Cover with water 1″ to 2″ over top of beans. Cover dish loosely with plastic wrap. Microwave on high for 15 minutes, rotating after 7 minutes. Drain and rinse beans very well; place in a large pot. Add 8 cups water, one 15 ounce can crushed tomatoes and seasonings from packet. Cover, bring to boil. Lower heat, cover pan and simmer 1 1/2 hours or until beans are tender. Stir occasionally.

Chickpea Wraps with Celery, Dill and Mustard

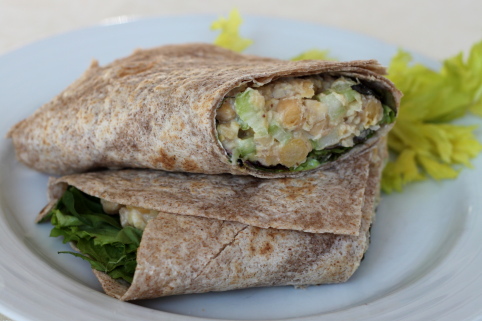
Lucky for me, my co-blogger Kristin keeps up on the cookbook scene. I rarely buy cookbooks (I think I’ve purchased maybe three in my lifetime) but Kristin always send me a good one for my birthday. This year, I was thrilled to receive Super Natural Every Day: Well-loved Recipes from My Natural Foods Kitchen by Heidi Swanson of 101 Cookbooks blogging fame. I pull regularly from her site for easy vegetarian recipes. I wasn’t aware she had a new cookbook until I opened Kristin’s package. What treat to try out some healthy dishes after weeks of December holiday food overload. I mean, I love Christmas cookies and Chanukah latkes, and a birthday cake or two goes down easy, but what really hit the spot after our New Year’s festivities were these savory chickpea wraps. The crisp celery, tangy mustard, and cool yogurt played off the tender chickpeas perfectly. The other recipes I’ve tried from the book have also been lovely, with the exception of one very terrible, nearly inedible chickpea stew. Note to Heidi (and fellow cookbook readers), I love saffron, yogurt, egg yolk and chickpeas–but not in soup form.


Chickpea Wraps with Celery, Dill and Mustard
adapted from Super Natural Every Day: Well-loved Recipes from My Natural Foods Kitchen by Heidi Swanson

For the bean-phobic, try substituting two cups of cooked, diced chicken breast for the chickpeas. I haven’t tried it yet but I’d bet good money this recipe makes a damn good chicken salad wrap.

Serves 4

3 cups (425 g) cooked chickpeas (garbanzo beans) or 2 x 15 oz/425 g cans chickpeas, rinsed and drained
1/3 cup (45 g) minced shallots
1/2 cup (60 g) chopped celery
1/2 teaspoon (or more to taste) dried dill or 2 tablespoons chopped fresh dill
1 1/2 tablespoons Dijon-style or stone-ground mustard
2/3 cup (155 g) plain yogurt
1/2 teaspoon sea salt
1 tablespoon fresh lemon juice, plus more if needed, and a bit of grated zest
4 pieces lavash flatbread or whole wheat tortillas (12 inch)
2 cups (30 g) mixed salad greens

In a large mixing bowl, whisk together the mustard, yogurt and salt. Spread about 2 tablespoons of the yogurt sauce across each piece of lavash.

Pulse 2/3 of the chickpeas in a food processor a few times, just enough to break them up. Transfer them to the mixing bowl with the remaining yogurt sauce, along with the remaining chickpeas, shallots, celery and dill. Gently toss to combine then add the lemon juice and zest and toss again. Taste and add more salt or lemon juice, if needed.

Sprinkle each piece of lavash with 1/4 of the mixed greens (the yogurt will help hold the greens in place), top each of the four wraps with 1/4 of the chickpea mixture. Fold or roll into a wrap and serve.


Slow Cooker Cassoulet

I originally posted this on February 15 2010, but have updated the recipe to make it easier and less time consuming.

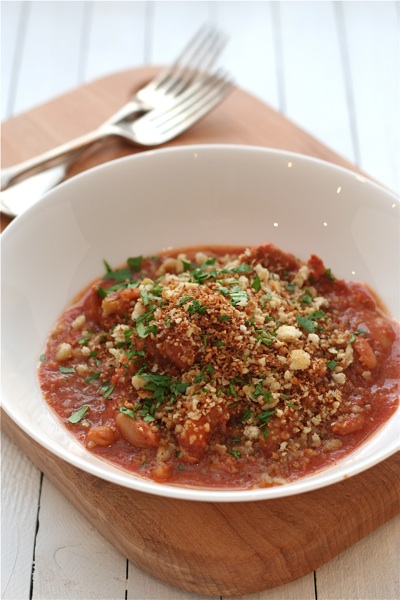
I’ve been trying to go back to cookbooks I haven’t used in awhile, so last week I pulled The River Cottage Meat Book by Hugh Fearnley-Whittingstall down off the shelf and cassoulet caught my eye. While I wound up making a different version, it ticks a lot of boxes — this one can be made in a slow cooker, it’s good value (cassoulet is a traditional French peasant dish), it’s hearty, rib-sticking food for cold nights and it makes more than enough for two meals.

If you like the idea of a cassoulet but don’t have a slow cooker or don’t have all day to let it cook, you could try Jacques Pépin’s 30-minute version or Jamie Oliver’s kinda sausage cassoulet. In his recipe, Hugh F‑W suggests serving this with an orange and watercress salad.

Slow Cooker Cassoulet

Serves 8 to 10

If you can’t get pork shoulder, pork leg or even loin would work too — just get the butcher to remove the fat for you. If you wanted to add in some veg, a few carrots, peeled and sliced on the diagonal, would work well.

olive oil
3 onions, coarsely chopped
salt and freshly ground black pepper
3 lb (1.4 kg) boneless pork shoulder, cut into 2‑inch pieces (you can ask your butcher to do this for you)
1 lb (450 g) fully cooked or smoked chorizo or garlic sausage links, sliced on the diagonal
2 x 14 oz (400 g) cans of cannellini, haricot or Great Northern beans
1 x 28 oz (or 2 x 14 oz/400 g) cans whole plum tomatoes, drained and coarsely chopped
2 cups (500 ml) chicken stock
1 cup (500 ml) dry white wine, such as Sauvignon Blanc (or use stock or water if you prefer not to use alcohol)
3 tablespoons tomato paste
1 head of garlic, halved crosswise
1 cup (100 g) breadcrumbs, plus extra to serve
a handful of chopped fresh flat-leaf parsley, plus extra for garnish
crusty bread, to serve

Put a large frying pan over a medium heat and add in a splash of olive oil. Add the onions and a pinch of salt to prevent the onions from browning and cook for about 10 minutes, until they’re translucent but now browned. Transfer the onions to the slow cooker, then stir in the pork, chorizo, beans, tomatoes, stock, wine, tomato paste and garlic along with a generous seasoning of salt and pepper.

Set the cooker to low and cook, covered, for about 8 hours, until the pork pulls apart easily with a fork (though it could be as much as 10 hours). Skim off any fat and remove and discard the garlic. Fold in the panko or breadcrumbs and the parsley. Taste and season as needed.

Let the cassoulet stand at room temperature for 10 minutes before serving. Sprinkle each serving with extra breadcrumbs and parsley and serve with warm crusty bread.

Bacon and Butterbean Chowder

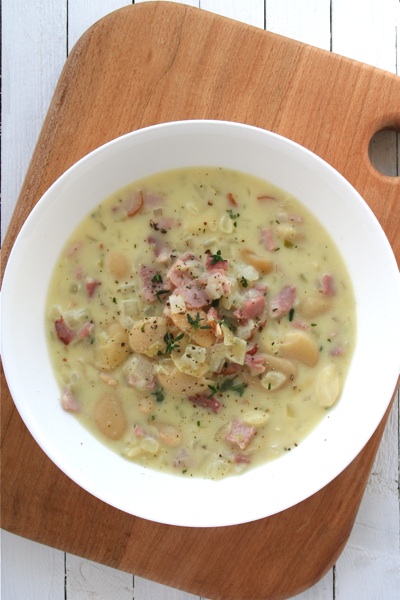
A couple weeks ago I was at The Tannery in County Waterford having lunch with a few other bloggers and food writers to celebrate the launch of the Cook with Avonmore site, which features Tannery chef Paul Flynn as their first guest chef. On the menu that day there was a choice of crab crème brûlée or this bacon and butterbean chowder as a starter. I went for the crab not only because it’s The Tannery’s signature dish, but because I knew I had the recipe for the chowder in my press pack. What I didn’t know, though, was what a fantastic recipe it is. From just a few ordinary ingredients, this soup is more than the sum of its parts.

Paul Flynn says, “A chowder for me is something that’s really rich and comforting. It’s something that you eat in front of the fire or just after a lovely long walk and you’re cold and you want something hot and heart-warming to eat.” Serve this with some good crusty bread, a nice cheese and a glass of red wine — either with or without the long walk beforehand — and I’m willing to bet it will be one of the nicest meals you’ll make this autumn.

Bacon and Butterbean Chowder
adapted from Paul Flynn via cookwithavonmore.ie

Serves 2 as a main course or 4 as a starter

Paul Flynn says that “when you use beautiful ingredients like butter and cream, you’ve got to realize that if you put just enough in, it gives you that lovely, luxurious richness that you’re looking for, and that will really comfort you on a cold night”, but you can use a little less cream if you don’t want the chowder to be quite as rich. You can also use a handful of fresh parsley instead of thyme.

knob of butter
olive oil
1 large onion, finely chopped
pinch of salt
1 garlic clove, finely chopped
6 pieces of smoked bacon or dry cure streaky bacon, finely diced
1 tablespoon flour
2 teaspoons chopped fresh thyme leaves, plus extra to garnish (or 1/2 teaspoon dried thyme)
1 teaspoon Dijon mustard
freshly ground black pepper
2 cups (500 ml) chicken stock
1 x 14 oz (400 g) can of butterbeans, rinsed
1/2 cup (125 ml) cream
crusty bread, to serve

Melt the butter in a pot over a medium heat along with a splash of olive oil so the butter doesn’t burn. Add the onion and a pinch of salt to prevent the onion from colouring. As Paul Flynn says, “The real key to this is that what you do inside this pot with the onions will provide you with the whole base flavour for the soup. If you rush this, it’s not going to be right.” So turn the heat down a little to medium-low, put the lid on and “let the magic happen”. Cook the onion for about 10 minutes, until it’s translucent. Raise the heat back to medium, add in the garlic and cook for 1 minute more, then add in the bacon and cook for about 5 minutes (though note that the bacon won’t go crispy because of the juice from the onions). Sprinkle the flour over the onions and bacon and give it all a stir, then allow it to cook for 2 minutes. Add in the thyme and mustard and a generous grinding of black pepper, then pour in the stock. Bring to the boil, then reduce the heat to a simmer and add in the butterbeans. Continue to simmer the soup for a few minutes, until the beans are warmed through, then stir through the cream. Taste the soup and adjust the seasoning if you think it needs more salt, though be careful because the bacon and stock are already salty. Ladle the soup into bowls, garnish with some of the reserved thyme leaves and serve with crusty bread.

End-of-Summer Squash Sauté with Three Bean Salad

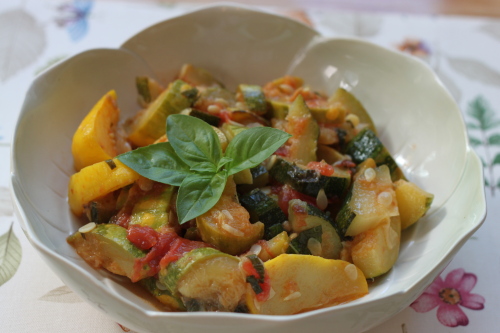
I love cooking at this time of the year. Vegetables and fruits are bountiful and at peak tastiness. It’s not too hot to use the stove top. And a week’s vacation at the end of August left me feeling (relatively) stress free at home and work. Not wanting to add any unnecessary work to my day, the dishes below provided a quick, tasty, and healthy meal and they take full advantage of the overabundant squash and beans from your or your neighbor’s backyard garden. This menu is light. If you want something more substantial for dinner or if you are cooking for guests, pick up a rotisserie chicken at the supermarket, cook up a little pasta to serve with the squash saute, or splurge on a trip to Kopp’s or your favorite ice cream store after dinner. What better way to celebrate the last few, long, warm nights of summer.

End-of-summer squash saute

End-of-Summer Squash Sauté

serves 4

2 or 3 medium summer squash (about 1 1/2 lbs / 680 g)
3 tablespoons olive oil
1 teaspoon kosher salt
1/2 teaspoon freshly ground black pepper
1/2 teaspoon garlic powder
1 large or 2 small tomatoes, peeled and coarsely chopped
3 tablespoons chopped fresh basil
freshly grated Parmesan cheese, for serving (optional)

Cut the squash in half lengthwise (or if the squash is very thick, cut it into quarters lengthwise), then dice into 1/2‑inch-thick pieces.

In a large saute pan with a lid, heat the olive oil over a medium-high heat until hot but not smoking. Add the squash and saute, stirring occasionally, for about 5 minutes, until it just begins to brown. Sprinkle the salt, pepper and garlic powder over the squash, then stir in the tomatoes. Cover and cook, stirring every few minutes, for 10 to 15 minutes longer, until the squash and tomato just begin to break down.

Remove the lid and continue to cook until your desired sauciness level. Stir in the basil and serve with grated Parmesan cheese, if desired. This dish tastes great over cooked pasta or rice or as a side dish.

***

Three Bean Salad
adapted from Molto Gusto: Easy Italian Cooking by Mario Batali

serves 6

1 tablespoon salt
1 lb (450 g) green beans [Note: smaller is better]
1 x 15 oz (425 g) can chickpeas, rinsed and drained
1 x 15 oz (425 g) white kidney beans (cannellini) or red kidney beans
1/4 cup (10 g) coarsely chopped fresh mint
1/2 cup (120 ml) Red Wine Vinaigrette (recipe below)
Maldon or other flaky sea salt and freshly ground black pepper

Bring four quarts of water to a boil in a large pot and add 1 tablespoon salt. Add the beans and blanch them until crisp-tender, about 3 minutes. Drain the beans in a colander and cool under cold running water; drain well.

Combine the green beans, chickpeas and kidney beans in a large bowl. Add the mint and toss. Add half the vinaigrette and toss gently again. Season with salt and pepper. Serve or, if possible, let stand at room temperature for 1 to 2 hours to bring out the flavors. Serve the salad with the remaining vinaigrette on the side.


Red Wine Vinaigrette

Makes 1 cup (250 ml)

1/4 cup (60 ml) good-quality red wine vinegar
1/4 cup (60 ml) sparkling water
1/2 cup (125 ml) extra virgin olive oil

Whisk the vinegar, water and olive oil together in a small bowl, or shake the ingredients together in a small, lidded jar, until well incorporated. The vinaigrette can be refrigerated for up to 5 days.

White Bean and Sausage Soup and Almond and Candied Bacon Bark

The first time I ever tried black pudding (a.k.a. blood pudding), I spit it out. I had only been living in Ireland for a few weeks and was at a fancy book launch for my new publishing job. One of the canapés being passed around was circles of pan-fried black pudding with a fancy relish on top, and not wanting to lose face in front of my new colleagues, not to mention my boyfriend, I was determined to try some. When in Rome, right? But I just couldn’t get over the fact that it was made from blood and I couldn’t even bring myself to chew it. Growing up in suburban Illinois, where an egg roll from the Chinese takeout was the most exotic thing I’d ever eaten, it was too much of a culture shock.

I was telling this story to my friend Caroline a few hours before we were due to go to the Clonakilty by Candlelight dinner last week. “Are you sure you want to go?” she asked, looking worried. “You know they’re bound to serve it there.” “Oh, I’m over it now,” I said. “I even ordered a black pudding and goat cheese tart at a restaurant last year.”
I was lucky to get a place at the free dinner on its second night, which was run as a pop-up restaurant by Clonakilty Blackpudding for only six nights. The location was kept secret until the day before, which turned out to be a Georgian house on Dublin’s north side. Caroline and I were the first to arrive (fellow food blogger Aoife was there that night as well) and we were handed a glass of Prosecco and directed towards the biggest turf fire I’ve ever seen, stacked eight briquettes deep at least. We also got a sneak peek of the room next door that we’d be eating in – along with 2,000 creepy china dolls crammed into floor-to-ceiling shelves that lined the room – and a look at the menu, which did indeed include a main course of black pudding with scallops and a carrot puree.

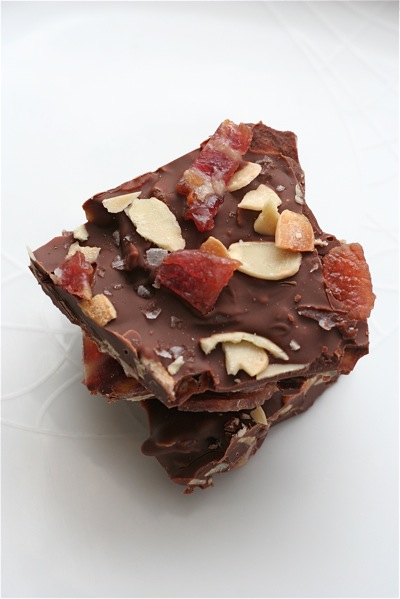
Because I’d won some Clonakilty black and white pudding, sausages and bacon by correctly answering the question “What is entomophagy the consumption of?” (insects), I made this white bean and sausage soup, an old cheap and cheerful stand-by. And feeling inspired by the chocolate-covered bacon, bacon praline and 12-year-old Jameson whiskey with a bacon and rosemary twist that we were served, I made this almond and candied bacon bark. This dessert seems to divide people firmly into two camps – people who have never heard of such a thing and think it sounds downright weird (they must have somehow missed the bacon mania boat), and people who think it sounds delicious and can’t wait to make it themselves. If you’re the former, then all I can say is don’t knock it till you’ve tried it – and then once you’ve tried it, try to stop yourself from eating all of it.

White Bean and Sausage Soup
adapted from The Barefoot Contessa Cookbook by Ina Garten

Serves 6

I’ve adapted the Barefoot Contessa’s original recipe to add sausages, but I make it just as often without them for a vegetarian version.

1 lb (450 g) dried white cannellini beans
olive oil
6 to 8 good-quality sausages
3 large onions, sliced
2 garlic cloves, minced
1 large branch fresh rosemary
2 quarts (2 liters) chicken or vegetable stock
1 bay leaf
salt and freshly ground black pepper

In a medium bowl, cover the beans with water by at least 1 inch and leave them in the refrigerator for 6 hours or overnight. Drain.

In a large stockpot over a low to medium heat, heat some olive oil and cook the sausages for about 10 or 15 minutes, until they’re browned on all sides and cooked through. Remove the sausages to a plate and set aside. Add the onions to the pot and saute for 10 to 15 minutes, until they are translucent. Add the garlic and cook for 1 more minute. Add the drained white beans, rosemary, chicken stock, and bay leaf. Cover, bring to a boil, and simmer for 30 to 40 minutes, until the beans are very soft. Remove the rosemary branch and the bay leaf. Pass the soup through the coarsest blade of a food mill or place in the bowl of a food processor fitted with a steel blade and pulse until coarsely pureed. Return the soup to the pot over a medium heat. Slice the sausages and add to the soup to reheat. Add salt and pepper to taste and serve hot.

***

Almond and Candied Bacon Bark
adapted from Ready for Dessert by David Lebovitz

David Lebovitz says it’s best to make the candied bacon the same day you plan to use it. If you want to play around with flavors (though this almond and candied bacon combo is insanely addictive), check out this list of top 10 chocolate bark mix-ins from the Big Girls, Small Kitchen blog for some inspiration.

1 1/4 lb (565 g) good-quality chocolate, broken into pieces
1/2 cup (50 g) flaked almonds, toasted
5 pieces of bacon, pancetta or streaky rashers
3 tablespoons brown sugar
flaky sea salt, such as Maldon (optional)

Preheat the oven to 400°F (200°C) and line a baking try with foil (shiny side down) or parchment paper. Place the strips of bacon on the tray and sprinkle each strip with about 2 teaspoons of brown sugar. Bake for 12 to 15 minutes, turning the strips over halfway through baking and dragging them through the melted sugar on the tray. They’re done when they’re mahogany colored. Cool on a wire rack until crisp, then crumble or roughly chop. Set aside.

While the bacon cools, place a piece of parchment paper on a baking tray or stretch a piece of cling film taught across a baking tray instead. Add the chocolate to a large heatproof bowl. Set the bowl over a pot of simmering water and stir often until the chocolate is almost melted.

Remove the bowl from the heat, wipe off the bottom, then continue to stir the chocolate until it’s all melted and smooth. Mix in two-thirds of the toasted almonds and two-thirds of the bacon.

Scrape the mixture onto the prepared baking tray and use a spatula to spread it to the desired thickness. Add the remaining almonds and bacon to the top of the chocolate, pressing them in lightly so they’ll adhere. Sprinkle bits of salt, if using, across the top. Refrigerate the baking sheet until the chocolate sets. Once the bark is firm, break it into pieces. Store the bark in the fridge, where it will keep for 3 days.