Category Archives: 30-minute meals

Whole Wheat Belgian Waffles with Raspberry Puree

Ask my husband, ask my mom, ask my coworkers: I am not a morning person. Despite my middle age, I still have to set an alarm clock every day, even weekends, or risk sleeping until lunchtime. Most days the only reason I want to drag myself out of bed is the promise of strong coffee and kid cuddles.  Not surprisingly, I usually skip breakfast. With that being said, I adore this recipe and wanted to share it. It is one of my tried and true, never fails me dishes. If you spend the night at my house, this is one of three things I will serve you when you wake up. And if you are questioning why a dinner blog might post a waffle recipe, consider it your next “breakfast for dinner” meal idea.

I was skeptical of 100% whole wheat waffles but these are incredibly light and almost crisp. I promise! Serve with fresh raspberries, maple syrup, whipped cream, and raspberry puree or your favorite waffle toppings.
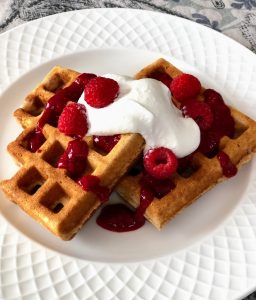
Whole Wheat Belgian Waffles

from King Arthur Flour

This recipe makes about 4 large waffles. I always double it, cook up the extra waffles then freeze them wrapped in wax paper inside freezer bags. Homemade freezer waffles! Much healthier and cheaper than Eggos.

  • 1 1/2 cups (170g) King Arthur White Whole Wheat Flour
  • 2 teaspoons baking powder
  • 1/2 teaspoon salt
  • 2 tablespoons (25g) granulated sugar
  • 1 large egg
  • 1 1/2 cups (340g) lukewarm milk
  • 5 tablespoons (71g) melted butter or 1/3 cup (67g) vegetable oil

Preheat your iron while you make the waffle batter. Whisk together the flour, baking powder, salt, and sugar.

In a separate bowl, whisk together the egg, milk, and butter or oil.

Mix together the wet and dry ingredients, stirring just until combined. The batter will be a bit lumpy. Cook the waffles as directed in the instructions that came with your waffle iron.

Raspberry Puree

Makes about 1 1/2 cups

  • 1 pint fresh raspberries or 10 ounces frozen raspberries defrosted
  • 1/4 — 1/2 cup sugar, honey, or maple syrup (to taste)

Blend ingredients in blender or food processor until smooth.
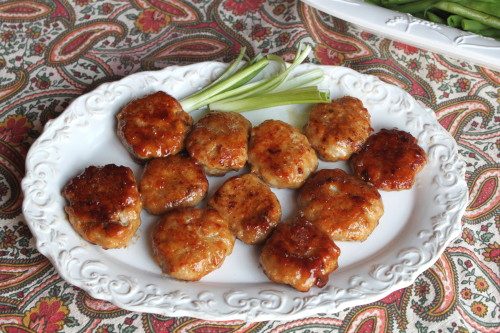
Chicken Cakes with Teriyaki Sauce

I vowed to post more recipes in 2013 and, like so many other New Year’s resolutions, find myself failing miserably by the end of January. Despite my blog negligence, I have been cooking up a storm. I now realize that the prospect of free time on the weekends thrills me because I know I will have time to spend a few hours on my feet in front of the stove, my desire to stand around and stir pots all afternoon the result of working a desk job, I guess!

Though these delicious chicken cakes aren’t the best thing I’ve made this month, they were cooked during our sunniest (most photo friendly) weather. I love the rich umami taste of these succulent little meat cakes and the fact that the homemade teriyaki glaze cooks in the pan along with the chicken, requiring no separate sticky pot to wash later. Though we all enjoyed them, Anabelle scarfed hers down fastest with a nod of approval and an it-tastes-like-sausage compliment. If you know my kids, no bigger praise can they bestow on food.

Chicken Cakes with Teriyaki Sauce
adapted from The Cookbook Junkie’s adaption from Around The World in 450 Recipes by Sarah Ainley (editor)

I paired this Japanese inspired dish with a cucumber salad and string beans. A side of rice would also be nice, but don’t expect to have extra sauce to flavor it. The teriyaki “sauce” is really a glaze. These would make awesome appetizers.

makes 1 dozen

For the chicken cakes:
1 lb (450 g) ground chicken
1 large egg [optional, I forgot to add the egg and my cakes turned out just fine]
1/2 small onion, grated
1 ½ teaspoons sugar
1 ½ teaspoons soy sauce
Cornstarch or tapioca starch, for coating
2–3 scallions, cut in half, white/light green ends shredded and green parts chopped
2 tablespoons vegetable, canola, or sunflower oil

For the teriyaki sauce:
2 tablespoons sake or dry white wine
2 tablespoons sugar
2 tablespoons mirin
2 tablespoons soy sauce

Mix the ground chicken with the egg, grated onion, sugar and soy sauce until the ingredients are thoroughly combined and well bound, about 2 minutes. The mixture will be quite sticky, which makes for good texture. Shape the mixture into 12 small, flat, round cakes and dust them lightly all over with cornstarch. Since the mixture is very sticky, I found it easiest to coat my fingers in cornstarch then drop the semi-formed cake into the cornstarch. Once it was covered in cornstarch I was able to properly form it.

Soak the white/light green part of the scallions in ice water for 5 minutes and drain well.  The ends should curl slightly.

Heat the oil in a frying pan. Place the chicken cakes in a single layer, and cook over medium heat for 3 minutes. Turn the cakes over and cook for 3 minutes longer, until cooked through.

Mix the ingredients for the sauce and pour it into the pan. Turn the chicken cakes occasionally until they are evenly glazed. Move or gently shake the pan  to prevent the sauce from burning.

Arrange the chicken cakes on a plate and top with the scallions. Serve immediately.


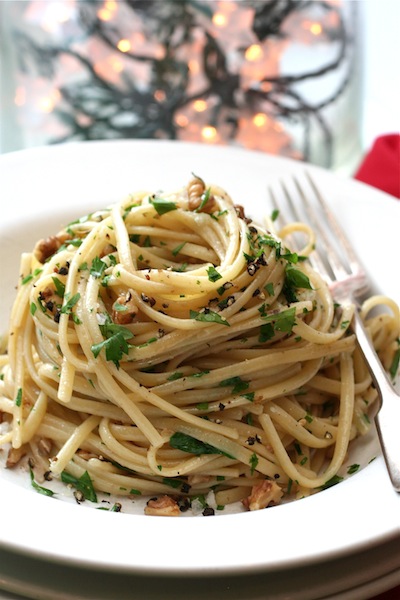
Neapolitan Christmas Eve Spaghetti with Walnuts

We’ve been hosting my in-laws for Christmas dinner — and Christmas Eve, and St. Stephen’s Day, and usually one or two more days besides — for years now, which means I spend a lot of my time happily wearing a path between the stove, sink and fridge in the days before and after Christmas Day itself. But in that busy week before the main event, when I’m feeling overwhelmed with shopping lists or last-minute presents or the cards I always procrastinate about writing, or when I’d rather be baking some cookies than fussing too much over dinner, I just want to put something on the table without too much effort or expense. And if it can be something that’s still in keeping with the holidays, like this recipe, then even better. As much as there’s nowhere I’d rather be than my kitchen, sometimes a quick, simple supper can feel like a gift.

Neapolitan Christmas Eve Spaghetti with Walnuts (U Spaghetti’ Anatalina)
adapted from Eat Like an Italian by Catherine Fulvio

Serves 4

This recipe comes from Catherine Fulvio’s latest book, Eat Like an Italian. Catherine says, “During the weeks before Christmas, wonderful fresh walnuts arrive in the shops. This was a recipe for ‘poor folks’ and it illustrates how Italians respect their ingredients.”

1 lb (450 g) spaghetti
1/2 cup (125 ml) good-quality extra virgin olive oil
4 garlic cloves, very finely sliced
6 tinned anchovies, drained and roughly chopped
1 1/2 cups (150 g) walnuts, lightly toasted and chopped
salt and freshly ground black pepper
2 tablespoons chopped fresh flat-leaf parsley, to garnish

Put a large pot of salted water on to boil. Cook the pasta according to the instructions on the package.

Meanwhile, gently heat the oil in a large saucepan (one that’s big enough to also hold all the cooked pasta later) over a low heat. Add the sliced garlic and cook for 1 minute, taking care not to burn the garlic or it will turn bitter and ruin the dish. Add the anchovies and cook for a few minutes more, stirring until they dissolve in the oil.

Reserve a mugful of the cooking water, then drain the pasta and add it directly to the sauce in the pan. Stir in some of the cooking liquid to loosen the pasta and return to the heat. Stir through the walnuts and cook for a further 1 to 2 minutes, then season to taste. Divide the pasta between 4 plates or shallow pasta bowls and garnish with the parsley.

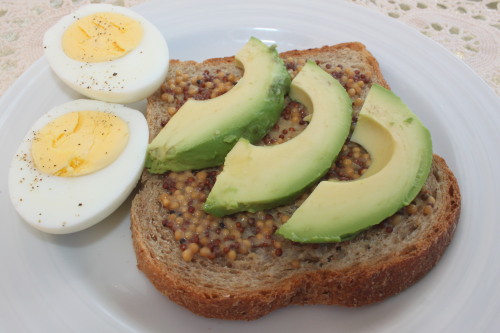
Toast with Avocado and Mustard

As we gear up for the holiday season, here’s my gift to you: a healthy recipe with three ingredients and five minutes of prep time. New York Mouth sent me some freebies last month and in preparation for their package, I spent some time scouring (more like falling in love with) their website. They distribute handcrafted, small batch, “indie” food fare. The site’s Tin Mustard description contained this open faced sandwich idea. I originally tried the “recipe” because I couldn’t imagine it would be edible much less delicious. But it is. I swear! Make sure to use ripe avocado, hearty bread, and good quality mustard. Tin Mustard’s whole grain mustard was amazing. Actually, all the products sent were delicious. For those looking for gift ideas for your favorite foodie (or food blogger, hint, hint),  it’s worth a look.

Toast with Avocado and Mustard
from New York Mouth

In my book, open faced sandwiches alone constitute more of a snack than a dinner so I rounded out the meal with hard boiled eggs and steamed green beans, making a kind of deconstructed salad nicoise. I think it would also taste great with some simply dressed greens or sharp cheddar on the side.

whole grain bread
avocado
whole grain mustard

Toast the bread to your taste. While the bread toasts, slice the avocado.Spread a tablespoon or so of mustard on the toasted bread. Place the sliced avocado on top of the mustard. Eat.

Pistachio-crusted Pork Tenderloin, Lemon-Basil Orzotto, and Seven Layer Bars

We moved into a new house three weeks ago. Exciting to be sure, but as much as I’m relieved to be done with selling my old house and moving 8+ years of life into a new one, I feel a homelessness of sorts. The new house has the right space and modern amenities (a master bathroom!) but it also has odd paint color, lower ceilings, and some kind of smell that is not bad but definitely not good. Paint and ceilings are tough to fix so I’ve been cooking like crazy trying to get this place to feel (and smell) more like mine. And despite the house not feeling quite like home yet, at least the dining room table feels the same with my family and friends gathered around it enjoying dinners together. This was my recent favorite.

Pistachio-crusted Pork Tenderloin

Serves 4

1 cup (150 g) shelled, salted pistachios
2 pieces pork tenderloin (about 2 lbs/900 g), cut into 1/2 inch thick medallions
freshly ground black pepper
olive oil

Preheat the oven to 375°F (190°C).

Pulse the pistachios in a food processor about 10 times until coarsely ground (like bread crumbs) but not pasty. Place the ground nuts in a shallow bowl.

Season the pork medallions to taste with pepper. Dredge the peppered pork in the ground pistachios, pressing gently so the nuts adhere to the pork. Place the medallions on a plate until they are all coated.

Heat a thin layer of olive oil in a large oven safe skillet over medium-high heat. Fry the pork medallions in a single layer in the heated oil, 2–3 minutes on each side until golden. Adjust the heat if necessary so the pistachios do not burn. Place the skillet in the preheated oven, baking 5–10 minutes until the pork is fully cooked.

***

Lemon-Basil Orzotto
adapted from the Cooking Channel (Kelsey Nixon)

Serves 4

2 tablespoons extra-virgin olive oil
1 small onion, minced
1 1/2 cups (300 g) orzo or pearl barley
1/2 cup (120 ml) dry white wine
3 cups (700 ml) chicken stock or broth
1/2 cup (70 g) frozen petite green peas, thawed
1/3 cup (35 g) grated Parmesan cheese
2 tablespoons chiffonade fresh basil
1 teaspoon lemon zest
1/4 cup (60 ml) heavy cream or half and half
Juice of 1/2 lemon
Salt and freshly ground black pepper

In a heavy-bottomed medium saucepan, heat the olive oil over medium-high heat. Add the onion and saute until fragrant and translucent. Add the orzo and toast for 2 minutes, stirring occasionally. Add the wine and cook until absorbed.

Gradually add the chicken stock, stirring frequently. Bring to a simmer, lower the heat, and cover. Cook for 8 to 10 minutes, until the liquid is almost absorbed and orzo is tender. Remove from the heat.

Stir in the peas, Parmesan, fresh basil, lemon zest, heavy cream, and lemon juice. Season the orzo with salt and pepper, to taste, and serve.

***

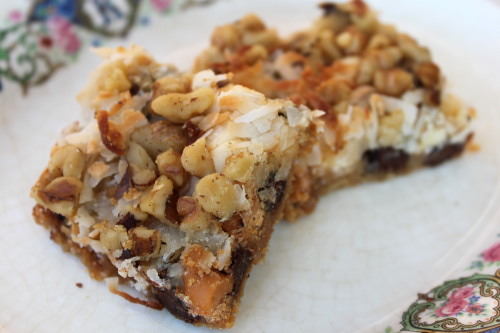
Seven Layer Bars
from allrecipes.com

I make these candy-like bars in the morning so they are cool and ready to eat after dinner. They travel well and can be cut into small pieces, making them perfect picnic, pot luck or bake sale fare.

Makes about 2 dozen bars

1/2 cup (110 g) butter
1 1/2 cups (150 g) graham cracker crumbs
1 cup (200 g) semisweet chocolate chips
1 cup (200 g) butterscotch chips
1 cup (100 g) chopped walnuts
14 oz (400 ml) sweetened condensed milk
1 1/3 cups (110 g) shredded coconut

Preheat oven to 350°F (180°C).

Place the butter in 13 x 9 inch pan and melt in the oven. Swirl to coat bottom and sides with butter.

Spread the crumbs evenly over the bottom of the butter, pressing to form a thin even crust on the bottom of the pan.

Layer the chocolate chips, butterscotch chips, and nuts over the crumbs. Pour the condensed milk over nuts. Sprinkle the coconut over the condensed milk. Press the toppings together lightly with a fork.

Bake until the edges are golden brown, about 25 minutes. Let cool and cut into small bars. Store in an air tight container.

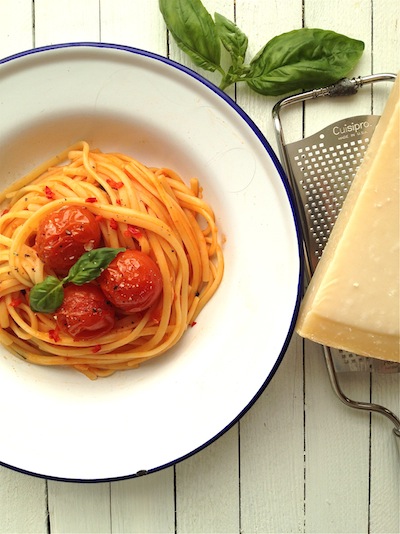
Spaghetti with Roast Cherry Tomatoes, Chili and Basil

Remember physically cutting recipes out of newspapers and magazines or writing them by hand onto recipe cards, to be filed away into boxes or binders? I was cleaning out my kitchen recently and found two big binders full of recipe clippings, shoved out of reach at the back of a cabinet, that I had completely forgotten about. I dusted them off and flipped through them to save any of the recipes that had caught my eye a decade ago that still sounded good, and it occurred to me that this would probably be the last time I ever paged through torn-out recipes. Now, if I see a recipe in print that I want to save for later, I look it up online and bookmark it or add it to my spreadsheet. This was a recipe I had cut out of a newspaper years and years ago, the original source long since forgotten, the paper already turning yellow and brittle, an old summer favorite happily rediscovered.

If you’re looking for ways to use up an abundance of garden tomatoes, try these too: Chicken Cacciatore, Tomato and Goat’s Cheese Tart, Ravioli and Tomato Salad, Oven-roasted Ratatouille, or Spaghetti with Fresh Tomato Sauce.

Spaghetti with Roast Cherry Tomatoes, Chili and Basil

Serves 4

This would look especially nice if you used a mix of yellow and red cherry tomatoes. You could also add some finely chopped sun-dried tomatoes to the sauce if you have them.

olive oil
2 garlic cloves, chopped
2 red chilies, deseeded and finely chopped
2 tablespoons tomato paste
1 lb 2 oz (500 g) cherry tomatoes, 16–20 left whole and the rest cut into quarters
1 teaspoon sugar
splash of white wine or vermouth (optional)
salt and freshly ground black pepper
small bunch of basil, leaves removed from stems and cut into thin ribbons (chiffonade)
1 lb (450 g) spaghetti
freshly grated Parmesan, to serve

Preheat the oven to 425°F (220°C).

Heat some olive oil in a large saucepan over a low heat. Add the garlic and chopped chili and cook for 1 minute, taking care not to let the garlic will burn or it will taste bitter and ruin the dish. Stir in the tomato paste and cook for 1 or 2 minutes, then add the chopped tomatoes and sugar. Turn up the heat and cook for a minute or two, then add just a splash of white wine or vermouth (or water) and season with salt and pepper. Bring to a rapid splutter, then lower the heat and let it gently bubble away until reduced to a thick-ish sauce.

Meanwhile, cook the spaghetti in a large pot of boiling salted water, reserving a cupful of the cooking water when it’s done. Scatter the remaining tomatoes onto a baking sheet, season well with salt and pepper and drizzle with olive oil. Roast in the hot oven for about 10 minutes, until the tomatoes start to split.

To serve, add the cooked, drained pasta to the chili tomato sauce, stirring well until all the pasta is coated with sauce. Add a splash of the reserved pasta water to loosen the sauce. Stir in the basil and divide the pasta between 4 plates or shallow bowls. Add the roasted tomatoes individually to the top of each dish. Finish with a few basil leaves to garnish and a grating of Parmesan.

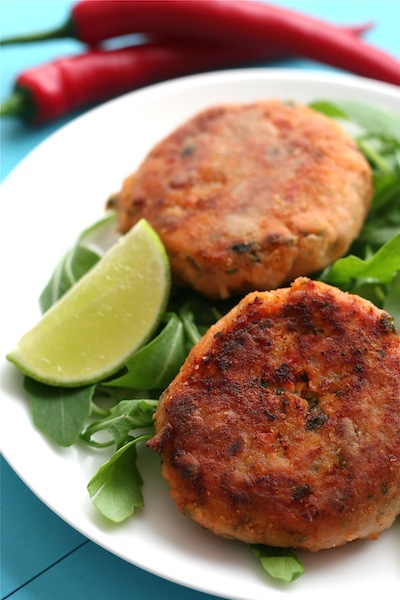
Sweet Potato and Salmon Fishcakes with Chilli and Lime

The other day, a fellow expat tweeted, “When I see a tourist in Dublin on a nice sunny day, I always feel the urge to stop them and tell them how lucky they are.” “Never mind them,” I tweeted back, “lucky us! At least they get to go back home to a proper summer somewhere.” After weeks of rain and temperatures that rarely even get above 65°F, I’ve just about given up on summer again. Even so, I still crave bright, zesty flavors in the summer, such as it is. These fishcakes make for a light supper served with a salad — or maybe soup, if that suits your climate and your woe-is-me mood better.

Sweet Potato and Salmon Fishcakes with Chilli and Lime

Serves 4 as a light supper

If you don’t want to coat the fishcakes in breadcrumbs, you can simply dredge them in the seasoned flour and pan fry them. And if you’d rather bake the cakes in the oven instead of fry them, just put them on a baking tray lined with parchment paper in an oven at 350°F (180°C) for 20 to 30 minutes.

1 lb 2 oz (500 g) sweet potatoes
2 x 7 oz (200 g) cans of salmon
1 red chilli, finely chopped
zest and juice of 1 lime
a handful of fresh cilantro (coriander), chopped
salt and freshly ground black pepper
1 cup (120 g) flour
1 egg, beaten
1 cup (100 g) dried breadcrumbs
olive, vegetable or rapeseed oil
lime wedges, to serve
green salad, to serve

Peel the sweet potatoes and cut them into large chunks or thick slices. Place in a pot with plenty of cold water and bring to the boil. Simmer for about 10 minutes, until the potatoes are tender when pierced with a sharp knife. Drain and transfer to a large bowl. Mash the potatoes until they’re smooth, then stir in the salmon, flaking apart any large pieces with a fork. Add in the chilli, lime zest and juice, the chopped cilantro and some salt and pepper and stir well to combine. Shape the sweet potato and salmon mixture into fish cakes and set aside on a plate.

Place the flour in a shallow bowl or plate and season generously with salt and pepper. Place the beaten egg in a second shallow bowl or plate and the breadcrumbs in a third bowl or plate. First dredge each fish cake in the flour, shaking off any excess. Set aside the floured cake on a plate and repeat with the remaining cakes (doing it this way helps to keep your hands cleaner). Next, dip each floured cake in the beaten egg, making sure it gets coated all over with the egg, then place in the bowl with the breadcrumbs, sprinkling the crumbs all over the cake and gently patting them in place. Set aside the breaded cake on a plate and repeat with the remaining cakes.

Heat some oil in a large frying pan over a medium heat. Add the cakes to the pan in batches, taking care not to overcrowd the pan. Cook the cakes for 5 to 8 minutes, until the breadcrumbs are golden. Flip the cakes over and cook for 5 to 8 minutes more, until the other side is golden and the cakes are cooked through. (Alternatively, you can bake the cakes in the oven; see note above.) Serve with lime wedges and a green salad for a light summer supper.

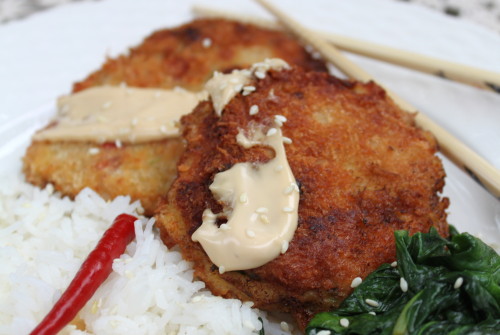
Crunchy Pork Kimchi Burgers

Last year I succumbed to a telemarketer begging me to buy a magazine subscription in support of a well-known charity. I’d like to tell you it was because I care deeply for the organization or felt pity for the poor saleswoman, but honestly, I just missed receiving a magazine with my name on it every month. After years of being a loyal subscriber to Gourmet (my idealistic college days), then Cooking Light (I put on weight working an office job in my early twenties) and, most recently, Cook’s Illustrated (the serious cooking began), I let the subscriptions expire four years ago when my first-born arrived. But no longer. My magazine days are here again. Unfortunately, I regretted last year’s selection of Food & Wine magazine. Besides this fantastic pork burger recipe and one other interesting salmon preparation, I didn’t find much inspiration in the magazine. Maybe I don’t drink enough wine to appreciate it. So, dear readers, tell me what periodical to order next. What cooking magazines do you love?

Crunchy Pork Kimchi Burgers
adapted from Food & Wine, May 2012

I used the last few precious tablespoons of my sister-in-law’s homemade kimchi for this recipe. Because the kimchi has a bit of kick to it, I made some of the burgers without the kimchi for the kids. Both versions tasted good but the kimchi really made the burger memorable.

Serves 4

1 tablespoon grated fresh ginger
1 large garlic clove, minced or grated
2 scallions, minced
1 lb (450 g) ground pork
3/4 cup (170 g) finely chopped kimchi
Kosher salt
All-purpose flour, for dusting
2 large eggs, beaten
1 1/2 cup (100 g) panko (Japanese bread crumbs), lightly crushed
Vegetable oil, for frying
12 oz (340 g) baby spinach
1/4 cup (60 ml) mayonnaise
1/2 teaspoon toasted sesame oil
1 tablespoon light soy sauce
Toasted sesame seeds, for garnish
Steamed rice

In a bowl, combine the ginger, garlic, scallions, pork and kimchi with 1 teaspoon of salt. Form the mixture into eight patties, about 1/2 inch thick. Dust the patties with flour and refrigerate for 10 minutes while you prep the other ingredients.

Put the eggs and panko in 2 shallow bowls. Dip the patties in the egg and then in the panko, pressing to help the crumbs adhere.

In a large skillet, heat 1/4 inch of vegetable oil. Depending on the size of your skillet, you will probably need to cook the patties in 2 batches. Add as many patties to the hot skillet as will fit and fry over moderate heat, turning, until golden and cooked through, 5 to 6 minutes. Drain on paper towels.

Pour off all but 1 tablespoon of the oil in the skillet. Add the spinach in batches, season with salt and cook over high heat until wilted, about 1 minute.

In a bowl, mix the mayonnaise, sesame oil and soy sauce. Mound the spinach on plates and top with the burgers. Top with the sauce and sprinkle with sesame seeds. Serve with steamed rice