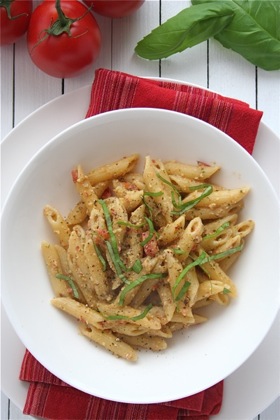
All posts by Kristin

Slow Cooker Cassoulet

I originally posted this on February 15 2010, but have updated the recipe to make it easier and less time consuming.

I’ve been trying to go back to cookbooks I haven’t used in awhile, so last week I pulled The River Cottage Meat Book by Hugh Fearnley-Whittingstall down off the shelf and cassoulet caught my eye. While I wound up making a different version, it ticks a lot of boxes — this one can be made in a slow cooker, it’s good value (cassoulet is a traditional French peasant dish), it’s hearty, rib-sticking food for cold nights and it makes more than enough for two meals.
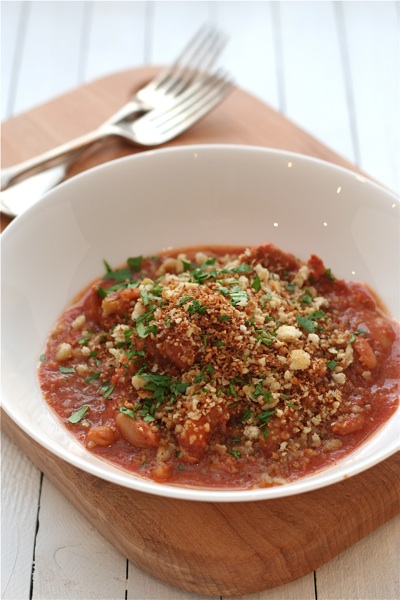
If you like the idea of a cassoulet but don’t have a slow cooker or don’t have all day to let it cook, you could try Jacques Pépin’s 30-minute version or Jamie Oliver’s kinda sausage cassoulet. In his recipe, Hugh F‑W suggests serving this with an orange and watercress salad.

Slow Cooker Cassoulet

Serves 8 to 10

If you can’t get pork shoulder, pork leg or even loin would work too — just get the butcher to remove the fat for you. If you wanted to add in some veg, a few carrots, peeled and sliced on the diagonal, would work well.

olive oil
3 onions, coarsely chopped
salt and freshly ground black pepper
3 lb (1.4 kg) boneless pork shoulder, cut into 2‑inch pieces (you can ask your butcher to do this for you)
1 lb (450 g) fully cooked or smoked chorizo or garlic sausage links, sliced on the diagonal
2 x 14 oz (400 g) cans of cannellini, haricot or Great Northern beans
1 x 28 oz (or 2 x 14 oz/400 g) cans whole plum tomatoes, drained and coarsely chopped
2 cups (500 ml) chicken stock
1 cup (500 ml) dry white wine, such as Sauvignon Blanc (or use stock or water if you prefer not to use alcohol)
3 tablespoons tomato paste
1 head of garlic, halved crosswise
1 cup (100 g) breadcrumbs, plus extra to serve
a handful of chopped fresh flat-leaf parsley, plus extra for garnish
crusty bread, to serve

Put a large frying pan over a medium heat and add in a splash of olive oil. Add the onions and a pinch of salt to prevent the onions from browning and cook for about 10 minutes, until they’re translucent but now browned. Transfer the onions to the slow cooker, then stir in the pork, chorizo, beans, tomatoes, stock, wine, tomato paste and garlic along with a generous seasoning of salt and pepper.

Set the cooker to low and cook, covered, for about 8 hours, until the pork pulls apart easily with a fork (though it could be as much as 10 hours). Skim off any fat and remove and discard the garlic. Fold in the panko or breadcrumbs and the parsley. Taste and season as needed.

Let the cassoulet stand at room temperature for 10 minutes before serving. Sprinkle each serving with extra breadcrumbs and parsley and serve with warm crusty bread.
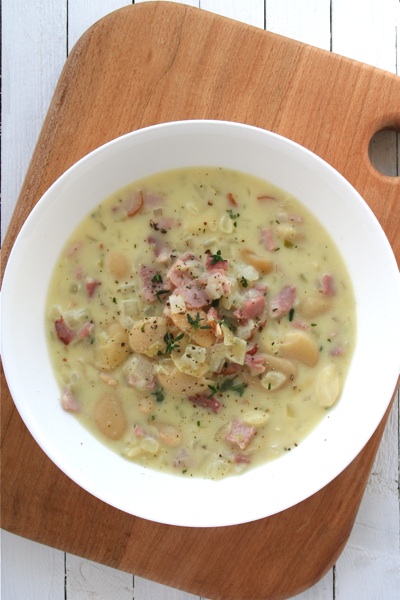
Bacon and Butterbean Chowder

A couple weeks ago I was at The Tannery in County Waterford having lunch with a few other bloggers and food writers to celebrate the launch of the Cook with Avonmore site, which features Tannery chef Paul Flynn as their first guest chef. On the menu that day there was a choice of crab crème brûlée or this bacon and butterbean chowder as a starter. I went for the crab not only because it’s The Tannery’s signature dish, but because I knew I had the recipe for the chowder in my press pack. What I didn’t know, though, was what a fantastic recipe it is. From just a few ordinary ingredients, this soup is more than the sum of its parts.

Paul Flynn says, “A chowder for me is something that’s really rich and comforting. It’s something that you eat in front of the fire or just after a lovely long walk and you’re cold and you want something hot and heart-warming to eat.” Serve this with some good crusty bread, a nice cheese and a glass of red wine — either with or without the long walk beforehand — and I’m willing to bet it will be one of the nicest meals you’ll make this autumn.

Bacon and Butterbean Chowder
adapted from Paul Flynn via cookwithavonmore.ie

Serves 2 as a main course or 4 as a starter

Paul Flynn says that “when you use beautiful ingredients like butter and cream, you’ve got to realize that if you put just enough in, it gives you that lovely, luxurious richness that you’re looking for, and that will really comfort you on a cold night”, but you can use a little less cream if you don’t want the chowder to be quite as rich. You can also use a handful of fresh parsley instead of thyme.

knob of butter
olive oil
1 large onion, finely chopped
pinch of salt
1 garlic clove, finely chopped
6 pieces of smoked bacon or dry cure streaky bacon, finely diced
1 tablespoon flour
2 teaspoons chopped fresh thyme leaves, plus extra to garnish (or 1/2 teaspoon dried thyme)
1 teaspoon Dijon mustard
freshly ground black pepper
2 cups (500 ml) chicken stock
1 x 14 oz (400 g) can of butterbeans, rinsed
1/2 cup (125 ml) cream
crusty bread, to serve

Melt the butter in a pot over a medium heat along with a splash of olive oil so the butter doesn’t burn. Add the onion and a pinch of salt to prevent the onion from colouring. As Paul Flynn says, “The real key to this is that what you do inside this pot with the onions will provide you with the whole base flavour for the soup. If you rush this, it’s not going to be right.” So turn the heat down a little to medium-low, put the lid on and “let the magic happen”. Cook the onion for about 10 minutes, until it’s translucent. Raise the heat back to medium, add in the garlic and cook for 1 minute more, then add in the bacon and cook for about 5 minutes (though note that the bacon won’t go crispy because of the juice from the onions). Sprinkle the flour over the onions and bacon and give it all a stir, then allow it to cook for 2 minutes. Add in the thyme and mustard and a generous grinding of black pepper, then pour in the stock. Bring to the boil, then reduce the heat to a simmer and add in the butterbeans. Continue to simmer the soup for a few minutes, until the beans are warmed through, then stir through the cream. Taste the soup and adjust the seasoning if you think it needs more salt, though be careful because the bacon and stock are already salty. Ladle the soup into bowls, garnish with some of the reserved thyme leaves and serve with crusty bread.

Honey Spiced Madeleines

Madeleines are my new favorite thing to bake. I don’t normally go for recipes that call for hard-to-find ingredients or specific equipment, but a madeleine pan is a little luxury and even the tiniest kitchen could surely squeeze one in. They take only minutes to pull together and 10 minutes to bake, yet people are invariably impressed by them. They’re perfect with tea or coffee and also make an excellent treat for a play date, seeing as how they don’t have that much sugar and are just the right size for little hands to hold.

They’re also open to endless variations — in my own cookbook collection, I have recipes for hazelnut lemon madeleines, rosewater madeleines and butterscotch madeleines — but I’ve fallen in love with these honey spiced ones and have made them three times in the past three weeks. There’s something about the spices, just right for autumn, and the soft, cake-like texture when they’re still warm from the oven that remind me of a doughnut, and in my book it doesn’t get better than that.

Honey Spiced Madeleines
adapted from Around My French Table by Dorie Greenspan (recipe available online here)
Makes 12 madeleines

There are all sorts of tips and tricks for how to make the perfect madeleine — letting the batter rest, putting the tin in the freezer, piping the batter into the moulds, not using baking powder — but I don’t worry about any of that and they still turn out perfectly fine and perfectly delicious.

3/4 cup (90 g) all-purpose flour
1/2 teaspoon baking powder
1/2 teaspoon ginger
1/4 teaspoon cinnamon
1/8 teaspoon ground cloves
1/8 teaspoon ground nutmeg
pinch of salt
pinch of freshly ground black pepper
1/3 cup (75 g) sugar
grated zest of 1/2 orange
2 large eggs, at room temperature
2 tablespoons honey
1 teaspoon pure vanilla extract
6 tablespoons (90 g) unsalted butter, melted and cooled
powdered sugar (icing sugar), to dust (optional)

Whisk together the flour, baking powder, spices, salt and pepper and set aside.

Working in a mixer bowl, stir the sugar and orange zest together. Fit the mixer with the whisk attachment, add the eggs to the bowl and beat for about 2 minutes, until the mixture is light, fluffy and thickened. Add in the honey, then the vanilla.  Switch to a rubber spatula and gently fold in the dry ingredients followed by the melted butter. You can use the batter now, but Dorie Greenspan says it’s better if you can give it a little rest. Press a piece of plastic wrap against the surface of the batter and chill for 3 hours or, if you have the time, overnight. Making the batter in advance also means you can have madeleines that are fresh from the oven and still warm if you’re serving them to guests, or make them in the morning and bake them after the kids get home from school for a little treat.

When you’re ready to bake them, centre a rack in the oven and preheat the oven to 400°F (200°C). Butter 12 full-size madeleine molds (or 36 mini-molds), dust the insides with flour and tap out the excess. If you have a non-stick madeleine mold, butter and flour it anyway or give it a light coating of vegetable cooking spray. (If your pan is silicone, you can leave it as is.) Place the pan on a baking sheet.

Spoon the batter into the molds, filling each one three-quarters full (if you overfill the molds, they’ll spill out over the sides a bit and won’t be quite as pretty when they’re done). Bake the large madeleines for 11 to 13 minutes and the minis for 8 to 10 minutes, or until the madeleines are golden and the tops spring back when prodded gently. Remove the pan from the oven and release the madeleines from the molds by rapping the edge of the pan against the counter. Gently pry any stuck madeleines from the pan using your fingers or a butter knife. Transfer the cookies to a rack to cool to just-warm or room temperature. Dust with powdered sugar (icing sugar) if you like.

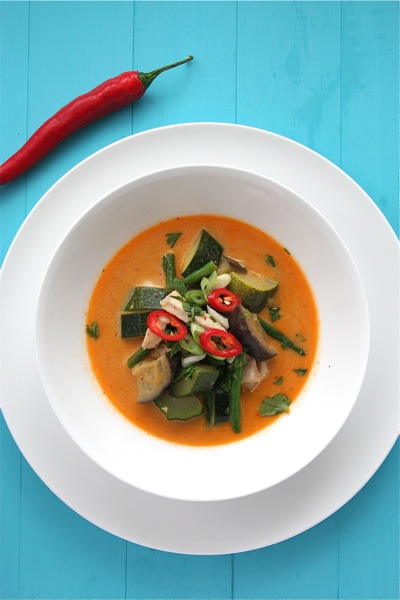
Thai Red Curry

I have an embarrassing confession to make. Despite living an hour’s drive away from Belfast for the past 12 years, the first time I visited the city was only this past March (I don’t count a couple trips to the Ikea off the motorway). But I tried to make up for lost time this summer with the Belfast Bred food tour, a Sunday trip to the Ulster Museum with the kids and an evening at the brand new Belfast Cookery School.

I love the fresh, bright flavors of Thai food, so I jumped at the chance to take a class with Kate Allen from the Thai-Tanic noodle bar using authentic ingredients. We made a tom yam soup and a Thai red curry, and even though we made our own curry paste from scratch, Kate admitted that they don’t even do that in her restaurant — they use a ready-made paste. I feel no shame, then, in doing the same at home for a quick weeknight supper.

The Belfast Cookery School is still running their Thai cooking classes, as well as classes on Italian food, dinner parties, fish and bread, if you live in Ireland and want to check it out. And if you’re looking for authentic Asian ingredients in Ireland, try Asia Market in Dublin or Asia Supermarket in Belfast.

Lazy Thai Red Curry

Serves 4

This recipe lends itself to a lot of variation. Try yellow or green curry paste if you don’t like red, use prawns instead of or in addition to the chicken, or leave out meat altogether to make a vegetarian version. The key to this recipe is having everything prepped and ready to go before you start cooking since it comes together quickly.

2 tablespoons ready-made Thai red curry paste (or more, to taste)
2 garlic cloves, finely chopped
1 x 14 oz (400 g) can of coconut milk
2 chicken breasts, sliced thinly into strips or into bite-sized pieces so they cook quickly
7 oz (200 g) green beans, cut into thirds
1 zucchini, cut into large dice
1 eggplant, cut into large dice
1 red chilli, deseeded and chopped, plus a few slices to garnish (optional)
juice and zest of 1 lime (or more, to taste)
2 tablespoons Thai fish sauce (or more, to taste)
1 teaspoon sugar
4 scallions, sliced thinly on the diagonal
chopped fresh cilantro and/or basil, to garnish
cooked jasmine or basmati rice, to serve

Heat a large pot over a medium heat. Add in the curry paste and allow it to cook for 1 or 2 minutes. Add in the garlic and cook for 1 minute more. Shake the can of coconut milk before you open it to distribute any solids, then pour it into the pot. Stir well to combine the coconut milk and the curry paste, then taste it and add more curry paste if you want it hotter.

Add in the chicken strips and bring to the boil. Reduce the heat to a fast simmer and cook for 10 minutes, until the chicken is cooked through. Add in the green beans, zucchini, eggplant, chilli (if using), lime zest and juice, Thai fish sauce and sugar. Cook for 5 to 10 minutes, or until the vegetables are cooked through. Taste and adjust the seasoning, adding more fish sauce if you think it needs more saltiness or more lime juice if it needs more zing. Ladle the curry into 4 bowls and sprinkle over the scallions, fresh cilantro and/or basil and the sliced chilli (if using). Serve with jasmine or basmati rice.

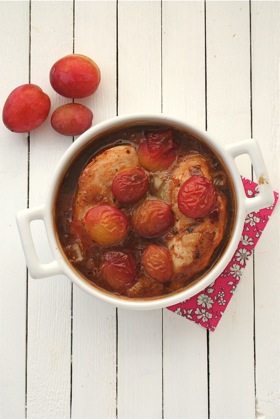
Baked Chicken with Plums, Ginger and Soy

Last week I went to visit a local cheesemaker, Peter Thomas, who makes the award-winning Bellingham Blue cheese. He also has a big garden and the beginnings of a small orchard, and after admiring all the fruit, he promptly pulled up more rhubarb than I could carry and sent his daughter out to pick a big bowlful of plums and apples to send home with me. With such unexpected bounty (not to mention half of wheel of cheese!), I pulled out this old favorite for dinner. Kids like it because of the sweetness from the jam and fruit. It’s the perfect dish for this time of year, when plums are in season — especially if you’re lucky enough to get them fresh off a tree that’s so laden down with fruit that its branches are breaking from the weight.


Baked Chicken with Plums, Ginger and Soy
adapted from Avoca Café Cookbook 

Serves 6

If you can’t get plum jam or fresh plums, try using apricot jam and fresh apricots instead.

olive oil
6 chicken breasts
salt and freshly ground black pepper
a knob of butter
1 onion, chopped
3 garlic cloves, chopped
1 x 12 oz (350 g) jar of plum or damson jam
2 tablespoons brown sugar
2 tablespoons lemon juice
1 tablespoon soy sauce
1 tablespoon tomato puree
1 teaspoon ground ginger
1 teaspoon dry mustard powder
1 teaspoon Worcestershire sauce
6 to 8 fresh plums, stoned and quartered
cooked plain rice, to serve
steamed broccoli, to serve

Preheat the oven to 350°F (180°C).

Heat some olive oil in a pan over a medium-high heat. Season the chicken breasts on both sides and brown them in the pan, then set aside. Add a knob of butter to the pan and turn the heat down to medium. Saute the onion for 10 minutes, until soft but not browned (add a pinch of salt to the onions to help prevent them from browning). Add in the garlic and cook for 1 minute more. Add in all the remaining ingredients except the plums and simmer for 15 minutes.

Arrange the chicken pieces in a single layer in a large baking dish. Cover with the sauce and scatter over the quartered plums. Cook in the oven for 30 to 40 minutes, until the sauce is bubbling and the chicken is cooked through. Serve with rice and some steamed broccoli on the side.

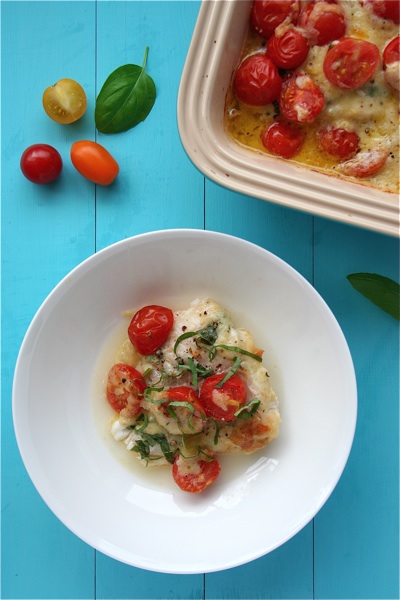
Gratin of Fish with Cheese, Tomatoes and Herbs

Back in December, a local DIY store had an unbeatable deal on greenhouses when they had them on sale for a little over €100, so we snapped one up. Granted, it’s as small and flimsy as you’d expect a €100 greenhouse to be, but it’s still standing, despite our reservations that it would all fall to pieces in the first strong wind. And it means that we’re finally able to grow tomatoes! But if I thought my husband was besotted with his potatoes last year, that was nothing compared to his love affair with the tomatoes. Any free minute he gets, he’s pottering around out in that greenhouse, checking on the cherry and San Marzano tomatoes before he leaves for work in the morning and then again as soon as he gets in the door at night to see how they’ve ripened during the day. I don’t think we’ll have a glut of them and will probably be eating them on their own with just a little salt, pepper and a drizzle of good olive oil, but if your garden is producing a lot of cherry tomatoes or if you can get them cheap at a farmers’ market, this is one of my favorite new dishes that I’ve made a few times now and is a good way to use them.

Gratin of Fish with Cheese, Tomatoes and Herbs
adapted from Rachel’s Favourite Food at Home by Rachel Allen

Serves 4

When you make this, you’ll probably start to think that the cheese and cream mixture isn’t enough to cover all the fish, but don’t worry, it will once it melts. Rachel Allen’s original recipe calls for flat fish, such as plaice or lemon sole, but I like the meatier texture of a firm white fish like hake or cod instead. If you can’t get one or the other of Gruyère or Swiss cheese (Emmental), just double the quantity of the cheese you can get. If you’re in Ireland, try using the Glebe Brethan farmhouse cheese instead of the Gruyère.

1 cup (100 g) grated Gruyère cheese
1 cup (100 g) grated Swiss cheese (Emmental cheese)
1 tablespoon Dijon mustard
5 tablespoons cream
salt and freshly ground black pepper
1 punnet (9 oz/250 g) cherry tomatoes
1 teaspoon chopped fresh thyme leaves or 2 tablespoons chopped fresh basil
1 1/2 lb (750 g) white fish fillets, such as hake or cod, skinned and deboned
green salad, to serve
boiled new potatoes, to serve

Preheat the oven to 350°F (180°C).

Place the grated cheeses, mustard and cream into a bowl and mix well. Season with salt and freshly ground black pepper and set aside.

Cut the cherry tomatoes in half and place into a bowl. Season with a little salt and add the herbs. Mix the ingredients well so that the cherry tomatoes are well seasoned.

Lay the fish in a gratin dish (or individual ovenproof dishes) in a single layer if you can. Dot the cheese mixture over the fish, then scatter the tomatoes and herbs on top. Transfer the fish to the oven and cook for 20 to 30 minutes (or 15 minutes for single portions), until the cheese is golden brown and the fish is cooked through.

To serve, place a portion of the fish on a plate and serve with a big green salad and some boiled new potatoes.

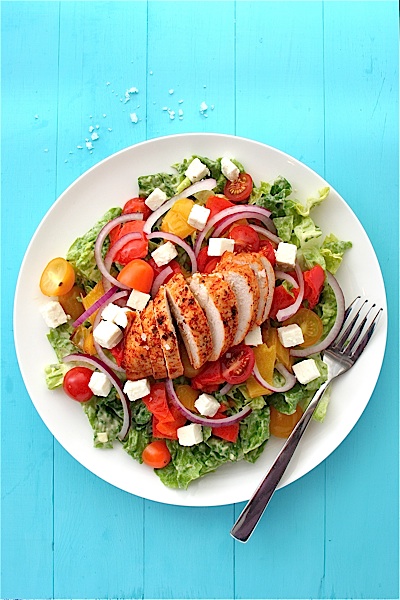
Smoky Lemon Chicken Salad with Roasted Peppers and Avocado

Just a couple weeks ago, there was a day in mid July where storm clouds were rolling in from the west, I made a cup of tea just so I could wrap my hands around something warm and I briefly debated lighting the wood stove to take the chill out of the air. I’ve lived in Ireland for 12 years and I usually don’t let the weather get me down — I know full well by now how disappointing Irish summers can be, weather wise — but that day was so grey and cold and dismal that I was close to tears. It might not be much of a summer most days, but we do get a nice surprise every now and again with a day that’s sunny and over 70°F, and on one such day I made this salad — and liked it so much that on the next warm, sunny day, I made it again.

Smoky Lemon Chicken Salad with Roasted Peppers and Avocado

Serves 4 as a main meal

The chicken could be grilled on a BBQ or grill pan instead of roasted in the oven. The avocado dressing (adapted from Mexican Everyday by Rick Bayless) makes the salad more substantial and filling, but if it seems like too much work, try this lime-garlic dressing and simply slice 2 avocados and add them to the salad instead. And speaking of too much work, you could use jarred roasted peppers instead of roasting fresh ones yourself too.

for the smoky lemon chicken:
1/2 cup (125 ml) freshly squeezed lemon juice (2 or 3 large, juicy lemons)
1/2 cup (125 ml) olive oil
1 teaspoon chilli powder
1 teaspoon smoked paprika
salt and freshly ground black pepper
4 chicken breasts

for the salad:
2 heads of Romaine lettuce, shredded
2 red peppers, roasted, deseeded and cut into bite-sized pieces
2 yellow peppers, roasted, deseeded and cut into bite-sized pieces
1 lb (425 g) cherry tomatoes, halved
1/2 red onion, sliced very thinly into half moons
1 cup (200 g) cubed or crumbled feta cheese

for the avocado dressing:
2 green onions, chopped (white and green parts)
1 avocado, skin and stone removed
1 garlic clove, minced
1/2 cup (10 g) cilantro (leaves and stems), roughly chopped
1/2 cup (125 ml) mayonnaise
1/4 cup (50 ml) vegetable oil
3 tablespoons fresh lime juice
1 teaspoon Worcestershire sauce
salt and freshly ground black pepper

Whisk together the lemon juice, olive oil, chilli powder, smoked paprika and a generous pinch of salt and freshly ground black pepper. Place the chicken in a glass bowl or ceramic dish and pour the marinade over. Cover tightly and place in the fridge for at least a few hours, or ideally overnight. When you’re ready to cook, preheat the oven to 400°F (200°C) and transfer the chicken to a baking sheet, trying to keep as much of the spices on the chicken as you can once you remove it from the marinade. Sprinkle over some salt and freshly ground black pepper and roast the chicken for 25 to 30 minutes, or until cooked through.

Meanwhile, to make the dressing, add all the ingredients to a food processor or blender. Process until smooth.

Toss the shredded Romaine lettuce with some of the dressing, making sure all the lettuce is coated. Divide the lettuce between 4 plates or large salad bowls, then scatter over the roasted peppers, halved cherry tomatoes and red onion slices, finishing with the feta cheese.

When the chicken is done, slice each breast into thin strips and place on top of the salad. Spoon over some additional dressing, if desired, and serve right away.

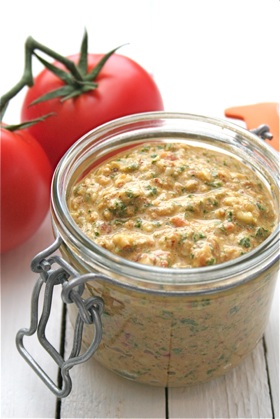
Pesto Trapanese

This is the fifth year we’ve had a vegetable garden at our house in the country, but I quickly learned the first year that basil doesn’t grow well (if at all) outdoors in Ireland. We have a small greenhouse this year, but all the space is taken up with tomatoes, Kirby cucumbers and peppers, so the basil plants had to make do with our kitchen windowsill, where they’re going gangbusters. I’d already made a few batches of regular pesto and was starting to get tired of it when I remembered bookmarking this recipe for pesto Trapanese last year, and it’s a new favorite, not to mention a nice change. Try it at least once this summer.


Pesto Trapanese
adapted from Catherine’s Italian Kitchen by Catherine Fulvio

Makes 2 cups (500 ml)

Use 1 cup (250 ml) of the pesto for dinner to serve 4 to 6 people and freeze the other half for another time. Alternatively, this will keep in the fridge, tightly covered, for up to 1 week with a thin layer of olive oil poured on top of the pesto to prevent the basil from turning black.

1 lb (425 g) spaghetti, linguini, penne or your favorite pasta
1 cup (125 g) whole almonds
3 large ripe tomatoes, quartered, or 10 ripe cherry tomatoes
2 garlic cloves, roughly chopped
2 oz (50 g) fresh basil leaves (about 2 large handfuls)
1/2 cup (125 ml) good-quality olive oil
salt and freshly ground black pepper

Cook the pasta in a large pot of boiling salted water according to the instructions on the packet.

To make the pesto, place the almonds in a food processor and whizz until they’re reduced to nibs (don’t overprocess them to a paste). Add in the tomatoes, garlic, basil, olive oil and a generous seasoning of salt and pepper and whizz again until everything is well combined. Add more olive oil if you want the consistency of the pesto to be thinner. Stir 1 cup (250 ml) of the pesto into the drained pasta and serve right away.