Baked Ziti with Tossed Salad and Apple Crisp

Matt and I became unwitting Sopranos fans last summer, when our son was a newborn. Our next-door neighbors had the series on DVD and loaned it to us after we told them we’d never seen any episodes. We broke it out one night when I didn’t have the energy to do anything but collapse on the sofa and watch TV. We were quickly hooked, to the point where we would often watch two or three episodes a night. One of the scenes that sticks out from the series is when, in The Happy Wanderer episode, a gang of them lock themselves away in a motel room for the Executive Game, a marathon high-stakes poker-playing session, and keep referring to “boxes of ziti” instead of money (one box of ziti being $1,000). I remember it because even for a show that throws in some mobspeak at every opportunity, this just seemed too over the top to me — nobody would really say that, would they? William Safire wrote that the show’s dialogue is “one part Italian, a little real Mafia slang, and a smattering of lingo remembered or made up for the show by former residents of a blue-collar neighborhood in East Boston,” so who knows?

This is a slimmed-down version of traditional baked ziti, which can have up to three different cheeses and maybe even some sour cream thrown in for good measure. The pasta cooks right in the sauce, making it a quick and easy meal for weeknights, but with just enough cream and cheese to make it feel like a comfort food treat. But if you’re looking for Carmela’s recipe, there’s always The Sopranos Family Cookbook.

Baked Ziti
adapted from The Best Skillet Recipes by Cook’s Illustrated Magazine (recipe via Serious Eats)

Serves 4

If you don’t have an oven-safe skillet, just make the dinner in a regular pot or frying pan and transfer to a large ovenproof baking dish instead (which is what I did).

1 x 28-oz can (or 2 x 14-oz (400‑g) cans) whole peeled tomatoes
1 tablespoon olive oil
6 garlic cloves, minced
1/4 teaspoon red pepper flakes
salt and freshly ground black pepper
3 cups (720 ml) water
12 oz (340 g) ziti (or rigatoni or penne)
1/2 cup (120 ml) heavy cream
1 oz (30 g) freshly grated Parmesan cheese
1/4 cup (10 g) chopped fresh basil
4 oz (110 g) mozzarella, shredded

Preheat the oven to 400°F (200°C). Meanwhile, pour the whole can of tomatoes into a blender or food processor. Process until the tomatoes are roughly chopped, but not pureed.

Pour the oil into a large oven-safe skillet set over a medium-high heat. Add the garlic and red pepper flakes and cook for about 1 minute, or until fragrant. Add in the chopped tomatoes and season well with salt and pepper. Bring to a boil, then reduce the heat to medium-low and simmer for 10 minutes, stirring occasionally.

Pour in the water, stir, and then add the pasta. Turn the heat back up to medium-high. Cook until the pasta is tender, about 15 minutes.

Add the cream, Parmesan, and basil. Stir well. Season with more salt and pepper, then sprinkle the mozzarella on top. Place the skillet in the oven and cook for 10 to 15 minutes, or until the cheese has melted and slightly browned.

***

Apple Crisp with Brandy-soaked Currants
adapted from Rustic Fruit Desserts by Cory Schreiber and Julie Richardson

Serves 6 to 8

For the apples, the authors recommend using Golden Delicious, Galas, Jonagolds, or another apple variety with a high water content. This recipe calls for soaking dried currants in brandy. The longer the currants steep, the more the flavor will be enhanced, so plan accordingly. If you forget to steep the currants, then leave them out because unsoaked currants will burn while cooking (I’m speaking from experience here).

for the brandy-soaked currants:
1/2 cup (70 g) dried currants (or raisins)
1/4 cup (60 ml) apple brandy (or regular brandy)

for the crisp topping:
3/4 cup packed (120 g) brown sugar
1 1/4 cups (150 g) all-purpose flour
1/2 teaspoon salt
1 teaspoon ground cinnamon
pinch of ground nutmeg (optional)
pinch of ground cloves (optional)
1/2 cup (110 g) unsalted butter, melted

for the fruit filling:
8 large apples, peeled, cored, and sliced 1/2 inch thick (3 lb (1.4 kg) prepped)
1/4 cup (50 g) granulated sugar
2 tablespoons all-purpose flour
heavy cream, custard or vanilla ice cream, to serve

Soak the currants (or raisins) in the brandy for at least 2 hours and up to 24 hours.

Preheat the oven to 375°F (190°C). Butter a 9‑inch-square baking pan.

To make the crisp topping, mix the brown sugar, flour, salt, and spices together in a bowl. Stir in the melted butter, then press the topping together with your hands to form small clumps. Put the topping in the freezer while you make the filling.

To make the fruit filling, toss the apples, sugar and flour together in a bowl until evenly combined, then transfer to the prepared pan.

Scatter the currants and any residual brandy over the apples, then sprinkle the crips topping evenly over the fruit.

Bake for 50 minutes, or until the crisp is golden and the filling is bubbling up through the topping. Cool for 20 minutes before serving with a drizzle of heavy cream, warm custard or a scoop of ice cream.

This crisp is best served the day it’s made, but any leftovers can be wrapped in plastic wrap and kept at room temperature for 2 to 3 days.

Steak Fajitas with Pico de Gallo

In Milwaukee, you can find dozens of restaurants that serve fajitas, but it’s hard to find great fajitas. Maybe my expectations are too high after a childhood of eating Tex-Mex on a regular basis — in Texas, I should add. In my experience, fajitas are only as good as their ingredients. The meat is especially important, and a charcoal grill is essential. I think this is why so many restaurant fajitas fail — cheap meat and lack of charcoal flavor. There are a few things that made last night’s fajitas good. I made the pico de gallo with tomatoes and onions fresh from Rare Earth Farm. Reuben grilled the Sulzer’s rib-eye steaks to a perfect medium rare on our Weber grill. And last but not least, Whole Foods had fresh baked-in-store whole wheat tortillas in stock. How could we go wrong?

Steak Fajitas

Serves 4 to 6

2 rib-eye steaks
salt and freshly ground black pepper
juice of 1 lime
2 onions (red and/or white)
2 bell peppers (any color)
1 tablespoon olive oil
toppings: pico de gallo, avocado, Monterey jack or cheddar cheese, salsa, sour cream

Season the steaks generously with salt and pepper and marinate in the lime juice in a shallow dish. Prepare the grill with charcoal banked to one side (you’ll need direct and indirect heat for this meal).

While the grill heats up and the steaks marinate, peel and slice the onion into thin half moons (about 1/4 cm thick). Cut the bell pepper into 1/2‑cm-wide strips. Place the vegetables onto aluminum foil (preferably heavy-duty foil). You’ll need enough foil to completely wrap up the vegetables, about 18 inches or so. Drizzle the vegetables with olive oil and season with salt and pepper. Crimp together the foil over the vegetables, starting with the short sides, then folding over the long sides. You’ll end up with a rectangular-shaped packet. The foil should be secure enough to remain closed throughout the grilling process.

When the grill is hot, place the foil packet of vegetables on the grill and cook over indirect heat for about 10 minutes (cooking time will vary depending on the size of the vegetable slices and the heat of the grill). If the vegetables aren’t tender, reseal the foil packet and cook for a few more minutes. Once tender, transfer the vegetables to a serving dish.

The steak can be cooked at the same time as the vegetables. Grill over a medium-high heat until desired doneness. Remove the steaks from the grill and allow to rest for 5 minutes. While the meat rests, heat the tortillas on the grill for a few seconds on each side. After the meat has rested, slice it into thin strips against the grain of the meat.

To assemble the fajitas, place some sliced meat on a tortilla and top with onions, peppers, and other toppings (pico de gallo, avocado, cheese, salsa, and/or sour cream), al gusto, to taste.

***

Pico de Gallo

Makes about 3 cups (720 ml)

1 medium white onion, minced
3 large vine-ripened tomatoes, diced small
1 or 2 jalapenos, minced
1 clove garlic, minced
juice of 1 lime (or 1 tablespoon white vinegar)
1 teaspoon salt
1/4 teaspoon freshly ground black pepper
3 tablespoons chopped cilantro

Rinse the onion in a colander under cold water for about 30 seconds. This will sweeten the onion and keep it crispy. Mix the onion and remaining ingredients in a medium bowl. Serve with tortilla chips or as an accompaniment to any Mexican meal.

Curried Chicken with Cucumber Yogurt Salad and Apple Honey Bundt Cake

When my husband was young, his birthday dinner of choice was his mom’s chicken curry. Shortly after we started dating, he made me the dish and, well, we’re married now. It’s just that good. He still makes it for me often. Though we’ve eaten it dozens of times together, we always end the meal by agreeing that “this was the best batch ever.”

The apple honey cake was left over from Rosh Hashanah dinner last weekend. Honey and apples are traditionally eaten on this holiday. What better way to combine them than a Bundt cake?

Curried Chicken
adapted From my mother-in-law, Kathy

Serves 4 to 6

4 teaspoons ground coriander
2 teaspoons ground cumin
4 tablespoons sesame seeds
2 tablespoons turmeric
1 teaspoon dried ground chili peppers (or more, to taste)
1/2 teaspoon ground ginger
2 teaspoons salt
1 whole chicken, cut into breasts, leg quarters, and wings
3 tablespoons butter
2 or 3 onions, thinly sliced
2 cups (480 ml) boiling water

Combine the dry ingredients and rub them onto the chicken. Melt the butter in a large frying pan and brown the onions over a medium heat. Pushing the onions to the sides of the pan, add the chicken to the onions and brown slightly over a medium-high heat.

Meanwhile, bring the water to boil in a dutch oven or stock pot. Add any remaining spice rub mixture to the water. Add the browned chicken and onions to the pot. Cook over a low heat, covered, for about 45 minutes, or until tender. Stir the chicken pieces around, remove the cover and continue cooking for 20 minutes or longer.

Serve with rice, cucumber yogurt salad, and chutney.

***

Cucumber Yogurt Salad

Serves 4 to 6

2 cucumbers, peeled and thinly sliced
1 to 2 teaspoons salt
3 cups (720 ml) plain yogurt

Place the sliced cucumber in a colander. Sprinkle with enough salt to cover the slices and allow to drain for 20 to 30 minutes. Mix together the cucumbers and yogurt in a serving bowl.

***

Apple Honey Bundt Cake
adapted from Allrecipes

Makes 12 servings

1 cup (200 g) white sugar
1 cup (230 ml) vegetable oil
2 eggs
2/3 cup (160 ml) honey
1 teaspoon vanilla extract
2 1/2 cups (300 g) all-purpose flour
1 teaspoon baking powder
1 teaspoon baking soda
1 teaspoon salt
1 teaspoon ground cinnamon
1/4 teaspoon ground allspice
4 medium apples, peeled, cored and shredded
1/2 to 1 cup (50 to 100 g) chopped walnuts

Preheat the oven to 325°F (160°C). Grease and flour a 9‑inch Bundt pan. 

In a large bowl, stir together the sugar and oil. Beat in the eggs until light, then stir in the honey and vanilla. Combine the flour, baking powder, baking soda, salt, cinnamon and allspice; stir into the batter just until moistened. Fold in the apples and nuts. 

Bake for 50 to 65 minutes in the preheated oven, or until a toothpick inserted into the crown comes out clean. Let cool for 10 to 15 minutes before inverting onto a plate and tapping out of the pan. 

Spring Rolls with Pork Meatballs and Spicy Peanut Sauce and Pinkberry-style Vanilla Frozen Yogurt

I love the idea of appetizers for dinner. Why waste time with big entrees when a succulent starter will do? My in-laws introduced me to a wonderful Vietnamese restaurant on the south side of Milwaukee called Phan’s Garden. After years of ordering and assembling their grilled pork meatball spring rolls, Reuben decided to take a stab at preparing the appetizer at home. Over the years, our recipe has been tweaked and nudged until we now no longer go to Phan’s Garden, preferring our home-cooked version of their spring rolls. We occasionally add a stir-fry or salad to the meal, but more often than not, the spring rolls alone make up our meal.

For those that aren’t familiar with Pinkberry, check out their website. I ate their yogurt only once, a couple of years ago while on vacation in New York, but still crave it. Luckily, 101 Cookbooks took a stab at creating a recipe to mimic Pinkberry’s concoction. I decreased the sugar further in an attempt to make the yogurt more tangy and less sweet, as I remember it. Add-ins are key to this type of yogurt. I love it with strawberry puree (great way to use frozen purees leftover from spring strawberry picking). This week, I stirred in toasted pecans and chocolate chips. Reuben makes a rocky road version with nuts, chocolate chips, and marshmallows. And it’s yogurt so you can eat it with a clear conscious.

IMG_6860

Spring Rolls with Pork Meatballs

Serves 4 to 6

1 1/4 lb (570 g) ground pork
1 egg
2 tablespoons minced garlic
1 tablespoon grated ginger
2 tablespoons thinly sliced green onions
1 teaspoon sugar
1 tablespoon fish sauce
salt and pepper to taste
2 tablespoons vegetable oil
12 rice spring roll skins
handful of torn lettuce leaves or mixed greens
4 oz (110 g) thin rice noodles, cooked according to package directions
2 carrots, grated
1 cucumber, peeled, halved, seeded, and sliced into thin half moons
1 bunch fresh basil and/or cilantro
1 serrano chili, thinly sliced

Combine the pork, egg, garlic, ginger, green onions, sugar, fish sauce and salt and pepper in a large bowl. Form the meat mixture into 1‑inch meatballs. Brown in the oil over a medium heat, turning occasionally, until cooked through, about 15 minutes.

The meatballs and remaining ingredients should be plated and brought to the table so each individual can make their own roll. To assemble rolls, soak a spring roll skin in a shallow dish of hot water (I use a pie plate) for 20 to 30 seconds until softened. Place a spring roll skin on plate and top (to taste) with lettuce, noodles, 2 or 3 meatballs (I split each meatball in half for easier rolling), shredded carrot, cucumber, fresh herbs, and a bit of chili. Do not overstuff or the rice skin will tear. Spicy peanut sauce can be added before rolling up or it can be served on the side for dipping. The roll is made like a burrito: fold the ends of the spring roll in, then roll up the long sides (see the picture below for an example).

IMG_6864

Spicy Peanut Sauce

Makes about 1 cup (240 ml)

1 tablespoon sesame oil
1/2 cup (125 g) unsweetened peanut butter
1 clove garlic, minced
1 teaspoon ginger, grated
1 tablespoon fish sauce
1 tablespoon soy sauce
juice of 1 lime
1 teaspoon sambal
1 teaspoon sugar
2 tablespoons shelled, roasted peanuts (optional)
1/4 cup (60 ml) hot water

Combine all the ingredients except the water in a food processor. Process until smooth; the mixture will be thick. While the processor is running, add the hot water 1 tablespoon at a time until the sauce reaches the consistency of pudding.

***

Pinkberry-style Vanilla Frozen Yogurt 
adapted from 101 Cookbooks

Makes about 1 quart

32 oz (960 g) plain whole-milk yogurt or 3 cups (720 g) Greek-style yogurt
3/4 cup (150 g) sugar
1/2 teaspoon vanilla extract

If using whole-milk yogurt, you will need to make strained yogurt by lining a mesh strainer with a few layers of cheesecloth or a thin dish towel. Scrape all the whole-milk yogurt into the cheesecloth. Place a strainer under the bowl to gather the liquid. Gather the ends of the cheesecloth and fold them over the yogurt, then refrigerate for at least 4 hours. After about 4 hours, the yogurt will be thickened and you should have about 3 cups of strained yogurt.

Mix together the strained yogurt (or Greek-style yogurt), sugar, and vanilla. Stir until the sugar is completely dissolved. Refrigerate for 1 hour. Freeze in your ice cream maker according to the manufacturer’s instructions. This can be eaten directly from the ice cream maker as a soft-serve style frozen yogurt. To solidify the yogurt further, pour into a bowl, cover, and freeze longer.

Stuffed Green Peppers, Salad with Corn, Tomato, and Goat Cheese, and Sweet Potato Pie

I know I’ve been watching too much Mad Men when I start craving cigarettes and pull out my Betty Crocker’s Cookbook from 1969. I can’t figure out how women ate these dishes and still managed to squeeze into their wool pencil skirts. Good girdles? Maybe it was the chain smoking.

Feeling housewifely after an evening marathon of Season 1 (thank you Netflix), I decided dinner needed a pie finale. Though sweet potato pies are more Mississippi than Manhattan, I couldn’t resist trying out this southern favorite. This was my first taste of sweet potato pie. I enjoyed it, a very nice alternative to a pumpkin pie. Unfortunately, the day after I made it, the pie fell out of my overstuffed fridge so I lost the leftovers as well as my favorite Le Creuset pie plate. I’m sure Betty Draper would be appalled by balancing dessert on top of a dozen ears of corn wedged between nearly expired yogurt.

Stuffed Green Peppers
adapted from Betty Crocker’s Cookbook/40th Anniversary Edition

Serves 6

6 large green bell peppers
1 lb (450 g) ground beef
1/2 small onion, minced
1 clove garlic, minced
1 teaspoon salt
1 1/2 cups cooked rice
1 x 15-oz (425‑g) can tomato sauce

Preheat the oven to 350°F (180°C). Cut a thin slice from the stem end of each pepper. Remove the seeds and membranes; rinse. Cook the peppers in enough boiling salted water to cover for 5 minutes; drain.

Cook the ground beef and onion in a large skillet until the hamburger is light brown; drain. Add the garlic to the pan and cook over a medium-high heat for 1 minute, until fragrant. Stir in the salt, rice and 1 1/3 cups of the tomato sauce; heat through.

Stuff each pepper with the beef/rice mixture, then stand upright in an ungreased 8 x 8 x 2‑inch baking dish  Pour the remaining sauce over the peppers. Cover and bake for 45 minutes. Uncover and cook for 15 minutes longer.

***

Salad with Corn, Tomato, and Goat’s Cheese with Sherry Vinaigrette

Serves 4

2 tablespoons sherry vinegar
1/2 teaspoon Dijon mustard
1/2 teaspoon kosher salt
1/4 teaspoon freshly ground black pepper
2 tablespoons olive oil
5 oz (140 g) mixed salad greens
2 ears of corn, cooked and kernels removed
2 small or 1 large tomato, diced
2 oz (60 g) goat’s cheese

To make the vinaigrette, whisk together the vinegar, mustard, salt, pepper, and olive oil (or shake to combine in a screw-top jar).

For the salad, mix together the greens, corn kernels, and tomato. Drizzle the vinaigrette on top and gently toss. Garnish with the goat’s cheese.

***

IMG_6838

Sweet Potato Pie
adapted from Bon Appétit, September 2002

Serves 8

2 large or 3 small red-skinned sweet potatoes (about 1 1/2 lb/680 g)
1 cup (packed) (170 g) golden brown sugar
1 cup (240 ml) whipping cream
3 large eggs
1 teaspoon vanilla extract
3/4 teaspoon ground cinnamon
1/4 teaspoon ground nutmeg
1/4 teaspoon salt
1 x 9‑inch prepared pie crust (Note: this recipe has a wonderful crust according to the online reviews, but I’m lazy and always use Pillsbury refrigerated pie crusts)
1 large egg white, beaten to blend
freshly whipped cream, to serve

Pierce the potatoes with a fork. Cook in the microwave on high until tender, about 6 minutes per side. Cut open and allow to cool completely. Scrape the potato flesh into a bowl and mash until smooth. Measure enough potato puree to equal 1 1/2 cups.

Preheat the oven to 400°F (200°C) and position the oven rack in the bottom third of the oven. Place the puree in a large bowl. Whisk in the brown sugar, cream, eggs, vanilla, cinnamon, nutmeg, and salt. Brush the pie crust with the beaten egg white. Transfer the filling to the crust.

Bake the pie until the filling is puffed around the edges and set in the center, about 45 minutes. Transfer to a rack and allow to cool. (Can be made 1 day ahead. Cover; refrigerate.) Serve with freshly whipped cream.

Tortellini with Spinach and Toasted Garlic and Caprese Salad

This is my go-to weeknight meal. You can prepare the whole menu in about 15 minutes, yet it’s tasty enough to serve at dinner parties. I frequently serve it alongside a broiled or grilled steak for extra protein. I made this menu for my good friend and first-time mom, Christie. Anabelle and I had the pleasure of visiting her and her darling daughter, and instead of showing up empty handed, I brought along the makings for this simple meal. Cooking is the last thing a new mom needs to worry about.

Tortellini with Spinach and Toasted Garlic

Serves 3

1 x 13-oz (370‑g) package cheese tortellini (Barilla recommended)
1/4 cup (60 ml) olive oil
3 to 4 cloves garlic, minced
7 to 12 oz (200 to 280 g) baby spinach, washed and drained
freshly grated Parmesan cheese

Cook the tortellini until it’s al dente, according to package directions. Drain the tortellini (but do not rinse) and rinse out the pan. Add the olive oil and minced garlic to the pan and heat on medium, stirring occasionally, until the garlic is golden. Watch the pan carefully, as the garlic will go from golden to burnt in a matter of seconds. If the garlic burns, start over with new olive oil and garlic. Just as the garlic turns golden, add the spinach to the pan. Saute the garlic and spinach together over a medium-high heat, stirring frequently, until the spinach is just wilted. Return the tortellini to the pan and toss with the spinach, garlic, and olive oil. Serve with grated Parmesan cheese.

***

IMG_6762

Caprese Salad

Serves 3

2 vine-ripened tomatoes (about 1 lb/450 g), sliced 1/4 inch thick
1/2 lb (225 g) fresh mozzarella, sliced 1/4 inch thick
8 to 10 large fresh basil leaves
2 tablespoons extra virgin olive oil
salt and freshly ground black pepper, to taste

Arrange the tomato, mozzarella, and basil leaves on a serving platter, overlapping them. Drizzle with olive oil. Season the salad with salt and pepper and serve immediately.

Spicy Chicken and Rice with Tossed Salad and Raspberry Crumb Bars

Sometimes it’s fun to see what I can pull together for dinner without shopping for any ingredients. I also like having an excuse to use the new Le Creuset brasier my mom bought me as an early Christmas present. I originally thought an arroz con pollo recipe would be fun to try, but there were too many recipes to choose from; Spain, Cuba, Puerto Rico, Mexico and a host of South American countries all have their own versions. If anyone out there has an arroz con pollo recipe that they love, please send it my way. After a long internet search, I found this tasty chicken and rice recipe. It’s quick to prepare (just shy of making our 30-minute meal category) and makes a complete dinner when paired with a simple tossed salad.

The raspberry crumb bars were made of necessity. My regular grocery store, Sendik’s, unbelievably priced their fresh raspberries at $1 a box. These are the same boxes that usually cost $3.99. I bought the raspberries in good faith, hoping I could use them before they spoiled. The berries were gone within a week thanks to these bars and a couple wonderful breakfasts of oatmeal topped with fresh raspberries and maple syrup.

Spicy Chicken and Rice

Spicy Chicken and Rice
adapted from Bon Appétit, September 2007

Serves 4

2 tablespoons extra virgin olive oil
4 large boneless, skinless chicken thighs
salt and freshly ground black pepper
about 1/8 teaspoon ground cloves
1 red bell pepper, deseeded and diced
1 onion, chopped
1/4 cup (40 g) raisins
3 oz (about 1/2 cup/90 g) coarsely chopped pitted imported green olives
2 small bay leaves
2 garlic cloves, peeled
1 teaspoon hot chili paste (such as sambal oelek) or 1 small Serrano chili, chopped
1 1/2 cups (250 g to 280 g) jasmine rice or long-grain white rice , rinsed and drained
2 1/2 cups (600 ml) low-salt chicken broth

Heat the oil in a large skillet over a medium-high heat. Sprinkle the chicken generously with salt and pepper, then lightly with the ground cloves. Add the chicken to the skillet and sauté until brown, about 4 minutes per side. Transfer the chicken to a plate.

Pour off all but 4 tablespoons of fat from the skillet. Add the bell pepper, onion, raisins, olives, bay leaves, garlic, and chili paste to the skillet. Sauté until the vegetables begin to soften, about 2 minutes. Add the rice and stir for 1 minute. Press the chicken into the rice. Add 2 1/4 cups (540 ml) of the broth and bring to a boil. Cover, reduce the heat to medium-low, and simmer until the chicken is cooked through and the rice is tender, about 20 minutes (add the remaining broth if the rice is too dry).

***

Don’t let the “breakfast” in the title of these bars make you think they are overly healthy. Though less sweet than a normal cookie and loaded with fresh, tangy berries, they fit more in the dessert category than breakfast category, in my opinion.

Raspberry Crumb Breakfast Bars
adapted by Smitten Kitchen from Baked: New Frontiers in Baking

Makes about 24 bars

for the crust and crumb:
1 1/2 cups (180 g) all-purpose flour
1 cup (170 g) firmly packed dark brown sugar
1 1/4 cups (100 g) rolled oats
3/4 teaspoon salt
3/4 teaspoon baking powder
1/2 teaspoon baking soda
1/2 teaspoon cinnamon
3/4 cup (1 1/2 sticks/165 g) unsalted butter, cut into 1‑inch pieces

for the raspberry filling:
1/4 cup (40 g) firmly packed dark brown sugar
1 tablespoon grated lemon zest
1/2 teaspoon cinnamon
2 tablespoons all-purpose flour
1 lb (450 g) raspberries, fresh or frozen
1/4 cup (60 ml) fresh lemon juice
2 tablespoons unsalted butter, melted and cooled

To make the crust and crumb, preheat the oven to 350°F (180°C). Butter the bottom and sides of a 9‑by-13-inch glass or light-colored metal baking pan. Put a long piece of parchment paper in the bottom of the pan, letting the parchment extend up the two short sides of the pan and overhang slightly on both ends. (This will make it easy to remove the bars from the pan after they have baked.) Butter the parchment.

Put the flour, brown sugar, oats, salt, baking powder, baking soda, and cinnamon in a food processor. Pulse in short bursts until combined. Add the butter and pulse until loose crumbs form. Reserve 1 1/2 cups of the mixture and set aside. Pour the rest of the mixture into the prepared pan and use your hands or the back of a large wooden spoon to push the crust into an even layer at the bottom of the pan. The crust should touch the sides of the pan. Bake until golden brown, 12 to 15 minutes. Transfer to a wire rack and let the crust cool. Keep the oven on while you make the raspberry filling.

To make the raspberry filling, in a medium bowl, whisk the sugar, lemon zest, cinnamon and flour together. Add the raspberries, lemon juice and butter and use your hands to toss gently until the raspberries are evenly coated.

To assemble and bake the bars, spread the raspberry filling evenly on top of the cooled crust. Sprinkle the reserved crust mixture evenly on top of the filling. Bake for 35 to 45 minutes, rotating the pan every 15 minutes, until the top is golden brown and the filling starts to bubble around the edges. Transfer to a wire rack to cool completely, then cut into squares and serve. The bars can be stored in the refrigerator in an airtight container for up to 2 days.

Late-summer Roast Beef Dinner and French Apple Tart

Nigella Lawson’s How to Eat: The Pleasures and Principles of Good Food is one of the bibles of modern-day cookbooks. It’s also one of the first cookbooks I bought in Ireland, and has taught me how to make things I’d never even heard of before moving abroad, like Yorkshire pudding and trifle. It also spells out the makings of something else that was completely foreign to me: a proper Sunday lunch. Nigella Lawson writes about it for four straight pages in How to Eat, but what sums it up rather romantically is this: “Sunday lunch … is about solidity, the family, the home.”

Sunday lunch is an institution in a lot of families, but it took me a long time to come around to its charms, especially since I’m the one doing all the cooking that goes into a big Sunday lunch, not my mother. In my case, I like to have our big meal as a late lunch at the weekends now simply because my kids are in better moods at that time of day, which not only means they’re more likely to eat what I put in front of them, but makes for a more pleasant dinner for all of us. Plus now that my daughter needs a packed lunch every day for school, a roast does double duty as Sunday’s dinner and Monday’s sandwich.

Strictly speaking, this menu isn’t a traditional Sunday lunch — there’s no roast potatoes, or the vegetables like carrots, parsnips or broccoli that you’d usually expect. But one of the things I love about How to Eat is that it contains lots of ready-to-go menus, not just stand-alone recipes, and this is Nigella’s late-summer roast beef menu from the “Weekend Lunch” chapter (though I made the French apple tart instead of the Yorkshire pudding with syrup and cream she calls for, and I also prefer Bon Appétit’s one-pot version of the cannellini beans with garlic and sage for being easier and more straightforward than Nigella’s recipe). After holding out all month, it’s finally time to embrace autumn, and this dinner seemed like a good compromise.

It’s National Organic Week in Ireland! Click here for a listing of events throughout the country.

Cold Roast Fillet of Beef 
from How to Eat by Nigella Lawson

Serves 8

fillet of beef — allow about 7 oz (200 g) per person
olive oil

Allow the beef to come to room temperature before you cook it (otherwise the cooking times here won’t be correct).

Preheat the oven to 480°F (250°C). If it’s possible to switch off the fan in your oven, do so in order to reduce evaporation (75% of lean meat is water, so fan ovens can make even good cuts of meat dry and tough).

Place the fillet in an ovenproof dish or roasting tray. Rub the beef all over with olive oil. (Nigella advises using a rosemary-infused oil for this menu, but plain olive oil works just fine too.)

Cook the beef for 15 minutes at the very high heat, then reduce the oven to 350°F (180°C). Cook the beef for 15 minutes per 18 oz (500 g) for rare; 18 minutes per 18 oz (500 g) for medium; and 25 minutes per 18 oz (500 g) for well done.

After the meat has had its advised cooking time, test it: either press it (if it feels soft it’s rare, bouncy it’s medium, hard it’s well-done) or pierce it with a knife to see. Always let any meat rest out of the oven for at least 10 minutes before carving.

If you’re cooking the beef ahead of time, take it out of the fridge 2 hours before you want to eat it. It should be cold, but not chilled. Or you could cook the fillet early enough in the day to simply allow it to cool to room temperature by the time you want to eat.

***

Rosemary and Anchovy Mayonnaise

1 cup (240 ml) mayonnaise
8 anchovy fillets in oil, drained and diced
1 sprig rosemary, finely chopped
1 tablespoon lemon juice
salt and freshly ground black pepper

Combine all the ingredients, mixing well. Chill until ready to serve. Serve alongside the beef. (This is also great to make sandwiches with the beef leftovers.)

***

Cannellini Beans with Garlic and Sage 
from Bon Appétit, October 2009

Makes about 6 cups

1 lb (450 g) dried cannellini beans
8 cups (2 liters) room-temperature water
2 tablespoons olive oil
1 large head of garlic, unpeeled, top 1/2 inch cut off to expose cloves
1 large sprig of fresh sage
1/4 teaspoon whole black peppercorns
1 teaspoon coarse kosher salt
extra virgin olive oil (for drizzling)

Place the beans in a large bowl. Cover with cold water (at least 6 cups/1 1/2 liters) and soak overnight.

Drain the beans and place in a heavy, large pot. Add the 8 cups (2 liters) of room-temperature water, olive oil, garlic, sage, and black peppercorns. Bring to a simmer over a medium-high heat. Reduce the heat to medium-low and simmer, uncovered, for 1 1/2 hours, stirring occasionally. Mix in the coarse salt. Continue to simmer until the beans are tender, adding more water if needed to keep beans covered, about 30 minutes longer. Cool the beans in the cooking liquid for 1 hour.

Using a slotted spoon, transfer the beans to a serving bowl, reserving the bean cooking liquid, if desired, but discarding the garlic, sage, and peppercorns. Season the beans to taste with pepper and more coarse salt. Drizzle with extra virgin olive oil and serve.

***

Tomato Salad
from How to Eat by Nigella Lawson

For this salad, simply slice some tomatoes (the best and ripest you can find) and arrange them on a plate. Sprinkle with salt, pepper and sugar (only if you think they need it, and even so, just a pinch), as well as some finely chopped spring onions or chives, a drop or two of balsamic or red wine vinegar, and a drizzle of extra virgin olive oil.

***

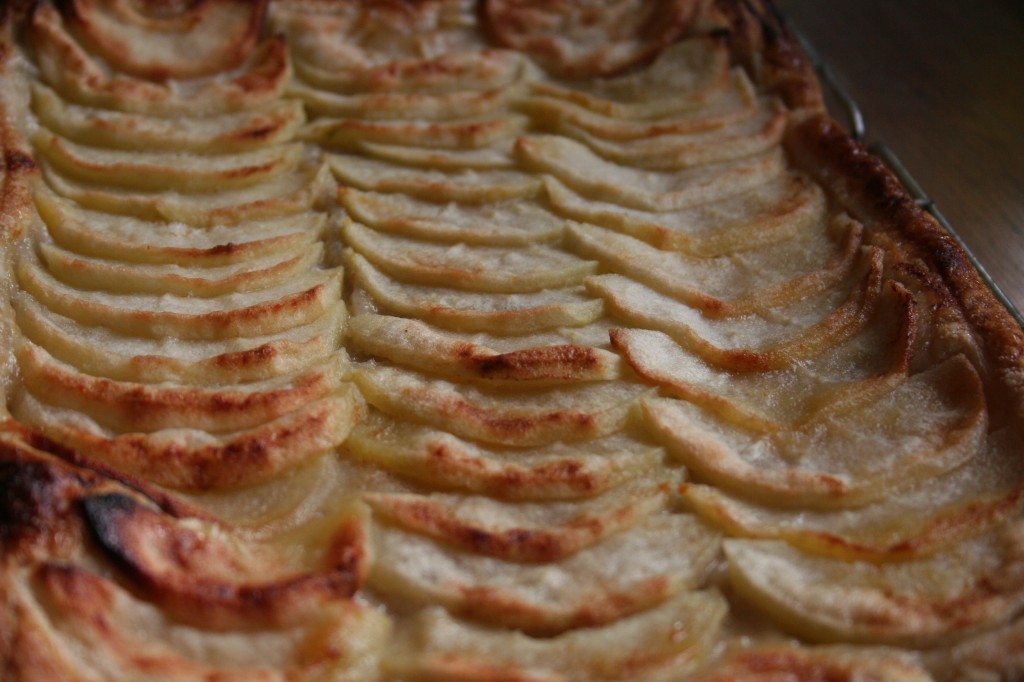
french apple tart

French Apple Tart (or Tarte Fine Aux Pommes, as Nigella Lawson calls it)
adapted from Barefoot Contessa Back to Basics by Ina Garten and Nigella Express by Nigella Lawson

Serves 4 to 6

This is mostly Nigella’s recipe, but the apricot jam and Calvados brushed on top is Ina’s touch from her version. The tart will still be delicious if you don’t add the jam mixture though. I pulled this together in 10 minutes, so it would also be a quick weeknight treat.

1 sheet shop-bought ready-rolled puff pastry, defrosted if frozen
2 large Granny Smith apples
2 tablespoons sugar
2 tablespoons (30 g) cold unsalted butter, small diced
1/4 cup (60 ml) apricot jam
2 tablespoons Calvados, rum, or water

Preheat the oven to 400°F (200°C). Line a sheet pan with parchment paper.

Lay the sheet of puff pastry on the lined baking sheet. Using the tip of a sharp knife, mark a 1/2‑inch border all the way around the edge of the rectangle. You need to score the lines on the pastry rather than cut all the way through it. This will allow a frame to rise above the apple filling. Refrigerate the dough while you prepare the apples.

Peel the apples and core them, then cut them in half. Slice the apples into 1/4‑inch-thick slices. Working from the inside edge, place the apple slices, closely overlapping, within the border of the pastry frame. Create neat lines of apple slices until the pastry is covered. Sprinkle with the sugar and dot with the butter.

Bake for 20 to 25 minutes, until the pastry is browned and the edges of the apples start to brown. Rotate the pan once during cooking. If the pastry puffs up in one area, cut a little slit with a knife to let the air out. And don’t worry if the apple juices burn in the pan, the tart will be fine. When the tart’s done, gently heat the apricot jam together with the Calvados, rum, or water and brush the apples and the pastry completely with the jam mixture. Loosen the tart with a spatula so it doesn’t stick to the paper. Allow to cool and serve warm or at room temperature, cut into squares or slices.

A Cooking Blog