Spicy Chicken and Rice with Tossed Salad and Raspberry Crumb Bars

Sometimes it’s fun to see what I can pull together for dinner without shopping for any ingredients. I also like having an excuse to use the new Le Creuset brasier my mom bought me as an early Christmas present. I originally thought an arroz con pollo recipe would be fun to try, but there were too many recipes to choose from; Spain, Cuba, Puerto Rico, Mexico and a host of South American countries all have their own versions. If anyone out there has an arroz con pollo recipe that they love, please send it my way. After a long internet search, I found this tasty chicken and rice recipe. It’s quick to prepare (just shy of making our 30-minute meal category) and makes a complete dinner when paired with a simple tossed salad.

The raspberry crumb bars were made of necessity. My regular grocery store, Sendik’s, unbelievably priced their fresh raspberries at $1 a box. These are the same boxes that usually cost $3.99. I bought the raspberries in good faith, hoping I could use them before they spoiled. The berries were gone within a week thanks to these bars and a couple wonderful breakfasts of oatmeal topped with fresh raspberries and maple syrup.

Spicy Chicken and Rice

Spicy Chicken and Rice
adapted from Bon Appétit, September 2007

Serves 4

2 tablespoons extra virgin olive oil
4 large boneless, skinless chicken thighs
salt and freshly ground black pepper
about 1/8 teaspoon ground cloves
1 red bell pepper, deseeded and diced
1 onion, chopped
1/4 cup (40 g) raisins
3 oz (about 1/2 cup/90 g) coarsely chopped pitted imported green olives
2 small bay leaves
2 garlic cloves, peeled
1 teaspoon hot chili paste (such as sambal oelek) or 1 small Serrano chili, chopped
1 1/2 cups (250 g to 280 g) jasmine rice or long-grain white rice , rinsed and drained
2 1/2 cups (600 ml) low-salt chicken broth

Heat the oil in a large skillet over a medium-high heat. Sprinkle the chicken generously with salt and pepper, then lightly with the ground cloves. Add the chicken to the skillet and sauté until brown, about 4 minutes per side. Transfer the chicken to a plate.

Pour off all but 4 tablespoons of fat from the skillet. Add the bell pepper, onion, raisins, olives, bay leaves, garlic, and chili paste to the skillet. Sauté until the vegetables begin to soften, about 2 minutes. Add the rice and stir for 1 minute. Press the chicken into the rice. Add 2 1/4 cups (540 ml) of the broth and bring to a boil. Cover, reduce the heat to medium-low, and simmer until the chicken is cooked through and the rice is tender, about 20 minutes (add the remaining broth if the rice is too dry).

***

Don’t let the “breakfast” in the title of these bars make you think they are overly healthy. Though less sweet than a normal cookie and loaded with fresh, tangy berries, they fit more in the dessert category than breakfast category, in my opinion.

Raspberry Crumb Breakfast Bars
adapted by Smitten Kitchen from Baked: New Frontiers in Baking

Makes about 24 bars

for the crust and crumb:
1 1/2 cups (180 g) all-purpose flour
1 cup (170 g) firmly packed dark brown sugar
1 1/4 cups (100 g) rolled oats
3/4 teaspoon salt
3/4 teaspoon baking powder
1/2 teaspoon baking soda
1/2 teaspoon cinnamon
3/4 cup (1 1/2 sticks/165 g) unsalted butter, cut into 1‑inch pieces

for the raspberry filling:
1/4 cup (40 g) firmly packed dark brown sugar
1 tablespoon grated lemon zest
1/2 teaspoon cinnamon
2 tablespoons all-purpose flour
1 lb (450 g) raspberries, fresh or frozen
1/4 cup (60 ml) fresh lemon juice
2 tablespoons unsalted butter, melted and cooled

To make the crust and crumb, preheat the oven to 350°F (180°C). Butter the bottom and sides of a 9‑by-13-inch glass or light-colored metal baking pan. Put a long piece of parchment paper in the bottom of the pan, letting the parchment extend up the two short sides of the pan and overhang slightly on both ends. (This will make it easy to remove the bars from the pan after they have baked.) Butter the parchment.

Put the flour, brown sugar, oats, salt, baking powder, baking soda, and cinnamon in a food processor. Pulse in short bursts until combined. Add the butter and pulse until loose crumbs form. Reserve 1 1/2 cups of the mixture and set aside. Pour the rest of the mixture into the prepared pan and use your hands or the back of a large wooden spoon to push the crust into an even layer at the bottom of the pan. The crust should touch the sides of the pan. Bake until golden brown, 12 to 15 minutes. Transfer to a wire rack and let the crust cool. Keep the oven on while you make the raspberry filling.

To make the raspberry filling, in a medium bowl, whisk the sugar, lemon zest, cinnamon and flour together. Add the raspberries, lemon juice and butter and use your hands to toss gently until the raspberries are evenly coated.

To assemble and bake the bars, spread the raspberry filling evenly on top of the cooled crust. Sprinkle the reserved crust mixture evenly on top of the filling. Bake for 35 to 45 minutes, rotating the pan every 15 minutes, until the top is golden brown and the filling starts to bubble around the edges. Transfer to a wire rack to cool completely, then cut into squares and serve. The bars can be stored in the refrigerator in an airtight container for up to 2 days.

Late-summer Roast Beef Dinner and French Apple Tart

Nigella Lawson’s How to Eat: The Pleasures and Principles of Good Food is one of the bibles of modern-day cookbooks. It’s also one of the first cookbooks I bought in Ireland, and has taught me how to make things I’d never even heard of before moving abroad, like Yorkshire pudding and trifle. It also spells out the makings of something else that was completely foreign to me: a proper Sunday lunch. Nigella Lawson writes about it for four straight pages in How to Eat, but what sums it up rather romantically is this: “Sunday lunch … is about solidity, the family, the home.”

Sunday lunch is an institution in a lot of families, but it took me a long time to come around to its charms, especially since I’m the one doing all the cooking that goes into a big Sunday lunch, not my mother. In my case, I like to have our big meal as a late lunch at the weekends now simply because my kids are in better moods at that time of day, which not only means they’re more likely to eat what I put in front of them, but makes for a more pleasant dinner for all of us. Plus now that my daughter needs a packed lunch every day for school, a roast does double duty as Sunday’s dinner and Monday’s sandwich.

Strictly speaking, this menu isn’t a traditional Sunday lunch — there’s no roast potatoes, or the vegetables like carrots, parsnips or broccoli that you’d usually expect. But one of the things I love about How to Eat is that it contains lots of ready-to-go menus, not just stand-alone recipes, and this is Nigella’s late-summer roast beef menu from the “Weekend Lunch” chapter (though I made the French apple tart instead of the Yorkshire pudding with syrup and cream she calls for, and I also prefer Bon Appétit’s one-pot version of the cannellini beans with garlic and sage for being easier and more straightforward than Nigella’s recipe). After holding out all month, it’s finally time to embrace autumn, and this dinner seemed like a good compromise.

It’s National Organic Week in Ireland! Click here for a listing of events throughout the country.

Cold Roast Fillet of Beef 
from How to Eat by Nigella Lawson

Serves 8

fillet of beef — allow about 7 oz (200 g) per person
olive oil

Allow the beef to come to room temperature before you cook it (otherwise the cooking times here won’t be correct).

Preheat the oven to 480°F (250°C). If it’s possible to switch off the fan in your oven, do so in order to reduce evaporation (75% of lean meat is water, so fan ovens can make even good cuts of meat dry and tough).

Place the fillet in an ovenproof dish or roasting tray. Rub the beef all over with olive oil. (Nigella advises using a rosemary-infused oil for this menu, but plain olive oil works just fine too.)

Cook the beef for 15 minutes at the very high heat, then reduce the oven to 350°F (180°C). Cook the beef for 15 minutes per 18 oz (500 g) for rare; 18 minutes per 18 oz (500 g) for medium; and 25 minutes per 18 oz (500 g) for well done.

After the meat has had its advised cooking time, test it: either press it (if it feels soft it’s rare, bouncy it’s medium, hard it’s well-done) or pierce it with a knife to see. Always let any meat rest out of the oven for at least 10 minutes before carving.

If you’re cooking the beef ahead of time, take it out of the fridge 2 hours before you want to eat it. It should be cold, but not chilled. Or you could cook the fillet early enough in the day to simply allow it to cool to room temperature by the time you want to eat.

***

Rosemary and Anchovy Mayonnaise

1 cup (240 ml) mayonnaise
8 anchovy fillets in oil, drained and diced
1 sprig rosemary, finely chopped
1 tablespoon lemon juice
salt and freshly ground black pepper

Combine all the ingredients, mixing well. Chill until ready to serve. Serve alongside the beef. (This is also great to make sandwiches with the beef leftovers.)

***

Cannellini Beans with Garlic and Sage 
from Bon Appétit, October 2009

Makes about 6 cups

1 lb (450 g) dried cannellini beans
8 cups (2 liters) room-temperature water
2 tablespoons olive oil
1 large head of garlic, unpeeled, top 1/2 inch cut off to expose cloves
1 large sprig of fresh sage
1/4 teaspoon whole black peppercorns
1 teaspoon coarse kosher salt
extra virgin olive oil (for drizzling)

Place the beans in a large bowl. Cover with cold water (at least 6 cups/1 1/2 liters) and soak overnight.

Drain the beans and place in a heavy, large pot. Add the 8 cups (2 liters) of room-temperature water, olive oil, garlic, sage, and black peppercorns. Bring to a simmer over a medium-high heat. Reduce the heat to medium-low and simmer, uncovered, for 1 1/2 hours, stirring occasionally. Mix in the coarse salt. Continue to simmer until the beans are tender, adding more water if needed to keep beans covered, about 30 minutes longer. Cool the beans in the cooking liquid for 1 hour.

Using a slotted spoon, transfer the beans to a serving bowl, reserving the bean cooking liquid, if desired, but discarding the garlic, sage, and peppercorns. Season the beans to taste with pepper and more coarse salt. Drizzle with extra virgin olive oil and serve.

***

Tomato Salad
from How to Eat by Nigella Lawson

For this salad, simply slice some tomatoes (the best and ripest you can find) and arrange them on a plate. Sprinkle with salt, pepper and sugar (only if you think they need it, and even so, just a pinch), as well as some finely chopped spring onions or chives, a drop or two of balsamic or red wine vinegar, and a drizzle of extra virgin olive oil.

***

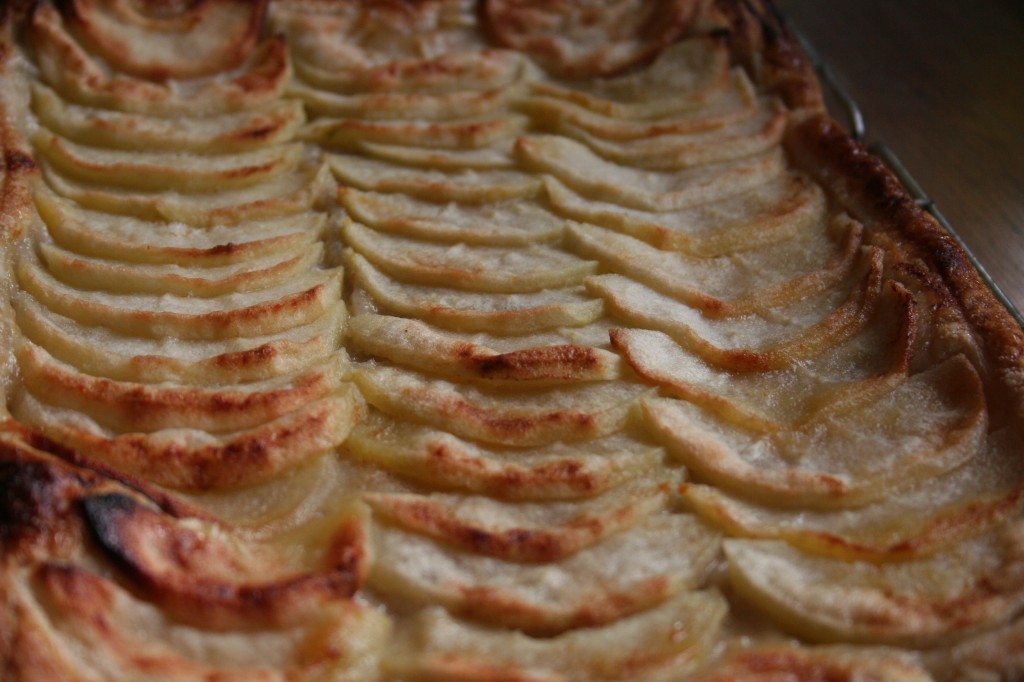
french apple tart

French Apple Tart (or Tarte Fine Aux Pommes, as Nigella Lawson calls it)
adapted from Barefoot Contessa Back to Basics by Ina Garten and Nigella Express by Nigella Lawson

Serves 4 to 6

This is mostly Nigella’s recipe, but the apricot jam and Calvados brushed on top is Ina’s touch from her version. The tart will still be delicious if you don’t add the jam mixture though. I pulled this together in 10 minutes, so it would also be a quick weeknight treat.

1 sheet shop-bought ready-rolled puff pastry, defrosted if frozen
2 large Granny Smith apples
2 tablespoons sugar
2 tablespoons (30 g) cold unsalted butter, small diced
1/4 cup (60 ml) apricot jam
2 tablespoons Calvados, rum, or water

Preheat the oven to 400°F (200°C). Line a sheet pan with parchment paper.

Lay the sheet of puff pastry on the lined baking sheet. Using the tip of a sharp knife, mark a 1/2‑inch border all the way around the edge of the rectangle. You need to score the lines on the pastry rather than cut all the way through it. This will allow a frame to rise above the apple filling. Refrigerate the dough while you prepare the apples.

Peel the apples and core them, then cut them in half. Slice the apples into 1/4‑inch-thick slices. Working from the inside edge, place the apple slices, closely overlapping, within the border of the pastry frame. Create neat lines of apple slices until the pastry is covered. Sprinkle with the sugar and dot with the butter.

Bake for 20 to 25 minutes, until the pastry is browned and the edges of the apples start to brown. Rotate the pan once during cooking. If the pastry puffs up in one area, cut a little slit with a knife to let the air out. And don’t worry if the apple juices burn in the pan, the tart will be fine. When the tart’s done, gently heat the apricot jam together with the Calvados, rum, or water and brush the apples and the pastry completely with the jam mixture. Loosen the tart with a spatula so it doesn’t stick to the paper. Allow to cool and serve warm or at room temperature, cut into squares or slices.

Bay Scallop Gratin and Buttermilk Birthday Cake with Chocolate Sour Cream Frosting

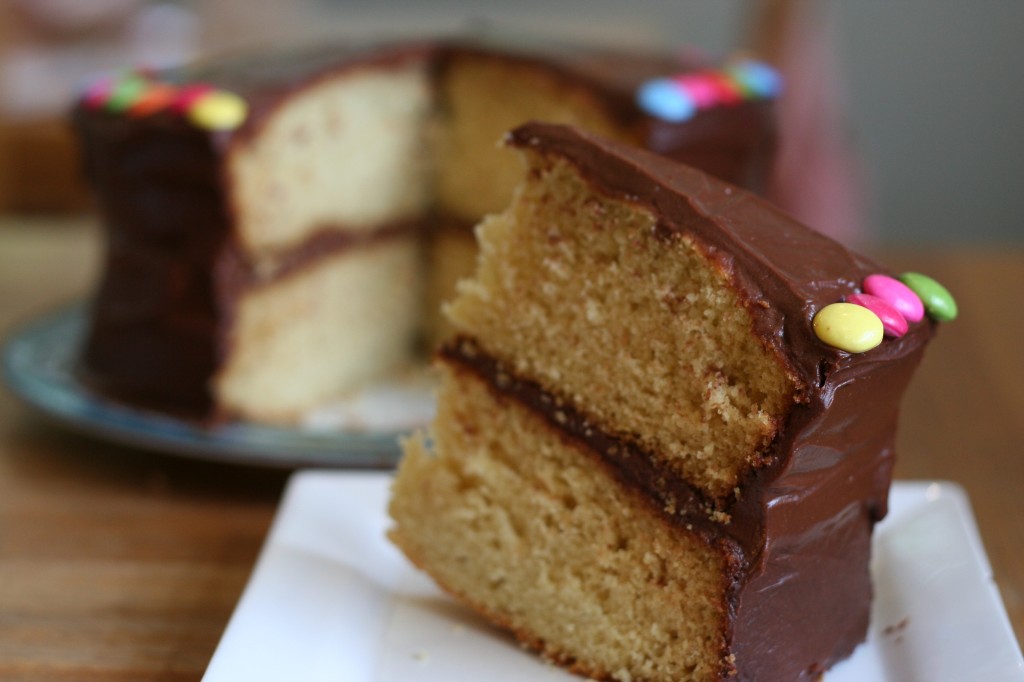
There has been no shortage of “staying in is the new going out” headlines since the recession hit last year, usually applied to statistics about fewer people going to pubs, a rise in subscriptions to online DVD rental services or a surge in sales of board games. Not surprisingly, restaurants have been particularly badly hit, with a number of high-profile cases in Ireland. But we haven’t really enjoyed going out to eat for a number of years now. Eating out in Ireland is notoriously expensive, and there’s nothing I hate more than a mediocre meal that costs nearly as much as a week’s worth of groceries and that I could make just as well or better myself. So when Matt asked me if I wanted to go out to dinner for my birthday yesterday, I said I’d rather splash out on some good-quality ingredients and make a nice dinner at home instead. And even though he kept offering to get me my favorite cake from a local patisserie or make me a birthday cake if I just gave him the recipe I wanted, I happily insisted on making it myself, since I’ve been looking forward to trying this buttermilk cake recipe since Deb at Smitten Kitchen posted it in July. I’ll definitely make it again as my go-to recipe now for a yellow cake or easy chocolate frosting, but I have to admit that it didn’t unseat Beatty’s chocolate cake as my favorite. Still, it’s good to try new things (especially cakes).

It’s National Organic Week in Ireland! Click here for a listing of events throughout the country.

Bay Scallop Gratin
adapted from Barefoot Contessa Back to Basics by Ina Garten

Serves 6

6 tablespoons (90 g) unsalted butter, at room temperature
6 large garlic cloves, minced
2 medium shallots, minced
2 oz (60 g) Parma ham or pancetta, minced
4 tablespoons minced fresh parsley, plus extra for garnish
2 tablespoons freshly squeezed lemon juice
2 tablespoons Pernod
2 teaspoons kosher salt
1 teaspoon freshly ground black pepper
6 tablespoons good olive oil
1/2 cup panko or breadcrumbs (if making your own fresh breadcrumbs, remove the crusts)
6 tablespoons dry white wine
2 lb (900 g) fresh bay scallops (or 6 scallops per person)
lemon, for garnish

Preheat the oven to 425°F (220°C). Place six 6‑inch round gratin dishes on a sheet pan.

To make the topping, place the butter in the bowl of an electric mixer fitted with the paddle attachment (you can also use a hand mixer). With the mixer on low speed, add the garlic, shallot, Parma ham or pancetta, parsley, lemon juice, Pernod, salt, and pepper and mix until combined. With the mixer still on low, add the olive oil slowly as though making mayonnaise, until combined. Fold the panko or breadcrumbs in with a rubber spatula and set aside.

Preheat the broiler, if it’s separate from your oven.

Place 1 tablespoon of the wine in the bottom of each gratin dish. With a small sharp knife, remove the white muscle and membrane from the side of each scallop and discard. Pat the scallops dry with paper towels and distribute them among the 3 dishes. Spoon the garlic butter evenly over the top of the scallops. Bake for 10 to 12 minutes, until the topping is golden and sizzling and the scallops are barely done. If you want the top crustier, place the dishes under the broiler for 2 minutes, until browned. Finish with a squeeze of fresh lemon juice and a sprinkling of chopped parsley and serve immediately with plain crusty French bread to soak up all the amazing juices.

***

slice of buttermilk birthday cake

Buttermilk Birthday Cake with Chocolate Sour Cream Frosting
adapted from Smitten Kitchen (you can watch a video of Deb from Smitten Kitchen talking about this cake and a video of the frosting being made at GoodBite.com)

Makes two 9‑inch-round, 2‑inch-tall cake layers

4 cups (480 g) plus 2 tablespoons cake flour or, failing that, plain flour
2 teaspoons baking powder
1 1/2 teaspoons baking soda
1 teaspoon salt
1 cup (225 g) unsalted butter, softened
2 cups (400 g) sugar
2 teaspoons pure vanilla extract
4 large eggs, at room temperature
2 cups (480 ml) buttermilk, well-shaken

Preheat the oven to 350°F (180°C). Butter two 9‑inch-round cake pans and line with circles of parchment paper. (Alternately, you can use a cooking spray, either with just butter or butter and flour to speed this process up.)

Sift together the flour, baking powder, baking soda, and salt in a medium bowl. Cream the butter and sugar together in a large bowl with an electric mixer at medium speed until pale and fluffy, then beat in the vanilla. Add the eggs one at a time, beating well and scraping down the bowl after each addition. At low speed, beat in the buttermilk until just combined (the mixture will look curdled, but don’t worry). Add the flour mixture in three batches, mixing until each addition is just incorporated (don’t overmix).

Spread the batter evenly in the two cake pans, then rap the pans on the counter several times to eliminate air bubbles. Bake until golden and a wooden pick inserted in center of cake comes out clean, 35 to 40 minutes. Cool in the pan on a rack for 10 minutes, then run a knife around the edge of the pan. Invert onto the rack and discard the parchment, then cool completely, about 1 hour.

Chocolate Sour Cream Frosting

Makes 5 cups of frosting, or enough to frost and fill a two-layer 9‑inch cake

15 oz (425 g) semisweet or bittersweet chocolate, chopped
1 1/4 teaspoons instant espresso (optional)
2 1/4 cups (540 ml) sour cream, at room temperature (this is important!)
1/4 to 1/2 cup (60 to 120 ml) light corn syrup (or golden syrup)
3/4 teaspoon vanilla extract

Combine the chocolate and espresso powder, if using, in the top of a double-boiler or in a heatproof bowl over simmering water. Stir until the chocolate is melted. (Alternately, you can melt the chocolate in a microwave for 30 seconds, stirring well, and then heating in 15 second increments, stirring between each, until the chocolate is melted.) Remove from the heat and let the chocolate cool until tepid.

Whisk together the sour cream, 1/4 cup (60 ml) of the corn syrup (or golden syrup) and vanilla extract until combined. Slwoly add the tepid chocolate and stir quickly until the mixture is uniform. Taste for sweetness, and if needed, add additional corn syrup (or golden syrup) in one-tablespoon increments until the desired level of sweetness is achieved.

Let the frosting cool in the refrigerator until it’s a spreadable consistency, about 30 minutes. Should the frosting become too thick or stiff, just leave it out until it softens again.

Black Bean, Eggplant and Leek Chili with Lime Sour Cream and Honey Buttermilk Cornbread

The first cookbook I remember buying was 1,000 Vegetarian Recipes. I was in college, living in a co-op at the time, and needed something to help me cook a vegetarian dinner once a week for 40 people. I probably thought the book was a bargain — with that many recipes, there would surely be loads of veggie crowd pleasers, right? Well, let’s just say it’s no longer in my cookbook collection. The New Vegetarian Epicure was the second cookbook I bought, and has been much better loved. This is the book that taught me how to cook my first proper recipes (quinoa salads and tempeh don’t really count) and I still turn to some of them as my go-to recipes, like this one for honey buttermilk cornbread. What’s your first favorite cookbook?
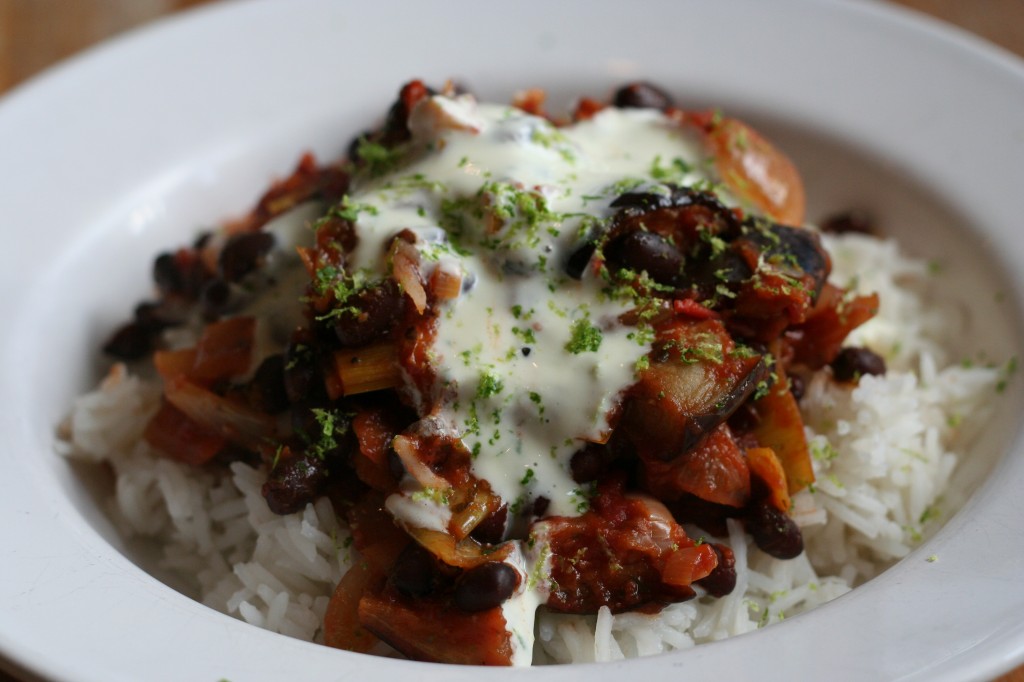
black bean, eggplant and leek chili with lime sour cream

It’s National Organic Week in Ireland. Click here for a listing of events throughout the country.

Black Bean, Eggplant and Leek Chili with Lime Sour Cream
adapted from Paradiso Seasons by Denis Cotter

Serves 4

for the chili:
7 oz (200 g) dried black beans (or 1 x 14-oz (400‑g) can of black beans)
olive oil
2 onions, finely chopped
1 large leek, chopped into chunks and washed well
3 cloves garlic, chopped
1 tablespoon ground coriander
1 tablespoon ground cumin
1 teaspoon chili powder
2 x 14-oz (400‑g) cans of chopped tomatoes
1 tablespoon tomato paste
salt and freshly ground black pepper
2 medium eggplants
1 bunch fresh cilantro (optional)
rice, to serve (optional)

for the lime sour cream:
zest and juice of 1 lime
1 cup (240 ml) sour cream or crème fraîche

Preheat the oven to 400°F (200°C).

To make the chili, soak the beans for 2 hours or overnight in cold water, then cook them in plenty of boiling water until tender (about 1 hour). Or you can skip this if you use canned beans.

Heat a little olive oil in a large pan and cook the onions and leeks for about 10 minutes, until soft. Add the garlic and spices and cook for 2 minutes before adding the tomatoes and the tomato paste. Bring the sauce to a boil, then reduce the heat and simmer for 15 minutes. Season to taste and check the spice levels —  the sauce needs to be very strongly spiced at this point, as the beans and vegetables will dilute its power.

While the sauce is cooking, chop the eggplant into large chunks, toss them in olive oil and roast them until browned and softened, about 30 minutes. Turn and toss the eggplant twice while they’re cooking.

Meanwhile, to make the lime sour cream, simply stir the lime zest and juice into the sour cream or crème fraîche.

Add the roasted eggplant and cooked beans to the sauce and simmer for 10 minutes. Stir in the fresh cilantro (if using) and check the seasoning and spicing again before serving on top of some plain boiled rice and with a dollop of the lime sour cream on top.

***

Honey Buttermilk Cornbread
from The New Vegetarian Epicure by Anna Thomas

Serves 8

1 cup (120 g) white flour
1 1/2 cups (340 g) cornmeal
1/2 teaspoon baking soda
1 teaspoon baking powder
3/4 teaspoon salt
3 large eggs
1 1/3 cups (320 ml) buttermilk
3 tablespoons honey
2 tablespoons (30 g) butter, melted

Preheat the oven to 350°F (180°C).

Sift together the flour, cornmeal, soda, baking powder and salt. In a separate bowl, whisk together the eggs, buttermilk, honey and melted butter. Combine the wet and dry ingredients, stirring gently just until the lumps are gone (don’t overmix). Pour the batter into a buttered 12 x 15-inch baking dish and bake for 30 to 35 minutes, or until a tester inserted in the center of the cornbread comes out clean. Cut into squares and serve hot or warm.

Salmon Provencal and Roast Herbed Potatoes with Balsamic Vinegar

I’ve been enjoying every minute of our Indian summer. On Tuesday, we spent the entire afternoon at the beach with some of my daughter’s new school friends, the first time we were able to play at the beach like that all summer. It was the kind of day I’ve been imagining having every summer since my daughter was one year old, but which I’ve never really been able to have because of the constant wet weather every summer since then — packing a big bag of toys and blankets and a picnic lunch, drinking tea and coffee with the other parents while the kids made a huge sand mountain, complete with a moat and driftwood for a bridge, and my baby playing happily in the sand at my feet. But as wonderful as it’s been to have an entire straight week of dry, sunny days (and with more still forecast!), the warmth has gone out of the air, I’ve started to turn on the heat in the mornings to take the chill off, and I know my summery meals — and the summer itself, such as it was — are finally coming to an end.

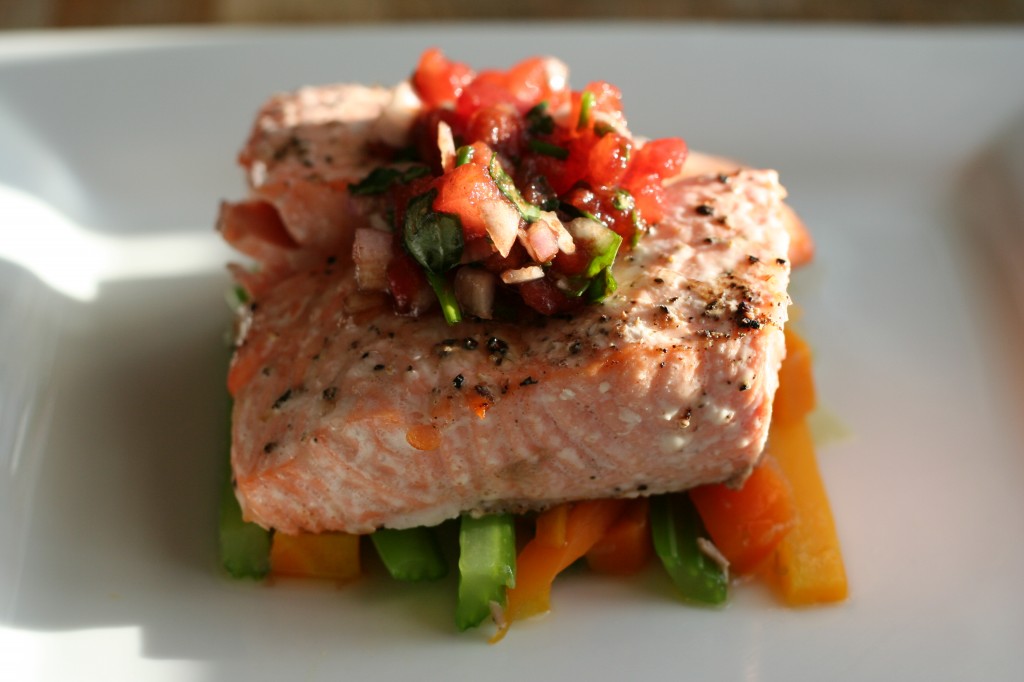
salmon provencal

It’s National Organic Week in Ireland! Click here for a listing of events throughout the country.

Salmon Provencal
adapted from Simply Recipes and Wolfgang Puck

Serves 4

4 ripe tomatoes, peeled, seeded, and chopped fine
3 shallots, minced
1 tablespoon chopped fresh tarragon
1 tablespoon chopped fresh basil
1 tablespoon chopped fresh chives
2 tablespoons olive oil
1 tablespoon balsamic vinegar or sherry vinegar
zest and juice of 1/2 lemon
salt and freshly ground black pepper
4 x 6‑oz (170‑g) salmon fillets
1 cup (240 ml) vegetable stock
2 carrots, julienned
1 leek, white part only, julienned
2 stalks celery, julienned

Preheat the oven to 400°F (200°C).

In a large bowl, combine the chopped tomatoes, shallots and fresh herbs. In another bowl, whisk together the oil, vinegar and lemon zest and juice (or shake to combine in a screw-top jar). Add to the tomato mixture and toss to coat. Season to taste with salt and pepper.

Arrange the salmon fillets on an oiled baking sheet without crowding. Drizzle with olive oil and season with salt and pepper. Bake until the salmon is barely cooked through and lightly browned on the edges, about 10 to 12 minutes.

Meanwhile, bring the vegetable stock to boil in a large saucepan. Add the julienned carrots, leek and celery and cook for 3 to 5 minutes, until tender but still crisp. Drain and set aside.

To serve, divide the julienned vegetables among 4 plates. Arrange the salmon fillets in the center of the vegetables and top each fillet with a couple tablespoons of the tomato mixture. Serve immediately.

***

Roast Herbed Potatoes with Balsamic Vinegar
adapted from Avoca Café Cookbook

Serves 6

1/4 cup (60 ml) olive oil
2 lb (900 g) new potatoes, halved (skin left on)
sea salt and freshly ground black pepper
1 head garlic, split into cloves but left unpeeled
1 tablespoon finely chopped fresh rosemary
1 tablespoon finely chopped fresh thyme
balsamic vinegar or good-quality red wine vinegar

Preheat the oven to 425°F (220°C).

Pour the olive oil into an ovenproof dish (one big enough to hold all the potatoes without overcrowding them) and put it into the oven to heat the oil. (Just don’t leave it in too long, or the oil will start to smoke. Five to 10 minutes is enough.)

Bring a pot of water to boil. Drop in the halved potatoes and parboil for 5 minutes only. Drain.

Remove the dish from the oven. Carefully add the potatoes to the hot oil, turning them to make sure they’re all coated in the oil. Season well with sea salt and freshly ground black pepper. Put into the oven to roast for 10 minutes. Add the garlic and half the herbs and continue to roast for a further 10 to 15 minutes, until the potatoes and garlic are tender. Remove from the oven. Allow to cool slightly, then sprinkle with the vinegar and remaining herbs. Check the seasoning and serve.

Grilled Lemon Chicken with Summer Corn Salad and Green Beans

Where I grew up in northern Illinois, there was a fabulous farm stand nearby at a busy intersection. My memory of it is that it always seemed to be on the verge of falling to pieces and I was always surprised when it reopened, having somehow made it through another punishing Midwestern winter. I remember getting huge watermelons there, and gallon jugs of apple cider in the autumn, but mostly my family bought all our sweet corn there in the summer. No barbecue or big family get-together was complete without someone getting sent outside to shuck all the ears of corn, piling the husks and corn silk into paper grocery bags at your feet.

Corn on the cob doesn’t feature much in Ireland. It’s actually kind of hard to find, and if you do, it tends to come in pairs, wrapped in cling film on a Styrofoam tray like you often see with exotic fruit. So when my organic fruit and veg supplier* started carrying it a few weeks ago, I bought some purely out of nostalgia, just so I could shuck a couple ears of it again. I guess you can take the girl out of the Midwest, but you can’t take the Midwest out of the girl.

*Don’t forget, it’s National Organic Week in Ireland. Click here for a listing of events throughout the country.

Grilled Lemon Chicken
adapted from The Barefoot Contessa Cookbook by Ina Garten

Serves 4

1/2 cup (120 ml) freshly squeezed lemon juice (2 or 3 large lemons)
1/2 cup (120 ml) good-quality olive oil
1 teaspoon kosher salt
1/2 teaspoon freshly ground black pepper
1 1/2 teaspoons minced fresh thyme leaves (or 1/4 teaspoon dried thyme)
4 boneless, skinless chicken breasts

Whisk together the lemon juice, olive oil, salt, pepper, and thyme. Pour over the chicken breasts in a nonreactive bowl. Cover and marinate in the refrigerator for 6 hours or overnight.

Heat a charcoal grill or griddle pan. Remove the chicken from the marinade, shaking off any excess. Grill the chicken breasts for 10 minutes on each side, until just cooked through. Cool slightly and cut diagonally in 1/2‑inch-thick slices.

***

Summer Corn Salad
adapted from Allrecipes.com

Serves 4

6 ears corn, husked and cleaned
1/2 red onion, diced
3 large tomatoes, diced
2 oz (60 g) feta, crumbled (optional)
1/4 cup (10 g) chopped fresh basil (or parsley)
1/4 cup (60 ml) olive oil
2 tablespoons white wine vinegar
salt and freshly ground black pepper

Bring a large pot of lightly salted water to a boil. Cook the corn in boiling water for 7 to 10 minutes, or until desired tenderness. Drain, cool, and cut the kernels off the cob with a sharp knife.

Deflame the onion by placing the chopped pieces into a strainer, rinsing under cold water, and shaking off the excess.

In a large bowl, toss together the corn, onion, tomatoes, feta, basil, oil and vinegar. Season to taste with salt and pepper. Chill until ready to serve. 

Pasta Shells with Lemon, Tuna and Artichokes

I had originally planned on making an autumn fish stew today, but with the sun splitting the stones, as they say here, for the past week, all thoughts of such wintry food went out the window. There will be plenty of time for that later. Considering that it rained almost every day of July and August, I’m going to enjoy every minute of this Indian summer for as long as it lasts, which means spending as much time playing outside with my poor pale kids as I can, instead of standing in front of the stove in the kitchen.

For anyone looking for something quick and easy to throw together after a long day at work or still easing their way into back-to-school routines, this is a no-cook dinner made up of kitchen cupboard staples that comes together in the time it takes to boil the pasta. It’s also the perfect recipe for hot days when you don’t want to turn on the oven or heat up the kitchen — or when you’re trying to hold onto the last few days of summer before making stews.

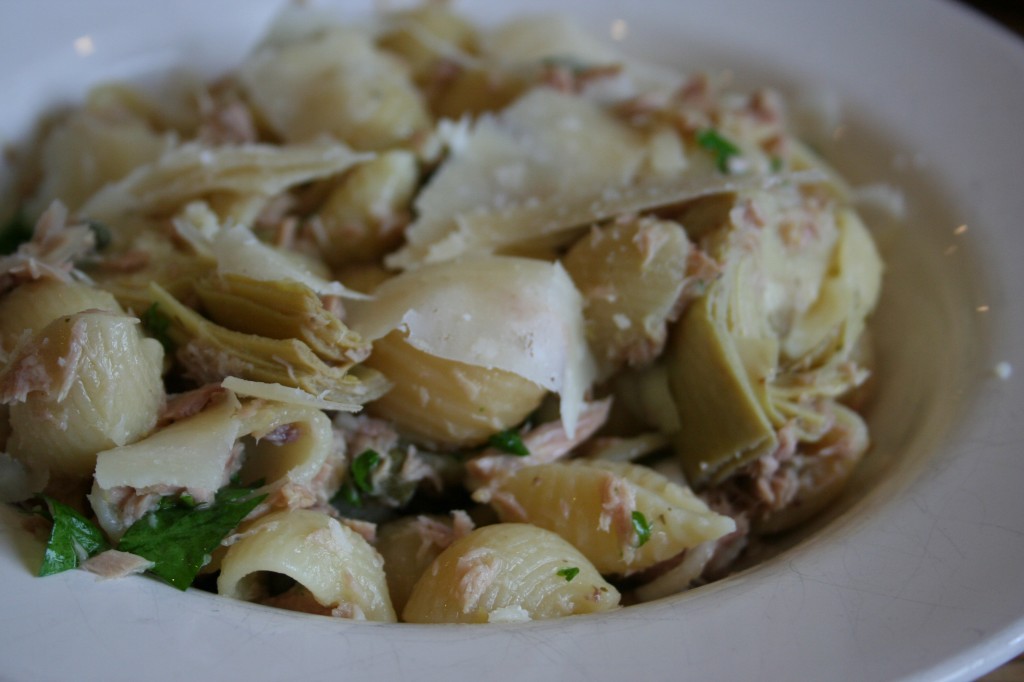
pasta shells with lemon, tuna and artichokes

Don’t forget, it’s National Organic Week in Ireland! Click here for a listing of events throughout the country.

Pasta Shells with Lemon, Tuna and Artichokes
adapted from Epicurious, August 1999

Serves 4

Looking around at other versions of this recipe, sun-dried tomatoes also seem to be a common addition.

1 lb (450 g) medium pasta shells (or other short pasta shape such as farfalle)
2 x 6‑oz (170‑g) cans tuna in olive oil, any bigger pieces broken into bite-sized chunks
1 x 6‑oz (170‑g) jar artichoke hearts, roughly chopped; reserve the oil they come in
6 green onions, finely chopped
1/2 cup pitted and chopped Kalamata olives
1/4 cup (60 ml) capers, drained
1/4 cup (60 ml) dry white wine (optional)
zest and juice of 1 lemon
1/2 cup (15 g) chopped fresh flat-leaf parsley
freshly grated Parmesan cheese, to serve

Bring a large pot of water to boil and cook the pasta according to the package instructions, until al dente. Meanwhile, mix all the other ingredients except the Parmesan in a large bowl. Add the oil that the artichoke hearts (and/or the tuna) came in to the bowl as well. (Or if you prefer, drain the tuna and artichokes and add 1/2 cup (120 ml) extra virgin olive oil instead.)

Drain the pasta, then add to the bowl and toss with the tuna mixture. Season to taste. Divide into 4 pasta bowls or plates. Grate Parmesan cheese over each bowl and serve.

Cream of Fresh Tomato Soup with Parmesan Toasts, Cape Cod Chopped Salad, and Honey Whole Wheat Pound Cake

It never fails — no sooner do I accept that summer is over and order a delivery of oil for the boiler, get the sweaters out of storage and think about swapping the summer-weight duvets for the winter ones than a spell of sunny, warm weather comes our way. I’m certainly not complaining about getting a break from the relentless rain we’ve had in Ireland for the third summer in a row, but it’s thrown me for a loop in planning out dinners for the week. I had already turned my thoughts to autumn casseroles and stews and Sunday roasts, but now I’m scrambling to make a few last salads and lighter meals while the good weather holds, or even clean off the grill to have one token barbecue this year.

This menu is the best of both worlds, perfect for this in-between time of year. If you’ve already had your fill of fresh tomato salads or pasta sauces and have canned enough to last you through the winter, this soup makes good use of the abundance of fresh tomatoes that are still available at this time of year. Keep it light but still seasonal by serving it with this salad, with its nod towards autumn in the apples and maple syrup. The honey whole wheat pound cake works perfectly to round off this late summer/early autumn dinner, especially if you dress it up with something like a cinnamon or maple ice cream.

It’s National Organic Week in Ireland! Click here for a listing of events throughout the country.

Cream of Fresh Tomato Soup with Parmesan Toasts
adapted from Barefoot Contessa Back to Basics by Ina Garten

Serves 5 to 6

3 tablespoons good olive oil
2 red onions, chopped
2 carrots, chopped
3 cloves garlic, minced
4 lb (1.8 kg) vine-ripened tomatoes, coarsely chopped
1 1/2 teaspoons sugar
1 tablespoon tomato paste
1/4 cup (10 g) packed chopped fresh basil leaves
3 cups (720 ml) chicken or vegetable stock
1 tablespoon kosher salt
2 teaspoons freshly ground black pepper
1/2 cup (120 ml) heavy cream
julienned fresh basil leaves, for garnish
Parmesan toasts, to serve (or croutons)

Heat the olive oil heat in a large, heavy-bottomed pot over a medium-low heat. Add the onions and carrots and sauté for about 10 minutes, until very tender. Add the garlic and cook for 1 minute. Add the tomatoes, sugar, tomato paste, basil, stock, salt, and pepper and stir well. Bring the soup to a boil, lower the heat and simmer, uncovered, for 30 to 40 minutes, until the tomatoes are very tender.

Add the cream to the soup and blend with a hand-held blender until smooth (or transfer to a blender or food processor and blend in batches). Reheat the soup over a low heat just until hot. Serve with julienned basil leaves scattered on top and Parmesan toasts or croutons.

Parmesan Toasts

1 French baguette
good olive oil
salt and freshly ground black pepper
freshly grated Parmesan cheese (grated on a box grater)

Preheat the oven to 400°F (200°C).

Slice the baguette diagonally into 1/4‑inch-thick slices. Make as many slices as you like to serve with the soup.

Place the slices on a sheet pan lined with parchment paper. Brush with olive oil and sprinkle with salt and pepper. Sprinkle a thick layer of grated Parmesan on the toasts and bake for 5 to 10 minutes, until the toasts are lightly browned. Allow to cool to room temperature. The toasts can be made a few hours in advance and crisped for a few minutes in a warm oven.

***

Cape Cod Chopped Salad
adapted from Barefoot Contessa Back to Basics by Ina Garten

Serves 4 as a starter or 2 as a main course with soup

for the salad:
8 oz (225 g) thick-cut bacon
8 oz (225 g) baby arugula (or spinach)
1 large Granny Smith apple, peeled and diced
1/2 cup (50 g) toasted walnut halves, coarsely chopped
1/2 cup (80 g) dried cranberries (or raisins)
6 oz (170 g) blue cheese, such as Roquefort, crumbled

for the dressing:
3 tablespoons apple cider vinegar
1 teaspoon grated orange zest
2 tablespoons freshly squeezed orange juice
2 1/2 teaspoons Dijon mustard
2 tablespoons pure maple syrup
salt and freshly ground black pepper
2/3 cup (160 ml) good-quality olive oil

Preheat the oven to 400°F (200°C).

Place a baking rack on a sheet pan and lay the bacon slices on the rack. Roast the bacon for about 20 minutes, until nicely browned. Allow to cool, then chop into bite-sized pieces.

In a large bowl, toss together the arugula, apple, walnuts, cranberries, and blue cheese. Add the chopped bacon to the salad.

For the dressing, whisk together the vinegar, orange zest and juice, mustard, maple syrup, salt and pepper in a bowl or shake to combine in a screw-top jar. Slowly whisk in the olive oil (or shake to combine in a screw-top jar).

Toss the salad with just enough dressing to moisten. Sprinkle with 1/2 teaspoon salt and toss well. Serve immediately.

***

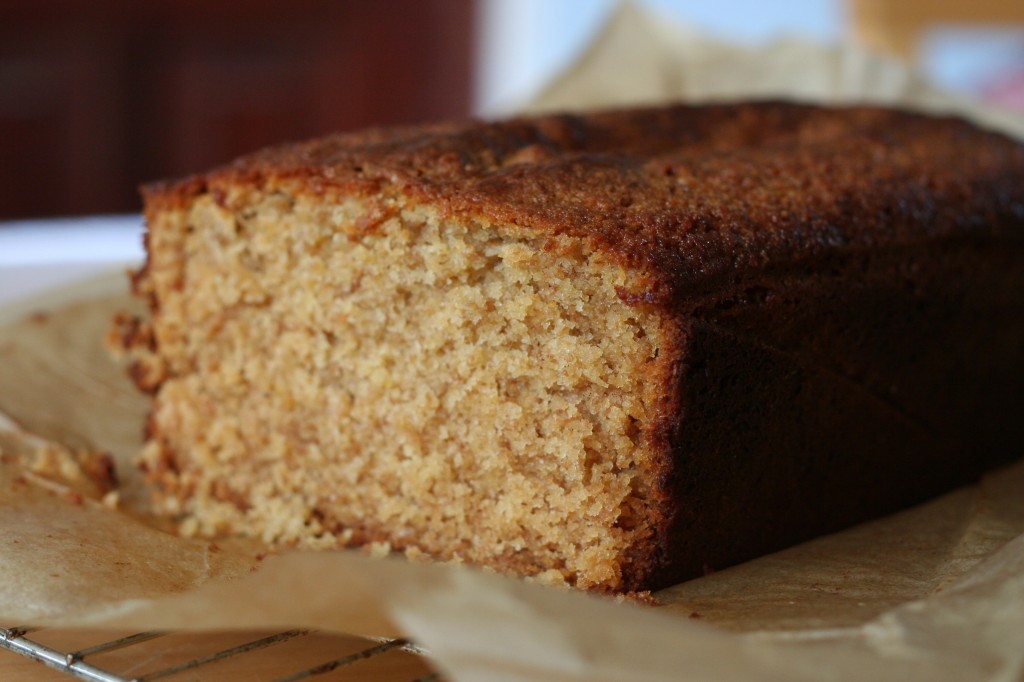
honey whole wheat pound cake

Honey Whole Wheat Pound Cake
adapted from Joy the Baker

Makes 1 loaf cake

The original recipe calls for 2 1/4 cups white whole wheat flour or whole wheat pastry flour. I can’t get either of those in my supermarket, so I used a combination of white and wholemeal flours instead. I had also just been looking at the Barefoot Contessa’s recipe for honey vanilla pound cake, which is similar to this but with lemon zest too, so I added it in here and it worked well.

1 cup (120 g) white flour
1 1/4 cup (200 g) wholemeal flour
2 teaspoons baking powder
3/4 teaspoon salt
1 1/2 sticks (170 g) butter, softened
1 cup (200 g) sugar
1/2 cup (120 ml) honey
2 teaspoons vanilla extract
zest of 1 lemon
3 large eggs
1 cup (240 ml) buttermilk (shake it well first)

Preheat the oven to 350°F (180°C). Butter and flour a 9 x 5‑inch loaf pan.

Sift the flours, baking powder and salt together in a small bowl and set aside.

Cream the butter, sugar and honey together until light and fluffy, about 3 to 4 minutes. Add the vanilla extract and lemon zest. Add the eggs one at a time, beating for about 1 minute after each addition. Scrape down the sides of the bowl as needed.

Add the dry mixture and buttermilk in three additions, beginning and ending with the dry ingredients. Scrape the bottom of the bowl with a spatula to make sure everything is evenly incorporated.

Pour the batter into the prepared loaf pan. Smooth the top and bake the cake for 50 to 60 minutes, until the cake is a lovely golden brown and a tester inserted into the center of the cake comes out clean.

Let the cake cool in the pan for 20 minutes before transferring to a wire rack to cool completely.