Spaghetti alla Genovese and Lemon Blueberry Buckle

How can you resist an article with a title like “Gourmet’s Guide to Cobblers, Crisps, Crumbles, Bettys, Buckles + Pandowdies”, if only to find out what in the world a pandowdy is? (For the record, it’s sliced fruit baked with sugar and spices in a deep dish, with a thick top crust.) It’s just too bad they didn’t include grunts and slumps in the article title to really round things out. The article included a link to a recipe for lemon blueberry buckle, which sounded like something nice to make while there’s still some blueberries left. But “nice” doesn’t do this recipe justice. And don’t let its humble, coffee cake-like appearance fool you either. It wound up being the best thing I baked all summer. It was so good that as soon as I finished my first piece, I went online to see what I could find out about the book the recipe comes from, Rustic Fruit Desserts. Once I had a look at the index on Amazon, I was sold — apple cobbler with cheddar cheese biscuits, cherry almond bars, fig and honey cream galette, pear sauce bundt cake with pear brandy butter … oh my. I might even have bought it just for the brown sugar rum glaze alone. Hurry and make this buckle while you still can with in-season blueberries — then see if you aren’t tempted to buy the book too.
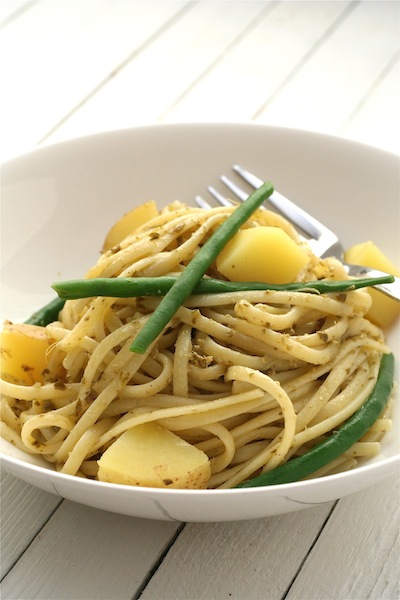
Spaghetti alla Genovese
adapted from Avoca Café Cookbook 2

Serves 4

4 small new potatoes, peeled and cut into thin slices
8 oz (225 g) green beans, ends trimmed
1 lb (450 g) spaghetti (or fettuccine or linguine)
3 or 4 tablespoons pesto (or more, to taste)
salt and freshly ground black pepper
freshly shaved Parmesan, to serve

Blanch the peeled, sliced potatoes in boiling salted water for 5 minutes, or until cooked. Refresh in cold water and set aside.

Cook the trimmed green beans in boiling salted water until tender but still al dente. Drain and set aside.

Cook the pasta in boiling salted water until al dente. Drain, reserving a cupful of the cooking water. Toss the pasta with the potatoes, green beans and pesto. Taste and adjust with more pesto if needed, and thin the sauce with some of the cooking water if you think it needs it. Season to taste with salt and pepper. Serve immediately with thick shavings of Parmesan scattered on top.

***
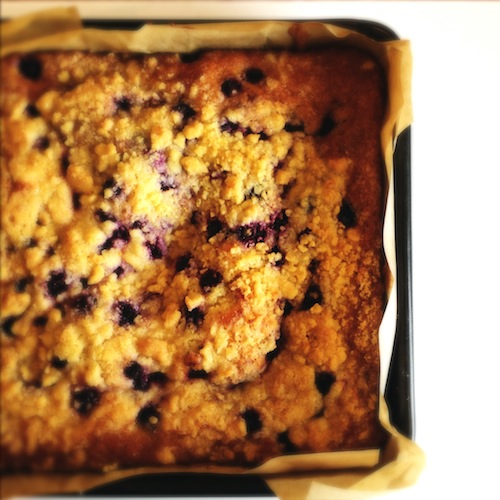
Lemon Blueberry Buckle
from Rustic Fruit Desserts: Crumbles, Buckles, Cobblers, Pandowdies, and More by Cory Schreiber and Julie Richardson

Serves 6 to 8

Covered in cling film, the buckle will keep at room temperature for 2 to 3 days (though in my house it was all eaten up in less than 24 hours).

for the crumb topping:
1/2 cup (60 g) all-purpose flour
1/3 cup (75 g) granulated sugar
1/8 teaspoon fine sea salt
zest of 1 lemon
1/4 cup (60 g) unsalted butter, at room temperature, cubed

for the cake:
1 1/2 cups (180 g) plus 2 tablespoons all-purpose flour
1 teaspoon baking powder
1/4 teaspoon baking soda
1/2 teaspoon fine sea salt
1/4 teaspoon freshly grated nutmeg (or a pinch of dried nutmeg)
6 tablespoons (90 g) unsalted butter, at room temperature
3/4 cup (150 g) granulated sugar
zest of 1 lemon
2 eggs
1/2 cup (120 ml) buttermilk
2 cups (320 g) blueberries, fresh or frozen

for the lemon syrup:
1/3 cup (75 g) granulated sugar
juice of 2 lemons

Preheat the oven to 350°F (180°C). Butter a 9‑inch-square baking pan.

To make the crumb topping, mix the flour, sugar, salt, and lemon zest together in a bowl, then add the butter and use a fork or your fingers to cut in the butter until the size of peas. Place the topping in the freezer until you mix the cake batter.

To make the cake, whisk the flour, baking powder, baking soda, salt, and nutmeg together in a bowl. Using a handheld mixer with beaters or a stand mixer with the paddle attachment, cream the butter, sugar, and lemon zest together on medium-high speed for 3 to 5 minutes, until light and fluffy. Add the eggs one at a time, scraping down the sides of the bowl after each addition. Sir in the flour mixture in 3 additions alternating with the buttermilk in 2 additions, beginning and ending with the dry ingredients and scraping down the sides of the bowl occasionally. Gently fold in half the blueberries, spread the batter into the prepared pan, and distribute the remaining blueberries over the cake.

Sprinkle the chilled crumb topping over the berries, then bake for 45 to 50 minutes, or until lightly golden and firm on top.

To make the glaze, combine the sugar and lemon juice in a small saucepan and whisk until blended. Cook over a medium-low heat, stirring occasionally, for 8 to 10 minutes, until syrupy. The glaze will bubble while cooking, so you may need to remove it from the heat to check that it’s thick enough.

Pour the glaze over the cake as soon as it’s removed from the oven. Reheat the syrup briefly if it has become too thick to pour.

Baked Chicken with Eggplant, Zucchini and Tomato Ragout

Gordon Ramsay is a lot like Marmite — you either love him or you hate him. When I mentioned to a friend last week that I was making some of his recipes, her first response was that she can’t abide the man. I’ll admit that Matt and I did get briefly hooked on Hell’s Kitchen last summer halfway through the series, but in general I’m with my friend — he does seem unnecessarily mean and over the top to me (though I suppose that all makes for good reality TV). I’d have to agree with Tom Doorley when he says “there is more commendable zeal in Jamie [Oliver’s] little finger than in all of Gordon’s much larger frame.” All that being said, when Matt came home one day with a surprise present of the Gordon Ramsay’s Fast Food cookbook, I wasn’t about to turn it down.
Baked Chicken with Eggplant, Zucchini and Tomato Ragout
adapted from Gordon Ramsay’s Fast Food by Gordon Ramsay

Serves 8

Chicken breasts are quickly seared, then baked on top of Mediterranean vegetables for a great one-pot dish. For convenience, you can make the ragout well in advance, but for best results, bake the chicken breasts just before serving.

5 tablespoons olive oil, plus extra to oil the casserole dish
8 large skinless chicken breasts
sea salt and freshly ground black pepper
1 large onion, roughly chopped
4 cloves garlic, chopped
2 medium eggplants, chopped
a handful of thyme sprigs (or 1 teaspoon dried)
a handful of rosemary sprigs (or 1 teaspoon dried)
4 small zucchini, chopped
1 glass of dry white wine
8 plum tomatoes, peeled, deseeded and chopped, or 1 x 14-oz (400‑g) can of chopped tomatoes
pasta, rice or crusty bread, to serve

Preheat the oven to 375°F (190°C). Heat a large heavy-based frying pan and add 3 tablespoons of the olive oil. Season the chicken with salt and pepper.

Sear the chicken breasts in batches: cook skin-side down for 3 to 4 minutes, until golden brown, then turn over and cook the other side for 2 to 3 minutes. Transfer to a plate.

Add the remaining oil to the pan and tip in the onion, garlic, eggplant and a few thyme and rosemary sprigs (or the dried herbs). Cook for 5 to 7 minutes, stirring occasionally, until the onions are soft and translucent and the eggplant are starting to soften. Season generously with salt and pepper.

Add the zucchini, then pour in the wine and simmer until it has reduced by half. In the meantime, put an oiled large roasting pan in the oven to warm up.

Stir the tomatoes through the vegetables, then tip everything into the roasting pan. Place the seared chicken breasts on top and scatter over some more herb sprigs. Bake in the oven for 5 to 10 minutes, depending on the thickness of the chicken, until firm and cooked through.

Rest for 5 minutes before serving on warm plates, either spooned on top of pasta or rice or with crusty bread on the side.

Fusilli with Zucchini, Tomatoes and Bacon and Oatmeal Chocolate Chip Cookies

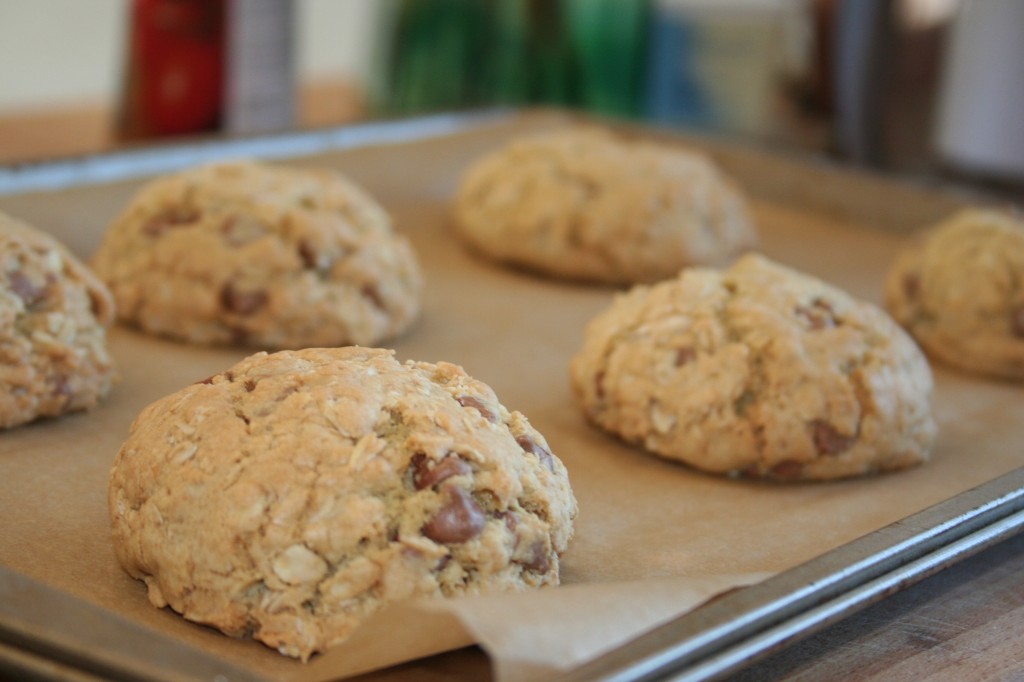
When I would come home from school growing up, the first thing that would greet me as I walked in the door was the smell of something good cooking. My own daughter starts school today, and I couldn’t let the day pass without a homemade treat. What could be better for her first day of school than milk and cookies? And a big, warm, fresh-from-the-oven oatmeal chocolate chip cookie at that. This is my absolute, hands down, all-time favorite cookie recipe. Using a 1/4 cup measuring cup to scoop out the dough is key, though — their generous size is part of what makes them so perfect. I love having one with a cup of tea or coffee, or even for breakfast (it has oatmeal in it, so it’s practically granola, right?), and I make a version of these for Christmas with white chocolate, pecans and dried cranberries too. And now I will love them even more, as I’ll always think of this now as the treat I made on such a special day for my not-so-little girl.

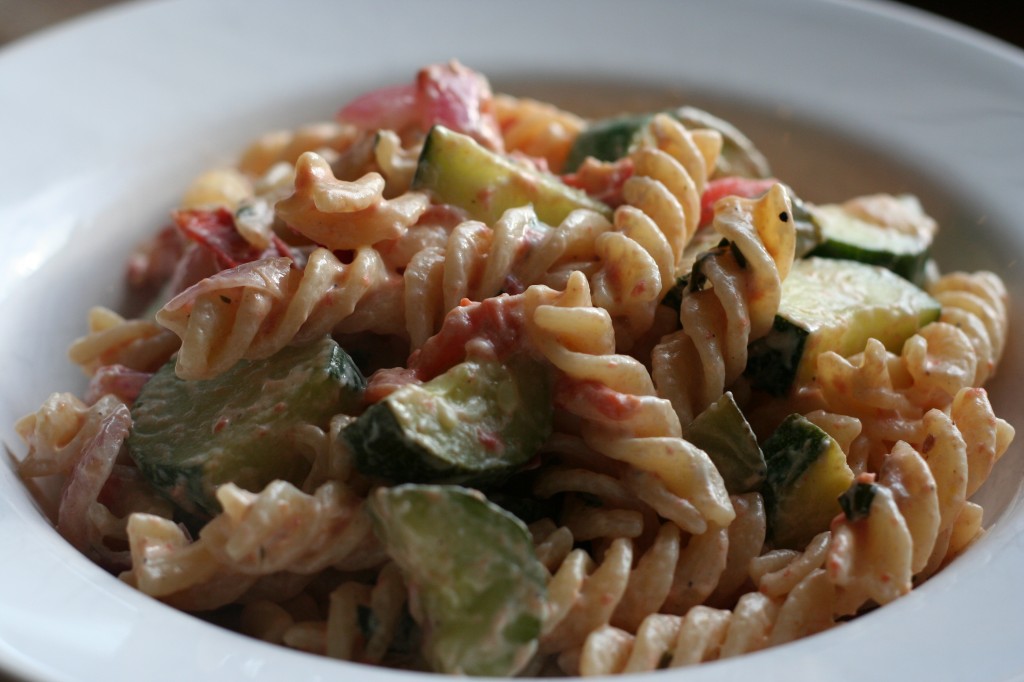
fusilli with zucchini, tomatoes and bacon

Fusilli with Zucchini, Tomatoes and Bacon 
adapted from Bon Appétit, September 2004

Serves 6

12 bacon slices, cut crosswise into 1‑inch pieces
1 large red onion, chopped
1 1/2 cups dry white wine
3 medium zucchini, halved lengthwise and sliced crosswise into 1/2‑inch-wide pieces
1 lb (450 g) fusilli (or gemelli or penne)
6 large ripe tomatoes, deseeded and coarsely chopped
1/2 cup (15 g) chopped fresh basil
1 cup (150 g) crumbled soft fresh goat’s cheese

Put a large pot of salted water on to boil. Cook the bacon in a heavy large skillet over a medium-high heat until brown and crisp. Using a slotted spoon, transfer to paper towels to drain. Pour off all but 1 tablespoon of the drippings from the skillet.

Add the onion and saute until soft, about 3 minutes. Add the wine and boil until it has reduced by one-third, about 3 minutes. Add the zucchini and saute until it’s crisp-tender, stirring occasionally, about 5 to 7 minutes.

Meanwhile, cook the pasta until al dente. Drain.

Add the chopped tomatoes and basil to the zucchini and onions and continue to saute on a medium heat while the pasta cooks, about 10 to 15 minutes.

Add the drained pasta to the zucchini and tomato mixture in the skillet (or if your skillet isn’t big enough to hold everything, put the drained pasta back in the pot you cooked it in and pour the vegetable mixture from the skillet into the larger pot). Toss over a medium-high heat until the sauce coats the pasta, about 3 minutes. Add the goat’s cheese and stir until it starts to melt, about 2 minutes more. Season to taste with salt and pepper and serve.

***

oatmeal chocolate chip cookies

Oatmeal Chocolate Chip Cookies
adapted from Orangette

Makes about 14 cookies

2 cups (240 g) unbleached all-purpose flour
1/2 teaspoon baking soda
1/2 teaspoon salt
3/4 cup (170 g) unsalted butter, melted and slightly cooled
1 cup (170 g) packed brown sugar
1/4 cup (50 g) granulated sugar
1 tablespoon vanilla extract
1 egg
1 egg yolk
1 1/2 cups (300 g) semi-sweet chocolate chips
1 1/2 cups (120 g) quick-cook oats or rolled oats

Preheat the oven to 325°F (160°C). Grease cookie sheets or line them with parchment paper or silicone baking mats.

Sift together the flour, baking soda, and salt and set aside. In a medium bowl, cream together the melted butter and brown and granulated sugars until well blended. Beat in the vanilla, egg, and egg yolk, mixing until light and creamy. Mix in the sifted ingredients, working until just blended. Stir in the chocolate chips and oats by hand, using a wooden spoon. Chill the dough in the refrigerator for 30 minutes to 1 hour. Use a table knife to scoop and press the dough into 1/4‑cup measuring scoops (0r roll 90 g of dough into a ball for one cookie), and plunk the mounds onto the prepared cookie sheets. Cookies should be 3 inches apart.

Bake the cookies for 15 to 20 minutes, or until the edges are lightly browned. Cool on baking sheets for a few minutes before transferring to wire racks to cool completely.

Salmon Marinated in Lemon and Mint with Homemade Cucumber Pickle and Creamy Lemon and Herb Potato Salad

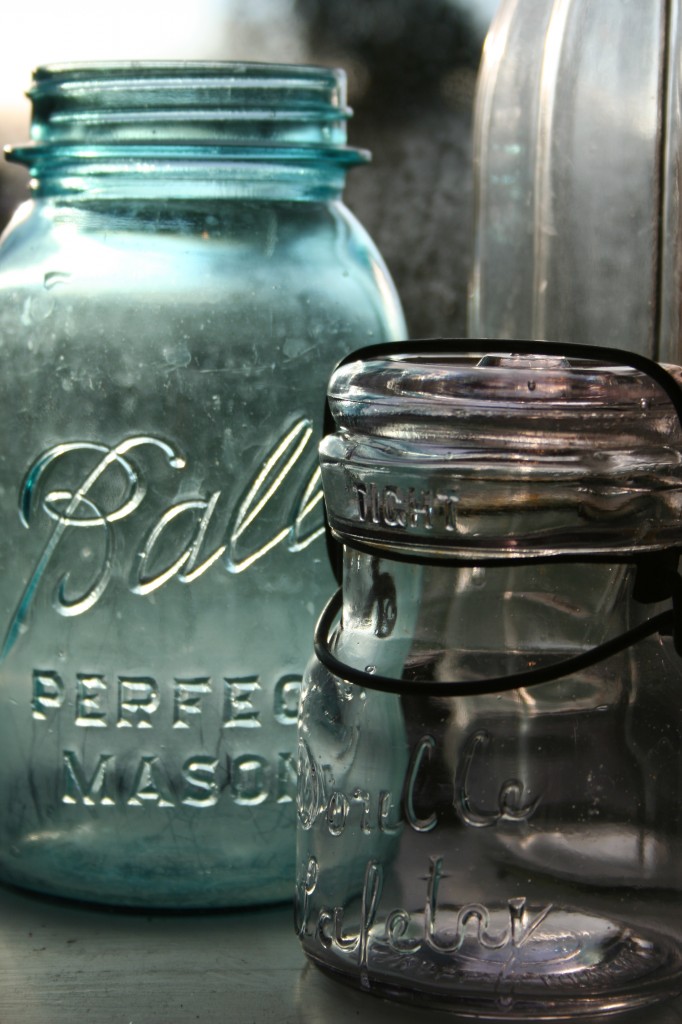
One of my best college memories is the summer I spent canning with my co-op housemate Rich. (What, you mean you didn’t spend your college summers putting up garden produce?) The house had a CSA subscription, our own small backyard garden plus a plot in a community garden, so there was a lot of produce to be had in the summer, even more than the 30 to 40 people who ate at the house every night could use up in a week. So on Sunday nights throughout that summer, armed with a battered copy of Stocking Up and Nina Simone playing on the radio, Rich and I would meet in the kitchen around 8 or 9 at night, when the heat of the day had eased a bit, and get to work, usually not finishing up till around midnight, when we would stand back and admire the finished row of jars cooling on the windowsill. These past few weeks I’ve been reading about the Canvolution in the US and remembering that summer, so when I saw that Clodagh McKenna suggested pairing a cucumber pickle with her salmon recipe, I took the opportunity to make a homemade batch. It’s not canning per se — you don’t need sterilized jars with preserving lids or hot water baths — but it’s a true pickle that will keep for weeks in the fridge. It only takes 10 minutes to make, so if you’ve never preserved food before, this is a quick and easy way to give it a try.
IMG_5398

If you’ve made jam and are giving some away as gifts or just want to dress up your own jars, check out this free download for some stylish labels you can print out.

Salmon Marinated in Lemon and Mint
adapted from Fresh from the Sea by Clodagh McKenna

Serves 4

4 x 7‑oz (200‑g) salmon fillets, skinned and deboned
juice of 2 lemons
4 mint sprigs, leaves roughly chopped
1 red chili, finely chopped (optional)
sea salt and freshly ground black pepper
2 tablespoons olive oil

Place the salmon fillets in a bowl and pour over the lemon juice, chopped mint and chili (if using) and season with salt and pepper. Mix well, cover and place in the fridge for 1 to 3 hours.

Place your griddle pan (or frying pan or barbecue) over a medium heat and add the olive oil. When the oil is hot, remove the salmon from the fridge and place it straight on the griddle. Cook for 3 to 5 minutes on each side.

***

Homemade Cucumber Pickle
from Rachel’s Favourite Food at Home by Rachel Allen

Makes about 4 x 14-oz (400‑g) jars

This is the recipe the famous Ballymaloe Cookery School in County Cork has been using for over 30 years. Make the perfect ploughman’s lunch by serving this with some brown bread, apples and a good mature Cheddar. Otherwise, this is good on burgers and all kinds of sandwiches, cold sliced meats and smoked fish, or barbecued or roasted meat and fish. If you have a food processor, using the slicing attachment will make short work of this recipe.

2 lb (900 g) unpeeled cucumber, thinly sliced (2 to 3 cucumbers)
3 small onions, peeled and thinly sliced (optional)
1 3/4 cups (350 g) sugar
1 tablespoon salt
1 cup (240 ml) cider vinegar or white wine vinegar

Mix the cucumber and onion in a large bowl. Add the sugar, salt and vinegar and mix well to combine. Make at least 1 hour ahead if possible, and store in a jar or bowl in the fridge.

***

Creamy Lemon and Herb Potato Salad 

Serves 6

Instead of potatoes, try using cooked, shredded chicken to make a tasty summertime chicken salad.

2 lb (900 g) new potatoes
zest and juice of 1 large lemon (about 3 tablespoons lemon juice)
1/2 cup (150 ml) mayonnaise or crème fraîche
4 scallions, thinly sliced
2 celery stalks, diced
a handful of fresh parsley, chopped
a handful of fresh basil, chopped
2 tablespoons chopped fresh dill
salt and freshly ground black pepper

Bring the potatoes to boil in a large pot of water. Reduce the heat to medium-low and simmer until the potatoes are tender, about 10 to 15 minutes (check after 10 minutes – you don’t want them to be too soft, as they need to hold their shape in the salad). Drain well and allow to cool slightly.

Cut the potatoes into halves or quarters, depending on how big they are (you want them to be in bite-sized pieces) and put into a large bowl. Whisk the lemon zest and juice with the mayonnaise or crème fraîche. Pour over the potatoes and toss well to coat. Add all the remaining ingredients and gently toss together. Season to taste with salt and pepper.

Drunken Stir-fried Beef with Green Beans, Cucumber Salad, and Chocolate-covered Coconut Macaroons

I subscribed to Cooking Light for years after I graduated college. Looking back, I’m not exactly sure why I continued my subscription. I rarely remade any recipes that I tried with a couple of exceptions, one being this Drunken Stir-fried Beef with Green Beans. I make this dish often, though it’s best in August, when the green beans, tomatoes, and basil are in abundance. Besides being tasty, this dish also reminds me of my son’s first real meal. When he was about 10 months old, after months of trying to get him to eat baby food, I decided to give him a bite of the flank steak in this dish. He devoured it and from then on we stopped trying to convince him to eat baby food and served him whatever we were eating.

Enough about the stir-fried beef. The real highlight of this meal was dessert. I’ve been craving these chocolate-covered coconut macaroons all summer and finally had a chance to make them. “Wow” is all I can say. Truly, truly, a fantastic cookie. And you can freeze them, too, for future decadent nibbles.

Drunken Stir-fried Beef with Green Beans

adapted from Cooking Light

1/2 teaspoon kosher salt
5 garlic cloves, minced
1 minced Serrano chili (or 1 teaspoon sambal)
2 teaspoons grated fresh ginger
zest and juice of 1 lime
1 tablespoon canola or peanut oil
1 lb (450 g)  flank steak, trimmed and cut into 1/4‑inch strips
1 lb (450 g) 1‑inch diagonally cut green beans
1 carton halved cherry tomatoes
1 tablespoon sugar
3 tablespoons Thai fish sauce
1 teaspoon cider vinegar
1 cup Thai basil leaves

Combine the salt and minced garlic in a mortar and pestle, and pound to form a paste. Add the chili, ginger, and lime zest, one at a time, until each ingredient is incorporated into the paste.

To prepare the stir-fry, heat the oil in a wok or large nonstick skillet over a medium-high heat. Add the paste, and stir-fry for 30 seconds (fumes may cause eyes and throat to burn slightly). Add the beef and stir-fry for 2 minutes. Add the beans and stir-fry for 4 to 5 minutes, until the beans are almost tender. Add the tomatoes, sugar, fish sauce, vinegar and lime juice. Stir-fry for 1 minute or until the beef reaches your desired degree of doneness. Stir in the basil. Serve with rice.

***

Simple Cucumber Salad

Serves 4

2 tablespoons soy sauce
2 tablespoons rice wine vinegar
2 teaspoons sesame oil
pinch of sugar
pinch of red pepper flakes
2 cucumbers, peeled and thinly sliced (1/8 inch thick)

Mix the first 5 ingredients until the sugar is dissolved. Toss with the cucumber slices. Chill for up to 2 hours, mixing occasionally.

***

Macaroon II

Chocolate-covered Coconut Macaroons
from Orangette

Makes 12 to 15 cookies

3 cups (250 g) lightly packed sweetened shredded coconut
3/4 cup (150 g) granulated sugar
3/4 cup (150 ml) egg whites (about 5 large)
1 1/2 teaspoon pure vanilla extract
1/4 teaspoon almond extract
8 oz (225 g) bittersweet or semisweet chocolate, finely chopped
3/4 cup (150 ml) heavy cream

Place the coconut, sugar and egg whites in a large, heavy saucepan, and stir to combine well. Cook over a medium-low heat, stirring regularly, for about 10 to 12 minutes, until the mixture is pasty but not dry. (The uncooked mixture will look sort of granular at first, then creamy as it heats, and then it will slowly get drier and drier. You want to stop cooking when it no longer looks creamy but is still quite gluey and sticky, not dry.) Remove from the heat. Mix in the vanilla and almond extracts. Spread out the coconut mixture on a large baking sheet. Refrigerate until cold, about 30 minutes.

Preheat the oven to 300°F (150°C). Line another baking sheet with parchment paper or a Silpat baking mat. Using a ¼‑cup measuring scoop, scoop and pack the coconut mixture into domes, and place them on the baking sheet. You should wind up with about a dozen. Bake the macaroons until golden, about 30 minutes. Transfer to a rack and cool.

Set the cookies on a rack over a rimmed baking sheet. Place the chopped chocolate in a medium bowl. Heat the heavy cream in a small saucepan until it is very hot and steamy (not boiling), remove from the heat, and pour it over the chocolate. Whisk until the mixture is smooth and the chocolate is thoroughly melted. Spoon the glaze over the macaroons, covering them almost completely and allowing the chocolate to drip down the sides. (You will have leftover glaze, which can be refrigerated or frozen.) Refrigerate the macaroons until the glaze sets, at least 2 hours. Transfer the macaroons to an airtight container, and refrigerate or freeze.

Fish en Papillote with Julienned Vegetables and Truffle Oil, Cauliflower Gratin, and Roasted Figs with Yogurt, Honey, and Walnuts

“So what do you do with parchment paper?” My mom asked me this last week after noting how easy the paper made removing carrot cake from its pan. I’m sure there are 1,001 uses for it, but personally, I only use it for lining pans when baking and for cooking fish. Steaming fish in parchment paper packets keeps it moist and locks in all the flavors you add to it. After a few days of thinking nonstop about fish en papillote, I decided to make it. In this version, leeks and truffle oil turn mild (a.k.a. boring) tilapia into an elegant dish.

Reuben’s grandma and mom joined us again for dinner and graciously agreed to be my guinea pigs as I experimented with roasting figs. Until this week, I had never eaten fresh figs. They looked beautiful at the grocery store so I decided to take a chance and buy a carton. I’m glad I did. The slight sourness of the yogurt in my recipe/experiment nicely balanced the sweetness of the figs and honey. As with most of my favorite desserts, the roasted figs dish is great for breakfast.

Fish with vegetables

Fish en Papillote with Julienned Vegetables and Truffle Oil
adapted from Sara Moulton Cooks at Home
by Sara Moulton

Serves 4

1 1/2 tablespoons plus 2 teaspoons unsalted butter
2 carrots, julienned
1 large leek, julienned
1 celery rib, julienned
kosher salt and freshly ground black pepper, to taste
vegetable oil, for brushing (or spray canola oil)
4 x 6‑oz (170‑g) thin fish fillets, no thicker than 1/3 inch each, such as tilapia or flounder, skin removed
4 teaspoons fresh lemon juice
4 teaspoons white truffle oil

Melt 1 1/2 tablespoons of the butter in a large heavy skillet over medium heat. Add the carrot, leek, and celery. Season with salt and pepper. Cook gently, stirring often, until softened, 5 to 7 minutes. Remove from the heat and set aside to cool.

Preheat the oven to 425°F (220°C). Cut out a parchment paper rectangle, about 10 inches by 12 inches. Fold in half, then reopen. Brush the whole rectangle lightly with some oil (or spray lightly with canola oil). Lay a fish fillet on one half of the oiled parchment, skinned side down, and season with salt and pepper. Drain the vegetables of as much liquid as possible and place 1/4 of the mixture on top of the fillet. Drizzle with 1 teaspoon lemon juice. Top the vegetable mound with 1 teaspoon butter and drizzle with 1 teaspoon of the truffle oil. Repeat with the remaining 3 fillets.

To close the parchment packages, fold the other half of the paper over the fillet and, starting with the top, make 1/4‑inch folds all around the perimeters and press to crimp and seal. Close the final crimp with a paper clip. Place the packets on baking sheets (2 packets on each sheet) and bake until puffed and lightly browned, 10 to 12 minutes. Transfer to warmed serving plates and serve at once, preferably while the packets  are still puffed. Serve with rice, mashed potatoes, or french bread to soak up the juices.

***

Cauliflower Gratin

Serves 6

1 large head cauliflower, cut into large florets
2 tablespoons unsalted butter, divided
3 tablespoons all-purpose flour
2 cups (480 ml) milk
1/2 teaspoon freshly ground black pepper
4 oz (110 g) grated cheddar, divided
2 oz (50 g) grated Parmesan

Preheat the oven to 375°F (190°C). Bring a large pot of salty water to boil. Boil the cauliflower florets for about 5 minutes, until just tender. (It’s better to undercook than to overcook the florets.) Drain the florets and pour into a greased casserole dish.

In a saucepan, melt the butter over a medium heat. Whisk the flour with the butter to make a paste. Cook the paste for about 1 minute, until it smells nutty. Take care not to let the paste brown. Slowly whisk in the milk. Bring just to a boil, the reduce the heat and simmer for 2 to 3 minutes, until the sauce thickens. Remove from the heat and stir in half the cheddar cheese.

Pour the cheese sauce over the cauliflower so that all the florets are covered. Sprinkle with the remaining cheddar and the Parmesan. Bake for 30 minutes, until lightly browned and bubbly.

***

Roasted Figs with Yogurt, Honey, and Walnuts

Serves 4

8 black or mission figs
14 oz (400 g) Greek-style yogurt
6 tablespoons honey, divided
4 oz (110 g) chopped walnuts

Preheat the oven to 425°F (220°C). Cut the figs in half lengthwise. Place the figs cut side up in a baking dish. Brush 2 tablespoons of honey over the cut side of the figs. Bake for 12 minutes, until just softened and heated through. Let cool 5 to 10 minutes.

For each serving, lay 4 fig halves on a serving plate. Spoon about 1/2 cup (90 g) yogurt on top of the figs. Drizzle 1 tablespoon of honey over the yogurt and figs. Sprinkle 1 oz (30 g) of walnuts on each serving.

Spicy Peanut Soba with Tofu and Vegetables and Tossed Salad with Sesame Vinaigrette

I am not a vegetarian. I am not a college student. I am not a hippie. I am not Chinese, Japanese, or Korean. I don’t even live in California. Despite this, I am a proud and frequent eater of tofu. If you think you hate tofu, you probably haven’t had it prepared correctly. Tofu itself is bland and, how shall we say, texturally challenged. But if prepared well, tofu can be delicious. And, of course, it’s good for you. Tofu is low in calories, high in protein, and costs less than ground beef at your local supermarket.

The peanut sauce paired with the tofu in this menu is bold, flavorful, and spicy. Try it. I think you’ll like the combination. And if for some reason you can’t bring yourself to eat tofu, feel free to substitute chicken, pork, or shrimp in the recipe.

Spicy Soba II

Spicy Peanut Soba with Tofu and Vegetables

Serves 6

1/4 cup (60 ml) soy sauce
1/2 cup (120 ml) peanut butter
1/2 cup (15 g) chopped cilantro, plus extra for garnish
1 clove garlic, minced
1/4 cup (60 ml) hot water
1 tablespoon sambal (or 2 tablespoons chili oil or 1/2 teaspoon cayenne pepper)
2 teaspoons sherry
2 teaspoons sugar
1 package extra-firm tofu, cut into 1‑inch cubes
1 cup (240 ml) peanut or canola oil
1 x 12-oz (300‑g) buckwheat soba noodles
1 red or orange bell pepper, sliced thin
12 oz (340 g) sliced mushrooms
12 oz (340 g) snow pea pods, trimmed
1 bunch green onions, bias cut, white parts separated from green parts
1/2 lb (225 g) fresh bean sprouts

Combine the first 8 ingredients (through sugar) in a blender. Blend until smooth. The sauce should be about the consistency of ketchup.

Cook the soba noodles according to the package directions. Drain and set aside.

Heat the oil in a wok until it’s smoking. Add half the tofu to the oil, stirring constantly to prevent sticking. Continue frying for 3 to 4 minutes, until the tofu is golden. Remove the tofu with a slotted spoon and drain on a paper towel-covered paper grocery bag. Repeat with the remaining tofu until it’s all cooked and drained.

Remove all but 1 tablespoon of the oil from the wok or large frying pan. On a high heat, stir-fry the bell pepper for 2 minutes. Add the mushrooms and stir-fry for 1 minute. Add the pea pods and white parts of the green onions. Stir-fry for another 2 to 3 minutes, until all the vegetables are tender, but still crisp. Stir in the green onions (green parts) and bean sprouts. Remove the wok from the heat.

Toss the tofu in about 1/2 cup (120 ml) of the peanut sauce. In a large serving bowl, mix the cooked soba noodles, vegetables and half the peanut sauce. Add more sauce as needed to coat all the noodles and vegetables. I usually end up using all but a couple tablespoons of sauce. Garnish with cilantro.

***

Sesame Vinaigrette

Makes about 1/2 cup (120 ml)

1 teaspoon mirin
1 teaspoon soy sauce
2 tablespoons olive oil
1 tablespoon sesame oil
2 tablespoons rice wine vinegar
dash of red pepper flakes

Whisk together all the ingredients until slightly emulsified (or shake to combine in a screw-top jar). Cover and refrigerate if not using immediately.

Barbeque Chicken, Zucchini Rice Gratin, and Grilled Corn on the Cob

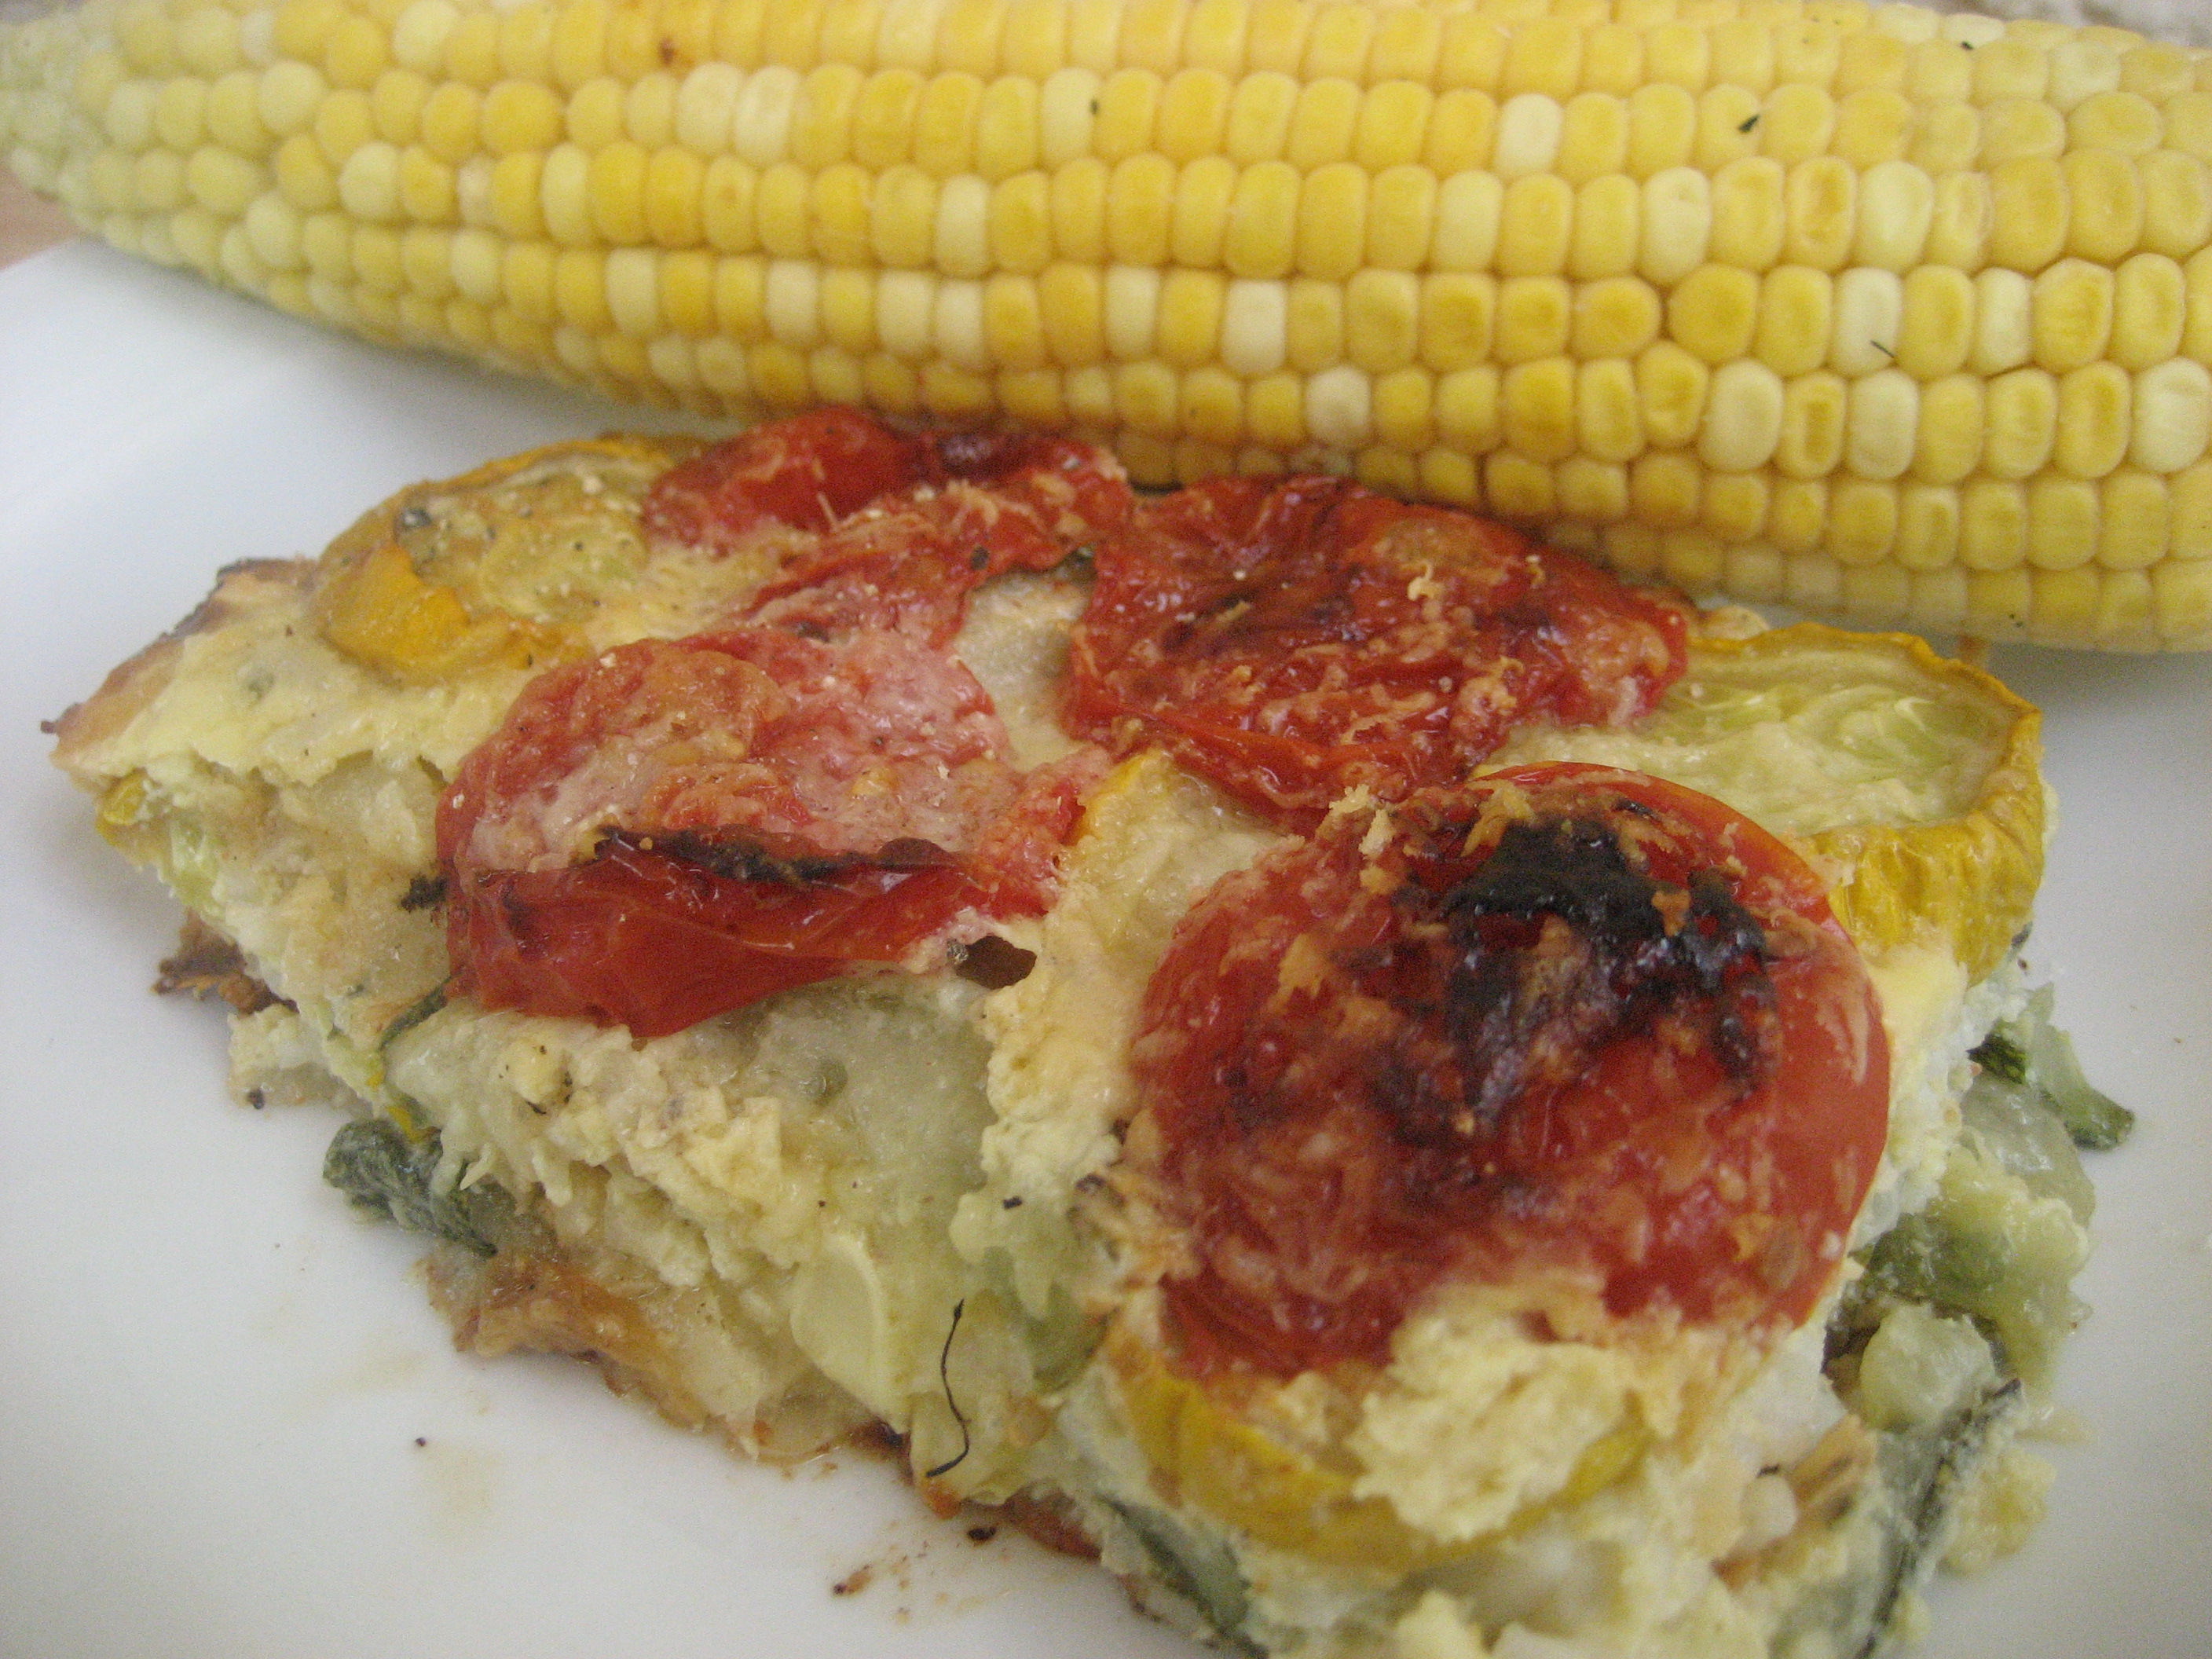
Zucchini bounty in August is a mixed blessing. The zucchini is at peak flavor, but can one really enjoy eating pounds of it week after week? Though tempted to try Kristin’s Chocolate Zucchini Cake from last week, I knew my currently dieting husband would not touch cake. In search of something less sweet, I stumbled across a well-reviewed Zucchini Rice Gratin recipe on Epicurious.com and gave it a try. Let me tell you, the reviewers were not wrong. This casserole-type dish is amazing.

I have not posted a barbeque chicken recipe since everyone seems to have their own favorite method, but I will share three tips for good chicken. One, don’t bother with chicken breasts; they dry out too fast and have minimal flavor. Two, use indirect heat to ensure even cooking without charring. Three, apply sauce only after the chicken has been cooked.

Zucchini Rice Gratin

Zucchini Rice Gratin
from Gourmet, March 2008

Serves 6 (side dish servings)

1/3 cup (60 g) long-grain white rice (or about 3/4 cup cooked rice)
1 1/2 lb (680 g) zucchini (about 3 medium), sliced crosswise 1/4 inch thick
6 1/2 tablespoons olive oil, divided
1/2 lb (225 g) plum tomatoes, sliced crosswise 1/4 inch thick
1 medium onion, halved lengthwise and thinly sliced
3 garlic cloves, finely chopped
2 large eggs, lightly beaten
1 teaspoon chopped thyme
1/2 cup (60 g) grated Parmigiano-Reggiano, divided

Preheat oven to 450°F (230°C) with racks in upper and lower thirds. Cook rice according to package instructions. (Note: I used 3/4 cup cooked, leftover rice.)

While rice cooks, toss the zucchini with 1 tablespoon oil and 1/2 teaspoon salt in a shallow baking pan. Toss the tomatoes with 1/2 tablespoon oil and 1/4 teaspoon salt in another baking pan. Roast the zucchini in the upper third of the oven and the tomatoes in the lower third, turning the vegetables once halfway through roasting, until tender and light golden, about 10 minutes for tomatoes and 20 minutes for zucchini. Leave the oven on.

Meanwhile, cook the onion and garlic with 1/2 teaspoon salt in 2 tablespoons oil in a large heavy skillet, covered, over a low heat, stirring occasionally until very tender, 15 to 20 minutes.

Stir together the onion mixture, cooked rice, eggs, thyme, 1/4 cup (30 g) cheese, 1 tablespoon oil, 1/4 teaspoon salt, and 1/2 teaspoon pepper. Spread half the rice mixture in a shallow 2‑quart baking dish, then top with half the zucchini. Spread the remaining rice mixture over the zucchini, then top with the remaining zucchini. Top with tomatoes and drizzle with the remaining 2 tablespoons oil, then sprinkle with the remaining cheese. Bake in the upper third of the oven until set and golden brown, about 20 minutes.

***

Grilled Corn on the Cob

Grilling corn is a great way to bring out its natural sweetness and to avoid heating up your kitchen on a hot day. To prepare, soak ears of corn (as fresh as possible) in a sink of cold water for 20 to 30 minutes. Drain. Cook ears on the grill over a medium heat for 10 to 15 minutes, or until tender, turning once or twice while cooking. Remove husks from corn. Serve with salt, pepper, and butter.

A Cooking Blog