Penne with Chorizo and Spinach and Dulce de Leche Brownies

I’ve been reading recipes for all manner of heavenly-sounding things made with dulce de leche for awhile now, but no matter how much I wanted to try it, I wasn’t about to make my own by boiling an unopened can of condensed milk and risk having it explode; my house had enough problems this summer without adding replastering my kitchen ceiling to the bill. But when I came across David Lebovitz’s version, which is simply (and safely!) baked in the oven for an hour, I gave it a go, and like David Lebovitz, I had to stop myself from eating it all to make the brownies.

I cut the brownies into two dozen bite-sized portions so that I could bring half of them over to a friend and so that Matt could take some more into work to share. I’ve spent the past three weekends in a row entertaining visitors, and all that wine and baking and richer-than-usual cooking means I’ve got a few pounds to lose now, so the last thing I needed was these brownies hanging around the house, because they would be impossible to stay away from. Even the jar of dulce de leche on its own was pretty irresistible. Now that I know how easy it is to make it myself, I can finally try out all those other recipes I’ve had my eye on.
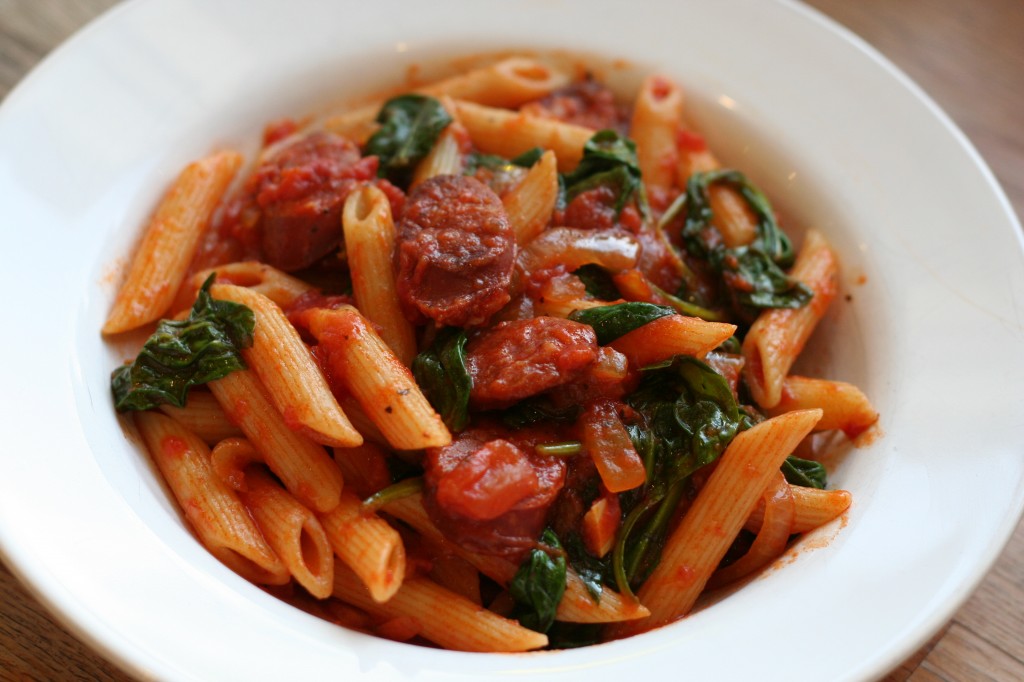
penne with chorizo and spinach

Penne with Chorizo and Spinach
adapted from Neven’s Real Food for Families by Neven Maguire

Serves 6

1 lb (450 g) chorizo sausage, cut into 1‑inch pieces on the diagonal
2 onions, thinly sliced
3 cloves garlic , crushed
1 red chili, deseeded and finely chopped, or a pinch of red pepper flakes (optional)
2 tablespoons shredded fresh basil
2 x 14-oz (400‑g) cans chopped tomatoes
1 teaspoon sugar
salt and freshly ground black pepper
1 lb (450 g) penne
8 oz (200 g) baby spinach

freshly grated Parmesan, to serve

Heat a frying pan and tip in the chorizo sausage pieces, then cook for 2 minutes, tossing the pan occasionally to ensure they cook evenly. Add the onions and garlic, then cook for another 5 minutes until the onions are golden, stirring occasionally.

Stir the chili (if using) into the chorizo and onion mixture with the basil and cook for 1 minute. Pour in the tomatoes, add the sugar and season to taste. Bring to the boil, then reduce the heat and simmer for 30 minutes, until slightly reduced and thickened, stirring occasionally.

Meanwhile, cook the pasta in a large pot of boiling salted water for about 10 minutes, or according to the packet instructions, until al dente. Drain well and return to the pot. Stir in the chorizo sauce along with the spinach and mix well to combine — the heat of the pasta and sauce should cook the spinach instantly.

To serve, divide the chorizo and spinach pasta among warmed bowls and scatter over the freshly grated Parmesan.

***

Dulce de Leche Brownies
adapted from David Lebovitz

Makes 12 large brownies or 24 bite-sized ones

1 x 14-oz (400‑g) can of sweetened condensed milk (I used Carnation brand)
sea salt
8 tablespoons (110 g) unsalted butter
6 oz (170 g) bittersweet or semisweet chocolate, finely chopped
1/4 cup (30 g) unsweetened Dutch-process cocoa powder
3 large eggs
1 cup (200 g) sugar
1 teaspoon vanilla extract
1 cup (120 g) flour
1 cup (240 ml) dulce de leche, either homemade or store bought

To make the dulce de leche, preheat the oven to 425° F (220° C).

Pour the can of sweetened condensed milk (not evaporated milk) into a glass pie plate or shallow baking dish. Stir in a few grains of sea salt. Set the pie plate within a larger pan, such as a roasting pan, and pour in hot water until it reaches halfway up the side of the pie plate. Cover the pie plate snugly with aluminum foil and bake for 1 to 1 1/4 hours. (Check on the pie plate a few times during the cooking time and add more water to the roasting pan if too much has evaporated.)

Once the dulce de leche is browned and caramelized, remove it from the oven and allow it to cool. Once cool, whisk until smooth. Store it in the refrigerator until ready to serve. Warm gently in a warm water bath or microwave before using.

To make the brownies, preheat the oven to 350°F (175°C).

Line an 8‑inch square pan with a long sheet of aluminum foil that covers the bottom and reaches up the sides. If it doesn’t reach all the way up and over all four sides, cross another sheet of foil over it, making a large cross with edges that overhang the sides. Grease the bottom and sides of the foil with a bit of butter or nonstick spray.

Melt the butter in a medium saucepan. Add the chocolate pieces and stir constantly over a very low heat until the chocolate is melted. Remove from the heat and whisk in the cocoa powder until smooth. Add in the eggs one at a time, then stir in the sugar, vanilla and then the flour.

Scrape half the batter into the prepared pan. Next, drop one-third of the dulce de leche, evenly spaced, over the brownie batter, then drag a knife through it to swirl it slightly. Spread the remaining brownie batter over, then drop spoonfuls of the remaining dulce de leche in dollops over the top of the brownie batter. Use a knife to swirl the dulce de leche very slightly.

Bake for 35 to 45 minutes. The brownies are done when the center feels slightly firm. Remove from the oven and allow the brownies to cool completely. These brownies actually become better the second day, and will keep well for up to 3 days.
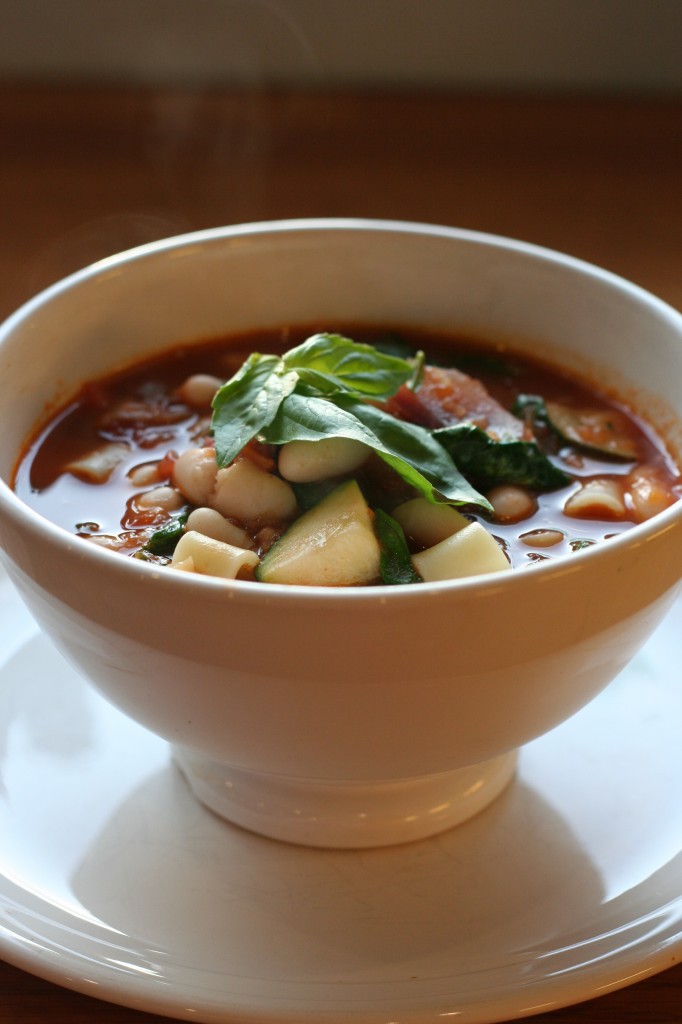
Early Autumn Minestrone and Tarte Tatin

Last week, an old friend came to visit from London for a long weekend with his wife and baby daughter. As we were all eating dinner one night, he told us that he’d recently made such a big pot of soup that not only did they eat it for lunch and dinner for four days straight, but when he put it in the refrigerator, the pot was so heavy it cracked the shelf. We all laughed about it, even my friend, but the next day I asked him why he didn’t freeze some of the soup instead of eating the same thing for the better part of a week. “I’ve been really busy lately and it means dinner is one less thing I have to worry about,” he said, and I couldn’t fault him there. A big pot of soup does make for effortless leftovers — though maybe not such a big pot that it makes four days’ worth. Still, you could do worse than to eat this soup for a few days running, seeing as how it’s packed full of veggies, beans, some greens and carbs, with a glass of red wine to elevate it into something a little more sophisticated than your usual minestrone. So Adrian, this recipe is for you — the next time you need something to see you through a busy patch, try this soup (though try not to make so much it breaks the fridge shelf again).

early autumn minestrone

Early Autumn Minestrone
adapted from Jamie’s Italy by Jamie Oliver

Serves 4 to 6

To make this suitable for vegetarians, just leave out the bacon and use vegetable stock.

olive oil
4 slices of smoked pancetta or bacon
2 small red onions, finely chopped
2 carrots, chopped
2 sticks of celery, chopped
1/2 head of fennel, chopped
3 cloves garlic, finely chopped
a small bunch of fresh basil, finely sliced (set aside some to garnish at the end)
2 x 14-oz (400‑g) cans of good-quality whole plum tomatoes
a glass of red wine
2 small zucchini, quartered and sliced
7 oz (200 g) chard or spinach, washed and roughly sliced (including stalks)
1 1/4 pints (600 ml) good-quality chicken, ham or vegetable stock
1 x 14-oz (400‑g) can of cannellini or borlotti beans
2 handfuls (2 oz/60 g) elbow macaroni, or other small pasta shape
sea salt and freshly ground black pepper
freshly grated Parmesan cheese, to serve
crusty bread, to serve

Heat a good splash of olive oil in a saucepan and add the chopped pancetta or bacon, onions, carrots, celery, fennel, garlic and basil. Sweat very slowly on a low heat, with the lid just ajar, for around 15 to 20 minutes, until soft but not brown. Add the tomatoes, zucchini and red wine and simmer gently for 15 minutes, breaking up the whole tomatoes with the back of a spoon.

Now add the chard or spinach, stock, beans and pasta. Stir and continue to simmer until the pasta is cooked, about 15 minutes.

If you think the soup is looking too thick, add a little more stock or water to thin it down a bit. Season to taste with salt and pepper. Serve sprinkled with the reserved basil and freshly grated Parmesan cheese and some good crusty bread on the side.

***

Tarte Tatin
adapted from Gourmet, March 2001

Serves 8

You can also make a Tarte Tatin with 4 pears, peeled, cored and halved. The tart can cool in the skillet for up to 30 minutes. It can also stand, uncovered, for up to 5 hours, then be heated over a moderately low heat for 1 to 2 minutes to loosen the caramel. Shake the skillet gently to loosen the tart before inverting. If you need to let the tart stand for any length of time before serving it, leave it in the skillet and don’t invert it, otherwise the caramel will make the puff pastry base turn soggy.

1 frozen puff pastry sheet
1/4 cup (60 g) unsalted butter, softened
1/2 cup (100 g) sugar
7 to 9 Gala apples (3 to 4 lb/1.4 to 1.8 kg), peeled, quartered lengthwise and cored (or use any firm dessert apple, such as Golden Delicious)
whipped cream, crème fraîche or vanilla ice cream, to serve

Note: You will need a well-seasoned 10-inch cast-iron skillet or an ovensafe 10-inch skillet

Preheat the oven to 425°F (220°C).

Roll the puff pastry sheet into a 10 1/2‑inch square on a floured work surface with a floured rolling pin. Brush off the excess flour and cut out a 10-inch round with a sharp knife, using a plate as a guide. Transfer the round to a baking sheet and chill.

Spread the butter thickly on the bottom and side of the skillet and sprinkle the sugar evenly over the bottom. Arrange as many apples as will fit vertically on the sugar, packing them tightly in concentric circles. The apples will stick up above the rim of the skillet.

Cook the apples over a moderately high heat, undisturbed, until the juices are deep golden and bubbling, which will take about 18 to 25 minutes. (Don’t worry if the juices color unevenly.) It’s important not to stir the caramel while it’s cooking, otherwise it might crystallize.

Lay the pastry round over the apples and tuck it in around the edges. Put the skillet in the middle of the oven over a piece of foil to catch any drips. Bake for 20 to 30 minutes, until the pastry is browned. Transfer the skillet to a rack and cool for at least 10 minutes. Be careful when handling the skillet from here on out — don’t forget that the handle will be very hot!

Just before serving, invert a platter with a lip over the skillet and, using potholders to hold the skillet and plate tightly together, invert the tart onto the platter. Replace any apples that stick to skillet. (Don’t worry if there are black spots; they won’t affect the flavor of the tart.) Brush any excess caramel from the skillet over the apples. Serve immediately with whipped cream, crème fraîche or vanilla ice cream.

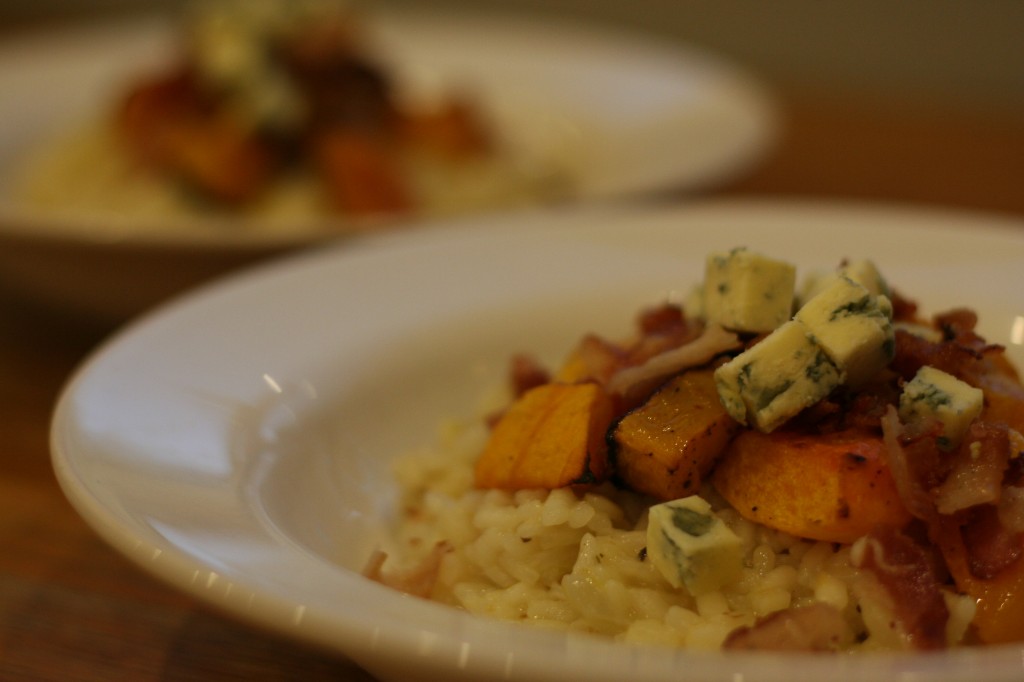
Risotto with Roasted Butternut Squash, Bacon and Blue Cheese

Risotto has an undeserved reputation for being hard work. It’s true that you do have to hang around in the kitchen to add stock and stir every five minutes or so, but it doesn’t need constant stirring and attention the way, say, polenta does, so it’s not as if you’re chained to the stove. Just put on a good CD while you cook. It took me a few tries to find a risotto recipe I liked as much as what I used to have in restaurants, and for me, the wine or vermouth (I always use vermouth) is the key ingredient — without it, I always think the dish is missing something. I always have a bottle of extra-dry Martini in the house, not only because I like to use it in place of white wine in most recipes, but mainly because I make risotto so often.

In the September 25 entry of The Kitchen Diaries*, Nigel Slater says of risotto, “I insist this warming, gooey rice dish has a season, just as porridge does,” and I agree (though I make a lemon risotto in the early Irish summer, when the days are still cool). It’s one of my go-to recipes for the colder months, plus both my kids love it — and why wouldn’t they? It’s total comfort food — creamy and savory — open to endless variations, and easy for my 17-month-old to scoop up with a spoon to feed himself. This is Matt’s favorite version, and it’s just right for autumn. You can expect plenty more risotto recipes from me in the coming months, now that the season for it is well and truly upon us.
*Amazon.com is selling The Kitchen Diaries in hardcover at a bargain price for only $16 (list price is $40). This cookbook is one of my favorites, so you might want to snap it up at this price.

risotto with roasted butternut squash, bacon and blue cheese

Risotto with Roasted Butternut Squash, Bacon and Blue Cheese

Serves 4

If you want to make a vegetarian version of this, just omit the bacon, and perhaps add some chopped toasted pecans when serving (much like this squash side dish).

1 large butternut squash
olive oil
4 tablespoons (60 g) unsalted butter
3 shallots or 1 small onion, very finely chopped
2 sticks of celery, very finely chopped
1/2 teaspoon dried sage
1 1/2 cups (300 g) risotto rice (Arborio rice)
1 cup (240 ml) dry white wine or extra-dry Martini
2 pints (1 liter) good-quality vegetable or chicken stock
6 slices of bacon or pancetta
1/2 cup (50 g) grated Parmesan cheese
1/3 cup (about 1 1/2 oz/40 g) blue cheese, crumbled
salt and freshly ground black pepper

Preheat the oven to 400°F (200°C).

Peel and halve the squash and scoop out the seeds. Cut the squash into 1‑inch cubes (you don’t need to be precise, just keep the pieces uniformly small). Place the squash in a roasting tin or casserole dish and drizzle with olive oil. Roast for 30 to 45 minutes, or until tender. Set aside and keep warm.

Heat the butter, shallots, celery and sage in a wide, deep saucepan and cook to soften, about 5 minutes. Mix in the rice, stirring to give it a good coating of the butter. Allow it to cook for a minute or two, until the grains of rice start to turn translucent. Add the white wine or Martini and let it bubble away for a few minutes. Meanwhile, heat the stock in another saucepan and keep it at simmering point.

Once all the wine or Martini has been absorbed into the rice, pour a ladleful of the stock into the rice and keep stirring until the stock is absorbed. Then add another ladleful and stir again. Continue doing this until the rice is al dente. You may not need all the stock; equally, you may need to add a bit more hot water. Don’t rush this process — allow the rice to fully absorb each ladleful of stock before adding the next one.

While the risotto is cooking, heat a separate frying pan and cook the bacon or pancetta until crisp. Drain on paper towels, then chop into bite-sized pieces. Set aside.

When you’ve added almost all the stock, test the rice — the risotto is ready when the rice is tender but still has a little bite. When the risotto is done, mix in the grated Parmesan. Divide between 4 serving bowls or plates and top with the roasted squash, bacon and blue cheese. Serve with more grated Parmesan if you wish, add seasoning to taste and serve immediately.

Mapo Dofu and Angel Food Cake with Chocolate Whipped Cream Frosting

Iron Chef may be one of television’s finest creations. And lest you think I’m recommending Food Network’s knockoff show Iron Chef America, I’m not. I’m referring to the original Japanese Iron Chef with dubbed in voices, wacky commentary, and often grotesque dishes (which more often than not involve some poor animal’s liver or reproductive parts). I first saw Iron Chef in the 90s on my first trip to New York. I still remember randomly stumbling across the competitive cooking show while staying up late watching cable. Reuben and I were instantly addicted. Unfortunately, being poor college kids at the time, we didn’t get cable or access to Iron Chef until several years later. Now, we are the proud owners of a nearly complete set of dubbed Iron Chef episodes and a limited edition Iron Chef board game (how geeky!). Though Iron Chef is great entertainment, I wouldn’t want to eat everything that’s prepared on the show, such as cod roe ice cream. On the other hand, there are a few dishes that look too good not to try out, one of them being Iron Chef Chinese Chen Kenichi’s Mapo Dofu. Though Chen cooks this tofu dish regularly in competition, I’ve only seen it on the menu of a handful of Chinese restaurants. I made the mistake of ordering it once in Salt Lake City — not the best place for authentic Chinese. After eating that blander-than-bland version, I figured I couldn’t do much worse at home. Reuben did some research and came up with a fantastic recipe. I’m not sure how close it is to the Iron Chef’s dish, but we love it.

If you haven’t had homemade angel food cake, you’re really missing out. The Styrofoam-like store-bought versions can’t hold a candle to a fresh-baked angel food cake. Tonight’s cake was leftover from my father-in-law’s birthday party. I made two cakes for the party, one with chocolate whipped cream frosting and the other with a lemon glaze. Though both were good, the chocolate version looked prettier. Of course I forgot to take a picture, but you’ll have to take my word for it.

Mapo Tofu

Quick and Easy Mapo Dofu
adapted from About.com

Serves 4

1/2 lb (225 g) ground pork
1 tablespoon soy sauce
pinch of cornstarch
1 package firm tofu, drained
4 green onions
1 clove garlic
2 tablespoons oil, for stir-frying
1/4 teaspoon sambal or chili paste with garlic
2 tablespoons black bean sauce
2 tablespoons water
1 teaspoon Szechuan peppercorn or ground coriander
rice, to serve

Marinate the ground pork in the soy sauce and cornstarch for 15 to 20 minutes. While pork is marinating, cut the tofu into 1/2‑inch cubes, cut the green onions on the diagonal into 1‑inch pieces, and peel and mince the garlic.

Heat a wok or large skillet over a high heat and add the oil. When the oil is hot, add the chili paste and garlic. Stir-fry until aromatic, about 30 seconds. Add the ground pork and stir-fry until the pork is nearly cooked through.

Lower the heat to medium and add the black bean sauce, tofu and green onions. Cook, stirring frequently, until the tofu is browned (8 to 10 minutes). Add water as needed. Just before serving, sprinkle with the Szechuan peppercorn or ground coriander. Serve over rice.

***

Angel Food Supreme Cake
adapted from Betty Crocker’s Cookbook/40th Anniversary Edition

Serves 10

3/4 cup (150 g) sugar
1 cup (115 g) cake flour
1 1/2 cups egg whites (about 11 eggs’ worth)
1 1/2 teaspoons cream of tartar
3/4 cup (150 g) granulated sugar
1 teaspoons vanilla
1/2 teaspoon almond extract
1/4 teaspoon salt

Preheat the oven to 375°F (190°C). Whisk together 3/4 cup sugar and flour; set aside.

Beat the egg whites and cream of tartar in large bowl with an electric mixer on medium speed until foamy. Beat in the granulated sugar 2 tablespoons at a time on high speed, until the meringue holds stiff peaks. Fold in the vanilla, almond extract and salt. Sprinkle the sugar-flour mixture, 1/4 cup at a time, over the egg white mixture, folding in until the sugar-flour mixture disappears. Push the batter into a 10-inch ungreased angel food cake pan (tube pan). Cut gently through the batter with a butter knife to remove any air bubbles.

Bake for 30 to 35 minutes, or until the top is golden and springs back when touched lightly. Invert the pan onto a heatproof funnel or wine bottle. Let it hang until the cake is completely cool. Loosen the side of the cake with a knife and remove from the pan. Cut with a serrated knife to serve.

***

Chocolate Whipped Cream Frosting
from Bon Appétit, October 1991

1 cup (120 g) powdered sugar
1/2 cup (60 g) unsweetened cocoa powder
1/4 cup (60 ml) milk
pinch of cream of tartar
2 cups (480 ml) chilled whipping cream

Whisk the powdered sugar, cocoa powder, milk and cream of tartar in a large bowl until smooth. Cover and refrigerate until well chilled, about 1 hour. (Can be prepared 4 hours ahead.)

Using an electric mixer, gradually beat the cream into the chocolate mixture. Continue beating until stiff peaks form. Place the cake on a platter. Spread the top and sides of cake with icing. Slice into wedges and serve.

Braised Spareribs with Fennel, Mashed Potatoes, and Curried Split Pea Soup

After a 10-minute dig into my deep freezer, I sadly realized we had eaten the last of our Tamworth ham from Farmer Nick’s. Though momentarily disappointed that I couldn’t make the scalloped potatoes and ham I’d been craving, I was thrilled to spot a rack of spareribs hiding beneath the frost. I usually bake spareribs and sauerkraut together for an easy, hearty meal, but I’d already made cabbage once that week and, frankly, didn’t relish the idea of another cabbage-based dinner. Instead, I settled on a braised spareribs recipe. But “settled” isn’t the appropriate word for this dish. “Spectacular” is more accurate. I know I rave about recipes more often than not, but this really is a fantastic preparation, really. The meat falls off the bone and the sauce is perhaps the most savory thing I’ve tasted all year. The only leftovers from the meal were a small bowl of mashed potatoes and a few tablespoons of the sauce. I mixed the two together the next day for lunch, which made for some damn good fried mashed potato patties.

Like the spareribs recipe, the soup recipe is also new to me, sent by my friend Allison. I loved it as a starter for dinner but enjoyed it even more the next day for lunch after the curry flavor developed. Not only was this a tasty soup, but it gave me an excuse to finally buy a stick blender (very fun item, by the way). Thanks for sharing, Allison! Which reminds me — if anyone has recipes they would like us to try out, please send them our way.

Braised Spareribs with Fennel
adapted from Anne Burrell at Food Network

Serves 4

1 rack spareribs, cut into ribs
2 tablespoons olive oil
kosher salt
1 large onion, cut into large dice
1 large fennel bulb, fronds removed, cut into large dice
6 garlic cloves
1 1/2 cups (360 ml) dry white wine
2 bay leaves
1 bundle thyme
pinch crushed red pepper
2 1/2 cups (600 ml) chicken broth

Preheat the oven to 400°F (200°C).

Coat a Dutch oven with olive oil and bring to a high heat. Season the ribs with salt and brown in the hot oil. Brown ribs on both sides. Remove ribs from the pan.

While the ribs are browning, puree the onion, fennel and garlic in the food processor to a coarse paste. After the ribs are browned and removed from pan, add the pureed vegetables and saute for 5 to 6 minutes, until golden.

Return the ribs to the pan and add the white wine, bay leaves, thyme and crushed red pepper flakes. Cook over a medium-high heat for 8 to 10 minutes, until the wine is reduced to about 1 cup (240 ml). Add the chicken broth, cover and place in the preheated oven. Cook the ribs for 2 hours or until they are very soft and almost falling off the bone. Check the ribs periodically to make sure the liquid hasn’t reduced too much. Serve the ribs and sauce over mashed potatoes.

***

Curried Split Pea Soup
adapted from Alton Brown at Food Network

Serves 8

2 tablespoons unsalted butter
1 onion, chopped
kosher salt and freshly ground black pepper
1 tablespoon minced fresh garlic
5 or 6 carrots, chopped
5 or 6 stalks of celery, chopped
1 lb (450 g) dried green or yellow split peas, picked over and rinsed
8 cups (1.9 liters) chicken broth (reserve 1 cup (240 ml) to thin out soup if it’s too thick)
1 tablespoon curry powder

Place the butter into a large saucepan or stock pot over medium-low heat. Once melted, add the onion and a generous pinch of salt and sweat for 2 to 3 minutes. Add the garlic and continue to sweat for an additional 1 to 2 minutes, making certain not to allow the onions or garlic to brown.

Add the peas, carrots, celery, 7 cups (1.7 liters) of chicken broth and curry powder. Increase the heat to high and bring to a boil. Reduce the heat to low, cover and cook at a simmer until the vegetables are very tender, approximately 45 to 50 minutes. Taste and adjust seasoning as needed. Using a stick blender, puree the soup until the desired consistency. If the soup is too thick, add some of the remaining chicken broth.

“Spaghetti” and Meatballs with Roasted Beets

Remember the Atkins craze? Eating bacon for dessert? The sudden and sad trend of lettuce wraps instead of burritos? I think this squash recipe may have been a part of that scene, which luckily seems to be coming to an end. I love my carbs and I’m not giving them up anytime soon, but it never hurts to cut back when you can. While the spaghetti squash in this recipe isn’t going to fool you into thinking you’re eating pasta,  I was able to get away with sending it to daycare as the starch in my son’s lunch — without any note home reminding me to send a balanced diet, including grains. Simply put, it’s a delicious vegetable dish with just a bit of pork to turn it into a main dish. And like most of my other recipes this week, it’s a nice way to use up your garden tomatoes, if you have any left.

“Spaghetti” and Meatballs
from Juan-Carlos Cruz at Food Network

Serves 6

1 large spaghetti squash
1/2 lb (225 g) spicy Italian turkey sausage links
2 tablespoons olive oil
3 cups (about 850 g) diced plum tomatoes
1/4 cup (100 g) Kalamata olives, pitted and chopped
1 tablespoon capers, drained
3 cloves garlic, crushed
1/2 cup (15 g) fresh basil leaves, sliced
1/3 cup (30 g) grated Parmesan cheese

Preheat the oven to 350°F (180°C).

Slice the spaghetti squash in half and place cut side down a baking sheet. Bake for 30 minutes or until tender when pierced with a knife.

Meanwhile, remove the sausage from its casings and form small meatballs about the size of a quarter. Heat a heavy nonstick pan over a medium-high heat and add the olive oil. When the oil is hot, add the meatballs and cook until browned on all sides. Add the tomatoes, olives, capers, and garlic and simmer for 15 minutes. In the last minute of cooking, add the basil.

While the sauce is simmering, scrape out the inside of the squash with a fork into a large bowl; set aside.

Toss the sauce and squash together and top with Parmesan. Serve immediately.

***

Roasted Beets

Serves 4

1 bunch beets, washed and trimmed
olive oil
salt and freshly ground black pepper, to taste

Preheat the oven to 415°F (210°C). Coat the washed and trimmed beets lightly with oil. Wrap the beets in aluminum foil, place on a baking sheet, and roast in the oven for about 1 hour, until cooked through. (I usually put 2 beets on each piece of foil.) Remove from the oven, let cool for 10 minutes, then peel and slice into 1/4‑inch-thick slices. Season to taste with salt and pepper. Butter or goat cheese are also good on top.

Shrimp Won Tons in Soup and Roasted Asparagus

I’ve probably mentioned that my son loves Asian food before, but I don’t think I mentioned how glad I am of this fact. Asian food, whether Japanese soba, Chinese stir-fry or Thai satay, is quick to prepare and relatively light. Sure beats serving mac and cheese and chicken nuggets. I also love salty sweet tastes, which are easy to find in Asian cuisines.

Though won tons aren’t exactly quick to throw together, using store-bought won ton skins and broth helps reduce the prep time. This was my first time making won tons; my husband usually takes care of it. I’ve included more pictures than usual not because they’re good pictures (they’re actually not good at all), but because I found the picture in the cookbook very helpful. I don’t want to break any copyright laws, so you’re all stuck with my amateur “how to” pictures. Kelly’s birthday wish list: better digital camera with a decent flash.

Shrimp Wontons

Shrimp Won Tons in Soup
adapted from Chinese Snacks Wei-Chuan Cooking Book by Huang Su Huei

Serves 3

for the filling:
10 medium raw, shelled shrimp (about 1/3 lb/170 g)
1/2 teaspoon rice wine
1/2 teaspoon salt
1/2 teaspoon cornstarch
1/4 cup minced bamboo shoots
1 teaspoon minced ginger
30 won ton skins

for the soup:
6 cups (1.4 liters) broth
1 teaspoon rice wine
1 1/2 teaspoon salt
1 tablespoon shredded ginger
6 oz (170 g) spinach or other green vegetable

Garnishes: black pepper, sesame oil, soy sauce, chopped green onion, mustard powder or Chinese mustard

Rinse and devein the shrimp. Drain them and cut each into 3 pieces, then mix thoroughly with the remaining filling ingredients.

Step 1Picture 1

Step 2Picture 2

To prepare each won ton, taking one won ton skin, put a teaspoon of filling in the center (picture 1). Fold over in half to form a triangle; make another fold one-quarter from the longest diagonal edge (picture 2).

Step 3Picture 3

Step 4Picture 4

Bring the two outside corners together (the one-quarter fold should be on the inside) and using a drop of water, pinch these 2 edges together to seal (pictures 3 and 4).

Put a large pot of water on to boil (this will be used to cook the won tons). While the water heats, make the soup. Heat the broth, rice wine, salt and ginger in a large saucepan until boiling. Reduce the heat and simmer for 5 to 10 minutes.

Once the won ton water is boiling, add the won tons and spinach, then cover. When the won tons rise to the surface of the water, remove them and the spinach and drain. Portion into serving bowls. and ladle some soup over them. Serve immediately with garnishes: 1/4 teaspoon black pepper, 1/2 teaspoon sesame oil, 1/2 tablespoon soy sauce, 1 tablespoon green onion, and a pinch of mustard powder are recommended for each serving.

***

Roasted Asparagus

Serves 2

1 bunch asparagus spears
good-quality olive oil
salt and freshly ground black pepper
sesame oil (optional)
sesame seeds (optional)

Preheat the oven to 425°F (220°C).

Snap the tough ends off the asparagus spears. Lay the spears in a single layer on a baking sheet. Drizzle with olive oil, salt and pepper. Roast for 5 to 10 minutes, until tender, depending on the size of spear. Drizzle with sesame oil and garnish with sesame seeds if desired.

Baked Rigatoni with Grilled Vegetables and Turkey Pesto Meatballs

I hesitate to post this pasta recipe, not because it wasn’t good, but because it was a lot of trouble. Considering the 2 hours it took me to peel the tomatoes, grill the vegetables, peel the peppers, simmer the sauce, boil the pasta, then bake dish, I expected a masterpiece, something as good as one of Rick Bayless’s moles, for example, which are worth every minute of work. We did enjoy the baked rigatoni, especially the leftovers, but it wasn’t the masterpiece I had hoped for. It’s a good recipe if you need to use up a lot of produce and you have an afternoon to spend hanging around the house, cooking and drinking the rest of the bottle of wine that you’ll need to open for the sauce.

Although the pasta was a bit disappointing, we loved the meatballs. I think they might be my best pesto concoction to date. Unlike the rigatoni dish, these couldn’t be easier or quicker to make.

Baked Rigatoni with Grilled Vegetables
from The New Vegetarian Epicure by Anna Thomas

Serves 8 to 10

1 large eggplant (about 1 1/2 lb/680 g)
2 large bell peppers
olive oil for grilling
2 large onions (red and/or white), peeled and sliced
3 cloves garlic, chopped
2 tablespoons olive oil
4 cups tomatoes (about 900 g), peeled and chopped
3 tablespoons fresh basil, chopped
3 tablespoons parsley, chopped
1/2 cup (120 ml) dry red wine
1 lb (450 g) rigatoni
8 oz (225 g) mozzarella, grated

Slice the eggplants lengthwise, 1/2‑inch thick. Salt the slices lightly on both sides and let them sit in a colander to drain for 30 to 45 minutes. Pat dry. Cut the peppers in quarters lengthwise and remove the seeds and stems. Brush the vegetables with olive oil.

Grill the eggplant until tender. Grill the peppers (skin side down) until charred. Put the peppers in a paper bag for a few minutes to sweat, then slip off their skins. Cut the vegetables into wide strips and set aside.

Heat 2 tablespoons olive oil, then saute the onion and garlic until golden. Add about three-quarters of the tomatoes, the herbs, salt and pepper, and the wine. Simmer until thickened, about 30 minutes.

Preheat the oven to 350°F (180°C) and oil a gratin dish or 9 x 13-inch baking pan. Cook the rigatoni in boiling salted water until just al dente. Drain and mix the pasta gently but thoroughly with the tomato sauce and grilled vegetables. Pour into the gratin dish and sprinkle with the remaining tomatoes and then the grated mozzarella.

Bake for about 30 minutes, until very hot and the cheese is beginning to color. If you like a brown, bubbly gratin topping, place under the broiler for 1 minute. Serve at once.

***

Turkey Pesto Meatballs

Makes about 18 meatballs

2 slices good-quality white bread, torn into smallish pieces
1 lb (450 g) ground turkey
3 tablespoons pesto
2 tablespoons grated Parmesan cheese
1 egg
1/2 teaspoon salt
1/4 teaspoon pepper

Make breadcrumbs by pulsing the torn bread in a food processor until crumbs form, usually about 20 short pulses.

Mix the breadcrumbs with the remaining ingredients in a medium bowl. Form the mixture into 1‑inch meatballs. Place the meatballs on a wire rack resting on top of a baking sheet (there should be space between the rack and sheet). Let the meatballs rest in the fridge for 20 to 30 minutes. Bake at 375°F (190°C) for 15 to 20 minutes, until cooked through, turning the meatballs over once, halfway through cooking.

A Cooking Blog