Tag Archives: Fruit

Late-summer Roast Beef Dinner and French Apple Tart

Nigella Lawson’s How to Eat: The Pleasures and Principles of Good Food is one of the bibles of modern-day cookbooks. It’s also one of the first cookbooks I bought in Ireland, and has taught me how to make things I’d never even heard of before moving abroad, like Yorkshire pudding and trifle. It also spells out the makings of something else that was completely foreign to me: a proper Sunday lunch. Nigella Lawson writes about it for four straight pages in How to Eat, but what sums it up rather romantically is this: “Sunday lunch … is about solidity, the family, the home.”

Sunday lunch is an institution in a lot of families, but it took me a long time to come around to its charms, especially since I’m the one doing all the cooking that goes into a big Sunday lunch, not my mother. In my case, I like to have our big meal as a late lunch at the weekends now simply because my kids are in better moods at that time of day, which not only means they’re more likely to eat what I put in front of them, but makes for a more pleasant dinner for all of us. Plus now that my daughter needs a packed lunch every day for school, a roast does double duty as Sunday’s dinner and Monday’s sandwich.

Strictly speaking, this menu isn’t a traditional Sunday lunch — there’s no roast potatoes, or the vegetables like carrots, parsnips or broccoli that you’d usually expect. But one of the things I love about How to Eat is that it contains lots of ready-to-go menus, not just stand-alone recipes, and this is Nigella’s late-summer roast beef menu from the “Weekend Lunch” chapter (though I made the French apple tart instead of the Yorkshire pudding with syrup and cream she calls for, and I also prefer Bon Appétit’s one-pot version of the cannellini beans with garlic and sage for being easier and more straightforward than Nigella’s recipe). After holding out all month, it’s finally time to embrace autumn, and this dinner seemed like a good compromise.

It’s National Organic Week in Ireland! Click here for a listing of events throughout the country.

Cold Roast Fillet of Beef 
from How to Eat by Nigella Lawson

Serves 8

fillet of beef — allow about 7 oz (200 g) per person
olive oil

Allow the beef to come to room temperature before you cook it (otherwise the cooking times here won’t be correct).

Preheat the oven to 480°F (250°C). If it’s possible to switch off the fan in your oven, do so in order to reduce evaporation (75% of lean meat is water, so fan ovens can make even good cuts of meat dry and tough).

Place the fillet in an ovenproof dish or roasting tray. Rub the beef all over with olive oil. (Nigella advises using a rosemary-infused oil for this menu, but plain olive oil works just fine too.)

Cook the beef for 15 minutes at the very high heat, then reduce the oven to 350°F (180°C). Cook the beef for 15 minutes per 18 oz (500 g) for rare; 18 minutes per 18 oz (500 g) for medium; and 25 minutes per 18 oz (500 g) for well done.

After the meat has had its advised cooking time, test it: either press it (if it feels soft it’s rare, bouncy it’s medium, hard it’s well-done) or pierce it with a knife to see. Always let any meat rest out of the oven for at least 10 minutes before carving.

If you’re cooking the beef ahead of time, take it out of the fridge 2 hours before you want to eat it. It should be cold, but not chilled. Or you could cook the fillet early enough in the day to simply allow it to cool to room temperature by the time you want to eat.

***

Rosemary and Anchovy Mayonnaise

1 cup (240 ml) mayonnaise
8 anchovy fillets in oil, drained and diced
1 sprig rosemary, finely chopped
1 tablespoon lemon juice
salt and freshly ground black pepper

Combine all the ingredients, mixing well. Chill until ready to serve. Serve alongside the beef. (This is also great to make sandwiches with the beef leftovers.)

***

Cannellini Beans with Garlic and Sage 
from Bon Appétit, October 2009

Makes about 6 cups

1 lb (450 g) dried cannellini beans
8 cups (2 liters) room-temperature water
2 tablespoons olive oil
1 large head of garlic, unpeeled, top 1/2 inch cut off to expose cloves
1 large sprig of fresh sage
1/4 teaspoon whole black peppercorns
1 teaspoon coarse kosher salt
extra virgin olive oil (for drizzling)

Place the beans in a large bowl. Cover with cold water (at least 6 cups/1 1/2 liters) and soak overnight.

Drain the beans and place in a heavy, large pot. Add the 8 cups (2 liters) of room-temperature water, olive oil, garlic, sage, and black peppercorns. Bring to a simmer over a medium-high heat. Reduce the heat to medium-low and simmer, uncovered, for 1 1/2 hours, stirring occasionally. Mix in the coarse salt. Continue to simmer until the beans are tender, adding more water if needed to keep beans covered, about 30 minutes longer. Cool the beans in the cooking liquid for 1 hour.

Using a slotted spoon, transfer the beans to a serving bowl, reserving the bean cooking liquid, if desired, but discarding the garlic, sage, and peppercorns. Season the beans to taste with pepper and more coarse salt. Drizzle with extra virgin olive oil and serve.

***

Tomato Salad
from How to Eat by Nigella Lawson

For this salad, simply slice some tomatoes (the best and ripest you can find) and arrange them on a plate. Sprinkle with salt, pepper and sugar (only if you think they need it, and even so, just a pinch), as well as some finely chopped spring onions or chives, a drop or two of balsamic or red wine vinegar, and a drizzle of extra virgin olive oil.

***
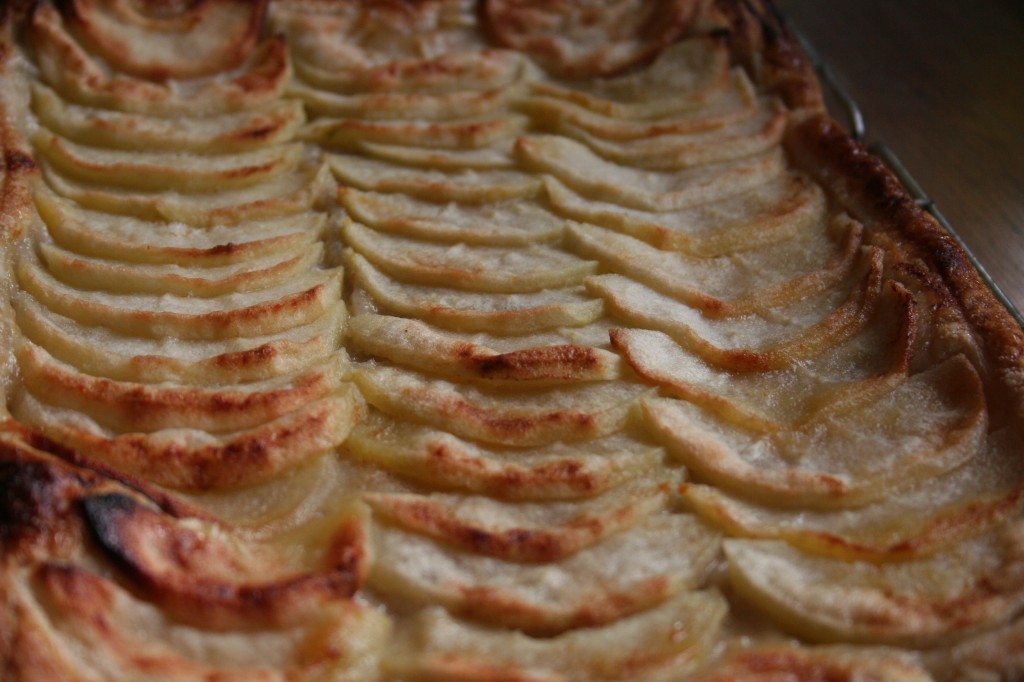
french apple tart

French Apple Tart (or Tarte Fine Aux Pommes, as Nigella Lawson calls it)
adapted from Barefoot Contessa Back to Basics by Ina Garten and Nigella Express by Nigella Lawson

Serves 4 to 6

This is mostly Nigella’s recipe, but the apricot jam and Calvados brushed on top is Ina’s touch from her version. The tart will still be delicious if you don’t add the jam mixture though. I pulled this together in 10 minutes, so it would also be a quick weeknight treat.

1 sheet shop-bought ready-rolled puff pastry, defrosted if frozen
2 large Granny Smith apples
2 tablespoons sugar
2 tablespoons (30 g) cold unsalted butter, small diced
1/4 cup (60 ml) apricot jam
2 tablespoons Calvados, rum, or water

Preheat the oven to 400°F (200°C). Line a sheet pan with parchment paper.

Lay the sheet of puff pastry on the lined baking sheet. Using the tip of a sharp knife, mark a 1/2‑inch border all the way around the edge of the rectangle. You need to score the lines on the pastry rather than cut all the way through it. This will allow a frame to rise above the apple filling. Refrigerate the dough while you prepare the apples.

Peel the apples and core them, then cut them in half. Slice the apples into 1/4‑inch-thick slices. Working from the inside edge, place the apple slices, closely overlapping, within the border of the pastry frame. Create neat lines of apple slices until the pastry is covered. Sprinkle with the sugar and dot with the butter.

Bake for 20 to 25 minutes, until the pastry is browned and the edges of the apples start to brown. Rotate the pan once during cooking. If the pastry puffs up in one area, cut a little slit with a knife to let the air out. And don’t worry if the apple juices burn in the pan, the tart will be fine. When the tart’s done, gently heat the apricot jam together with the Calvados, rum, or water and brush the apples and the pastry completely with the jam mixture. Loosen the tart with a spatula so it doesn’t stick to the paper. Allow to cool and serve warm or at room temperature, cut into squares or slices.

Pork Chops and Red Cabbage, Pan-roasted Patty Pan Squash, and Mom’s Apple Cake

Depending on who you ask, we have been blessed or cursed with an early fall here in Wisconsin. The air is crisp but the sky is still blue and sunny. I usually love fall, not for the leaves or cooler weather, but for the return to school when I was younger, the start of field hockey season when I played it, and the presence of hearty vegetables and fruits in the market after I learned to cook. I’m actually dreading this fall though, since I return to work after a wonderful summer of maternity leave with my new daughter, Anabelle. While I still have the chance, I’m going to spend September baking cakes, simmering soups, and slow cooking meats. October (and my return to work) will come soon enough.

Today’s menu is in honor of the cooler weather and the basketball-sized head of red cabbage in last week’s CSA delivery. In my adaptation of Bon Appétit’s version of pork chops and red cabbage, I cooked the cabbage in my Crock-Pot instead of on the stove for an hour. Not having to watch an open flame frees up your day considerably. The apple cake was made the day before and actually improved after sitting at room temperature for 24 hours. The cake was wonderful after dinner but would be just as good for breakfast with a cup of coffee or tea. The patty pan squash recipe is a repeat from last month’s Crusty Chicken Thighs with Mushroom Sauce post.

Pork Chops and Red Cabbage

Pork Chops with Red Cabbage
adapted from Bon Appétit, February 1995

for the cabbage:
1 tablespoon olive oil (only needed if making on the stove top, not in a slow cooker)
1 small head red cabbage or 1/2 large head red cabbage, thinly sliced
1 onion, thinly sliced
2 garlic cloves, thinly sliced
1/2 teaspoon kosher salt
1 teaspoon dried oregano, crumbled
2 tablespoons balsamic vinegar
salt and freshly ground black pepper

for the pork:
1 teaspoon olive oil
4 x 5‑oz (140‑g) 1/2‑inch-thick, bone-in pork chops
salt and freshly ground black pepper
1/2 teaspoon dried oregano, crumbled
1/8 teaspoon dried sage
1/3 cup (80 ml) chicken broth
1 tablespoon balsamic vinegar

For the cabbage, combine the cabbage, onion, garlic, salt and oregano in a slow cooker. Cook on high for about 4 hours, until the cabbage is tender, stirring occasionally. (If you don’t have a slow cooker, follow the original recipe: heat the oil in a heavy large skillet over a medium heat. Add the cabbage, onion, garlic, salt and oregano and cook until cabbage and onion are tender, stirring occasionally, about 50 minutes.) Stir the balsamic vinegar into the cooked cabbage and season to taste with salt and pepper. (This can be prepared up to 3 hours ahead. Cover skillet/slow cooker and let stand at room temperature. Bring to a simmer before continuing with recipe.)

For the pork, heat the oil in another heavy large skillet over a medium-high heat. Season the pork chops with salt and pepper and rub with the oregano and sage. Add the pork chops to the skillet and fry until cooked through, turning once, about 8 minutes.

Transfer the cabbage to a platter. Place the pork chops atop the cabbage. Remove the skillet from the heat. Add the chicken broth and balsamic vinegar to the skillet. Stir with a wooden spoon, scraping up any browned bits from the bottom of the skillet. Pour the sauce over the pork and serve.

***

Mom’s Apple Cake
from Smitten Kitchen

6 apples (Note: I used 7 small Early Goldens)
1 tablespoon cinnamon
5 tablespoons sugar
2 3/4 cups (330 g) flour, sifted
1 tablespoon baking powder
1 teaspoon salt
1 cup (240 ml) vegetable oil
2 cups (400 g) sugar
1/4 cup (60 ml) orange juice
2 1/2 teaspoons vanilla
4 eggs

Preheat the oven to 350°F (180°C). Grease a tube pan. Peel, core and chop the apples into chunks. Toss with the cinnamon and sugar and set aside.

Stir together the flour, baking powder and salt in a large mixing bowl. In a separate bowl, whisk together the oil, sugar, orange juice and vanilla. Mix the wet ingredients into the dry ones, then add the eggs, one at a time. Scrape down the bowl to ensure all the ingredients are incorporated.

Pour half the batter into the prepared pan. Spread half the apples over it. Pour the remaining batter over the apples and arrange the remaining apples on top. Bake for about 1 1/2 hours, or until a tester comes out clean. (Note: I baked my cake a full 1 1/2 hours and it was a bit overcooked, even though the tester still didn’t appear to be clean.)

Gnocchi with Tomato, Spinach and Ricotta and Brandied Plum Cake

One of the great things about cooking is that the more you do it, the easier and faster it gets. (Though I’ve also become my own worst enemy in that regard — I do almost all the cooking, even on weekends when I could otherwise have a break from it, because I’m so much faster at it than my husband.) When you know that you can pull together a dinner in the time it takes for water to boil and some pasta to cook, or that you can cook some fresh fish in less than 10 minutes, frozen pizzas start to lose their appeal.

But even though I love to cook, there are plenty of days too when I don’t have the energy or am pressed for time to get something on the table for two hungry little kids. And as much as I prefer to cook from fresh, unprocessed ingredients, there are certainly worse convenience foods to have in your pantry than a jar of pasta sauce and a packet of potato gnocchi. Store-bought potato gnocchi cooks in 2 or 3 minutes, making it the ultimate fast food, plus a nice change from pasta. Check out all the quick and easy recipes for gnocchi from the UK’s Olive magazine for more inspiration.

If you like the sound of brandied plums but don’t have time for the cake, just make the plums on their own, which takes only 10 minutes. Serve them with vanilla ice cream, with the syrup drizzled over — no one will complain about not having them in a cake.

IMG_9243

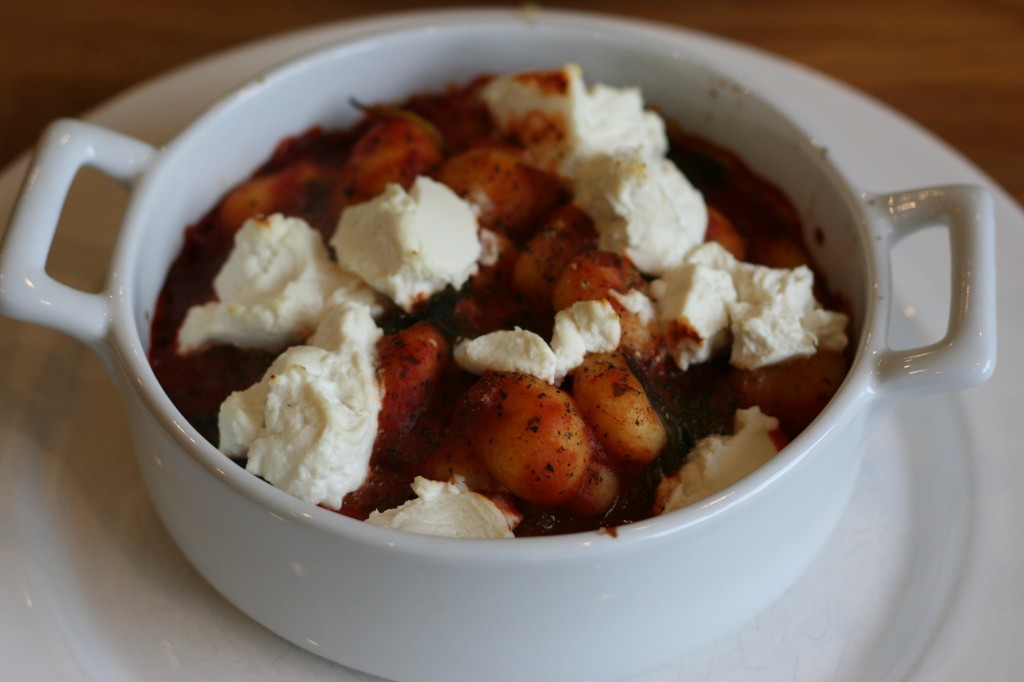
Gnocchi with Tomato, Spinach and Ricotta
adapted from Olive, November 2005

Serves 6

You could vary this recipe by using your favorite pasta shape instead of gnocchi, and stirring 1 tub of ricotta cheese directly into the sauce along with the spinach to make it nice and creamy. Do I even have to say that bacon would be good in this too?

2 x 18-oz (500‑g) packs store-bought potato gnocchi
2 x 14-oz (400‑g) good-quality jars of tomato sauce
7 oz (200 g) baby spinach, washed
2 x 9‑oz (250‑g) tubs of ricotta cheese
a handful of freshly grated Parmesan, to serve

Preheat the oven to 400°F (200°C). Cook the gnocchi according to packet instructions and drain. Meanwhile, heat the tomato sauce, add the spinach and stir until wilted. Put the gnocchi in a lightly oiled ovenproof dish, pour the sauce over and dot with blobs of ricotta. Scatter the grated Parmesan over and pop into the hot oven until bubbling and golden, about 10 minutes.

***

Brandied Plum Cake
inspired by The Kitchen Diaries by Nigel Slater

Serves 12

This cake is very moist, so it doesn’t really need the brandy syrup drizzled over it at the end, though it’s a nice touch. Instead, you might like to save it in the fridge to drizzle over vanilla ice cream another time. If you have any leftover plums that won’t fit on top of the cake, save them to have with yogurt for breakfast.

for the brandied plums:
3 tablespoons sugar
2 tablespoons brandy
1/4 teaspoon cinnamon
16 ripe plums, stoned and quartered

for the cake:
3/4 cup (160 g) butter
3/4 cup (150 g) sugar
3 large eggs
3/4 cup (90 g) all-purpose flour
1 1/2 teaspoons baking powder
1 cup (100 g) ground almonds
1/2 cup (50 g) walnuts, finely chopped

Preheat the oven to 350°F (180°C). Grease a 9‑inch springform pan and line the base with a piece of parchment paper.

To make the brandied plums, combine the sugar, brandy and cinnamon in a frying pan. Cook over a high heat, stirring often, until the sugar dissolves. Reduce the heat, add the plums and cook until they are soft but still hold their shape, about 5 minutes. Transfer the plums to a bowl with a slotted spoon and set aside. Reserve the brandy syrup left behind from the plums.

Beat the butter and sugar until pale and fluffy. Add the eggs one at a time to the butter and sugar. Sift the flour and baking powder together and fold them gently into the mixture with a spatula. Fold in the ground almonds and chopped walnuts.

Scrape the mixture into the lined springform pan. Place the quartered plums on top of the cake mixture (they will sink into the cake as it bakes). Bake for 40 to 45 minutes, until a cake tester comes out clean. If you think the top of the cake is browning too much, cover it with tin foil. Remove the cake from the oven and leave to cool in the pan for 15 minutes before releasing the sides of the pan. Serve with some of the reserved syrup spooned over the top of each slice.

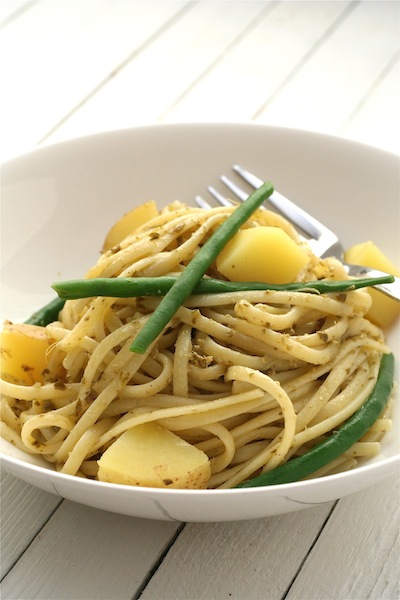
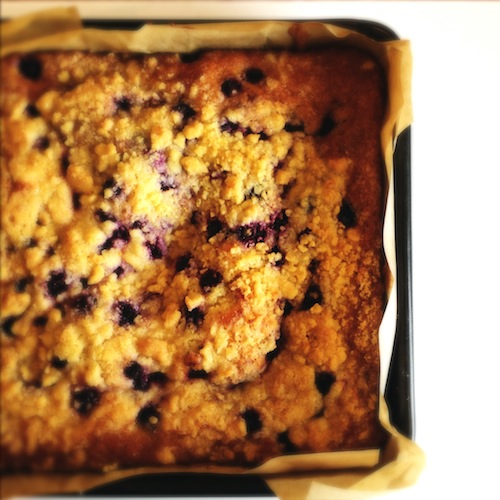
Spaghetti alla Genovese and Lemon Blueberry Buckle

How can you resist an article with a title like “Gourmet’s Guide to Cobblers, Crisps, Crumbles, Bettys, Buckles + Pandowdies”, if only to find out what in the world a pandowdy is? (For the record, it’s sliced fruit baked with sugar and spices in a deep dish, with a thick top crust.) It’s just too bad they didn’t include grunts and slumps in the article title to really round things out. The article included a link to a recipe for lemon blueberry buckle, which sounded like something nice to make while there’s still some blueberries left. But “nice” doesn’t do this recipe justice. And don’t let its humble, coffee cake-like appearance fool you either. It wound up being the best thing I baked all summer. It was so good that as soon as I finished my first piece, I went online to see what I could find out about the book the recipe comes from, Rustic Fruit Desserts. Once I had a look at the index on Amazon, I was sold — apple cobbler with cheddar cheese biscuits, cherry almond bars, fig and honey cream galette, pear sauce bundt cake with pear brandy butter … oh my. I might even have bought it just for the brown sugar rum glaze alone. Hurry and make this buckle while you still can with in-season blueberries — then see if you aren’t tempted to buy the book too.

Spaghetti alla Genovese
adapted from Avoca Café Cookbook 2

Serves 4

4 small new potatoes, peeled and cut into thin slices
8 oz (225 g) green beans, ends trimmed
1 lb (450 g) spaghetti (or fettuccine or linguine)
3 or 4 tablespoons pesto (or more, to taste)
salt and freshly ground black pepper
freshly shaved Parmesan, to serve

Blanch the peeled, sliced potatoes in boiling salted water for 5 minutes, or until cooked. Refresh in cold water and set aside.

Cook the trimmed green beans in boiling salted water until tender but still al dente. Drain and set aside.

Cook the pasta in boiling salted water until al dente. Drain, reserving a cupful of the cooking water. Toss the pasta with the potatoes, green beans and pesto. Taste and adjust with more pesto if needed, and thin the sauce with some of the cooking water if you think it needs it. Season to taste with salt and pepper. Serve immediately with thick shavings of Parmesan scattered on top.

***

Lemon Blueberry Buckle
from Rustic Fruit Desserts: Crumbles, Buckles, Cobblers, Pandowdies, and More by Cory Schreiber and Julie Richardson

Serves 6 to 8

Covered in cling film, the buckle will keep at room temperature for 2 to 3 days (though in my house it was all eaten up in less than 24 hours).

for the crumb topping:
1/2 cup (60 g) all-purpose flour
1/3 cup (75 g) granulated sugar
1/8 teaspoon fine sea salt
zest of 1 lemon
1/4 cup (60 g) unsalted butter, at room temperature, cubed

for the cake:
1 1/2 cups (180 g) plus 2 tablespoons all-purpose flour
1 teaspoon baking powder
1/4 teaspoon baking soda
1/2 teaspoon fine sea salt
1/4 teaspoon freshly grated nutmeg (or a pinch of dried nutmeg)
6 tablespoons (90 g) unsalted butter, at room temperature
3/4 cup (150 g) granulated sugar
zest of 1 lemon
2 eggs
1/2 cup (120 ml) buttermilk
2 cups (320 g) blueberries, fresh or frozen

for the lemon syrup:
1/3 cup (75 g) granulated sugar
juice of 2 lemons

Preheat the oven to 350°F (180°C). Butter a 9‑inch-square baking pan.

To make the crumb topping, mix the flour, sugar, salt, and lemon zest together in a bowl, then add the butter and use a fork or your fingers to cut in the butter until the size of peas. Place the topping in the freezer until you mix the cake batter.

To make the cake, whisk the flour, baking powder, baking soda, salt, and nutmeg together in a bowl. Using a handheld mixer with beaters or a stand mixer with the paddle attachment, cream the butter, sugar, and lemon zest together on medium-high speed for 3 to 5 minutes, until light and fluffy. Add the eggs one at a time, scraping down the sides of the bowl after each addition. Sir in the flour mixture in 3 additions alternating with the buttermilk in 2 additions, beginning and ending with the dry ingredients and scraping down the sides of the bowl occasionally. Gently fold in half the blueberries, spread the batter into the prepared pan, and distribute the remaining blueberries over the cake.

Sprinkle the chilled crumb topping over the berries, then bake for 45 to 50 minutes, or until lightly golden and firm on top.

To make the glaze, combine the sugar and lemon juice in a small saucepan and whisk until blended. Cook over a medium-low heat, stirring occasionally, for 8 to 10 minutes, until syrupy. The glaze will bubble while cooking, so you may need to remove it from the heat to check that it’s thick enough.

Pour the glaze over the cake as soon as it’s removed from the oven. Reheat the syrup briefly if it has become too thick to pour.

Fish en Papillote with Julienned Vegetables and Truffle Oil, Cauliflower Gratin, and Roasted Figs with Yogurt, Honey, and Walnuts

“So what do you do with parchment paper?” My mom asked me this last week after noting how easy the paper made removing carrot cake from its pan. I’m sure there are 1,001 uses for it, but personally, I only use it for lining pans when baking and for cooking fish. Steaming fish in parchment paper packets keeps it moist and locks in all the flavors you add to it. After a few days of thinking nonstop about fish en papillote, I decided to make it. In this version, leeks and truffle oil turn mild (a.k.a. boring) tilapia into an elegant dish.

Reuben’s grandma and mom joined us again for dinner and graciously agreed to be my guinea pigs as I experimented with roasting figs. Until this week, I had never eaten fresh figs. They looked beautiful at the grocery store so I decided to take a chance and buy a carton. I’m glad I did. The slight sourness of the yogurt in my recipe/experiment nicely balanced the sweetness of the figs and honey. As with most of my favorite desserts, the roasted figs dish is great for breakfast.

Fish with vegetables

Fish en Papillote with Julienned Vegetables and Truffle Oil
adapted from Sara Moulton Cooks at Home
by Sara Moulton

Serves 4

1 1/2 tablespoons plus 2 teaspoons unsalted butter
2 carrots, julienned
1 large leek, julienned
1 celery rib, julienned
kosher salt and freshly ground black pepper, to taste
vegetable oil, for brushing (or spray canola oil)
4 x 6‑oz (170‑g) thin fish fillets, no thicker than 1/3 inch each, such as tilapia or flounder, skin removed
4 teaspoons fresh lemon juice
4 teaspoons white truffle oil

Melt 1 1/2 tablespoons of the butter in a large heavy skillet over medium heat. Add the carrot, leek, and celery. Season with salt and pepper. Cook gently, stirring often, until softened, 5 to 7 minutes. Remove from the heat and set aside to cool.

Preheat the oven to 425°F (220°C). Cut out a parchment paper rectangle, about 10 inches by 12 inches. Fold in half, then reopen. Brush the whole rectangle lightly with some oil (or spray lightly with canola oil). Lay a fish fillet on one half of the oiled parchment, skinned side down, and season with salt and pepper. Drain the vegetables of as much liquid as possible and place 1/4 of the mixture on top of the fillet. Drizzle with 1 teaspoon lemon juice. Top the vegetable mound with 1 teaspoon butter and drizzle with 1 teaspoon of the truffle oil. Repeat with the remaining 3 fillets.

To close the parchment packages, fold the other half of the paper over the fillet and, starting with the top, make 1/4‑inch folds all around the perimeters and press to crimp and seal. Close the final crimp with a paper clip. Place the packets on baking sheets (2 packets on each sheet) and bake until puffed and lightly browned, 10 to 12 minutes. Transfer to warmed serving plates and serve at once, preferably while the packets  are still puffed. Serve with rice, mashed potatoes, or french bread to soak up the juices.

***

Cauliflower Gratin

Serves 6

1 large head cauliflower, cut into large florets
2 tablespoons unsalted butter, divided
3 tablespoons all-purpose flour
2 cups (480 ml) milk
1/2 teaspoon freshly ground black pepper
4 oz (110 g) grated cheddar, divided
2 oz (50 g) grated Parmesan

Preheat the oven to 375°F (190°C). Bring a large pot of salty water to boil. Boil the cauliflower florets for about 5 minutes, until just tender. (It’s better to undercook than to overcook the florets.) Drain the florets and pour into a greased casserole dish.

In a saucepan, melt the butter over a medium heat. Whisk the flour with the butter to make a paste. Cook the paste for about 1 minute, until it smells nutty. Take care not to let the paste brown. Slowly whisk in the milk. Bring just to a boil, the reduce the heat and simmer for 2 to 3 minutes, until the sauce thickens. Remove from the heat and stir in half the cheddar cheese.

Pour the cheese sauce over the cauliflower so that all the florets are covered. Sprinkle with the remaining cheddar and the Parmesan. Bake for 30 minutes, until lightly browned and bubbly.

***

Roasted Figs with Yogurt, Honey, and Walnuts

Serves 4

8 black or mission figs
14 oz (400 g) Greek-style yogurt
6 tablespoons honey, divided
4 oz (110 g) chopped walnuts

Preheat the oven to 425°F (220°C). Cut the figs in half lengthwise. Place the figs cut side up in a baking dish. Brush 2 tablespoons of honey over the cut side of the figs. Bake for 12 minutes, until just softened and heated through. Let cool 5 to 10 minutes.

For each serving, lay 4 fig halves on a serving plate. Spoon about 1/2 cup (90 g) yogurt on top of the figs. Drizzle 1 tablespoon of honey over the yogurt and figs. Sprinkle 1 oz (30 g) of walnuts on each serving.

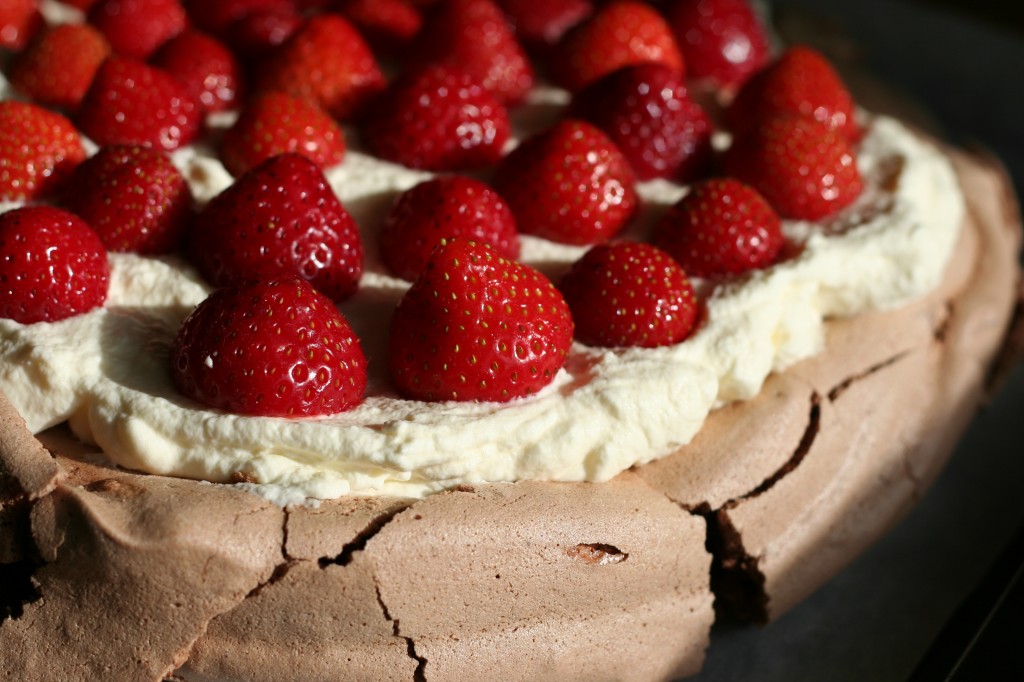
Spaghetti with Fresh Tomato Sauce and Chocolate Pavlova with Strawberries

One of my favorite things to do when I visit my mom is to sit down with a cup of coffee and flip through her stash of magazines. I never buy them myself, so it’s a treat to have so many to look through at one time, and she always has half a dozen cooking ones lying around (some of which invariably find their way into my suitcase … sorry Mom!). If I remember correctly, I first came across this recipe in one of her Martha Stewart magazines about 10 years ago, and it was the first time I’d ever heard of peeling tomatoes. It quickly became a favorite summertime staple, one that we look forward to having as soon as good tomatoes are available. If I had to pick just one dish that sums up summertime to me, this would be it.

Still looking for more ways to use up tomatoes? Try Chicken Cacciatore, Tomato and Goat’s Cheese Tart, Ravioli and Tomato Salad, Oven-roasted Ratatouille or Spaghetti with Roast Cherry Tomatoes, Chili and Basil.

Spaghetti with Fresh Tomato Sauce

Serves 4

3 lb (1.4 kg) ripe tomatoes
1 tablespoon olive oil
2 cloves garlic, finely chopped
1 bunch fresh basil, chopped
1 teaspoon sugar (optional)
salt and freshly ground black pepper
1 lb (450 g) spaghetti (or angel hair or linguine)
freshly grated Parmesan, to serve

First, skin the tomatoes. To do this, cut a shallow X in the bottom of each tomato with a sharp knife, then pour boiling water over them and leave until the skin around the X starts to curl away, about 1 to 2 minutes. Drain and allow to cool, then slip off their skins. Cut into quarters or roughly chop them — it doesn’t matter too much since they’ll break up during the cooking anyway. If you want,  you can deseed the tomatoes to make a thicker, more concentrated sauce, but I rarely bother and just let it simmer for longer instead.

Heat the oil in a large frying pan or stockpot (one that is big enough to hold all the tomatoes). Saute the garlic for 1 minute, taking care not to let it burn or it will ruin the flavor of the sauce. Add the tomatoes, basil and the teaspoon of sugar. Season well with salt and pepper. Bring to the boil, then reduce the heat and simmer, uncovered, for 30 minutes, until the sauce has thickened, stirring now and then. You could serve the sauce now, or let it continue simmering until it has reduced even further — I always let it bubble away for at least 1 hour, and preferably 90 minutes.

Put a pot of water on to boil and cook the pasta according to the packet instructions. Divide the pasta between 4 bowls and spoon the tomato sauce over. Top with freshly grated Parmesan and serve. This is fantastic with a simple green salad and garlic bread.

***

chocolate pavlova with strawberries

Chocolate Pavlova with Strawberries
adapted from Forever Summer by Nigella Lawson

Serves 8 to 10

for the chocolate meringue base:
6 egg whites
1 1/2 cups (300 g) caster sugar
3 tablespoons cocoa powder, sieved
1 teaspoon balsamic or red wine vinegar
1/4 cup (50 g) dark chocolate, finely chopped

for the topping:
2 cups (480 ml) cream
1 lb (450 g) strawberries or raspberries
2–3 tablespoons coarsely grated dark chocolate

Preheat the oven to 350°F (180°C). Line a baking tray with baking parchment and draw a circle approximately 9 inches (23 cm) in diameter onto the paper with a pencil (or just trace around a dinner plate). Just make sure the circle doesn’t go too close to the edge of the baking sheet, because the pavlova will spread a bit during cooking. Flip the paper over so that the penciled-in circle is facing down onto the sheet (so that the pavlova doesn’t come into direct contact with the pencil lead).

Beat the egg whites in a spotlessly clean and perfectly dry bowl until satiny peaks form, then beat in the sugar a spoonful at a time until the meringue is stiff and shiny. Sprinkle over the cocoa, vinegar and chopped chocolate. Gently fold everything until the cocoa is thoroughly mixed in.

Mound the mixture onto the circle you’ve drawn onto the baking parchment, smoothing the sides and top. Place in the oven, then immediately turn the temperature down to 300°F (150°C) and cook for about 1 to 1 1/4 hours. When it’s ready it should look crisp around the edges and on the sides and be dry on top, but when you prod the centre you should feel the promise of squidginess beneath your fingers. Turn off the oven and open the door slightly, and let the chocolate meringue disc cool completely (or you could even leave it in the oven overnight).

When you’re ready to serve, invert the cooled pavlova onto a big, flat-bottomed plate. Whisk the cream till thick but still soft and pile it on top of the meringue, then scatter over the fruit. Coarsely grate the chocolate so you get curls rather than rubble, as you don’t want the berries’ luscious colour and form to be obscured, and sprinkle haphazardly over the top, letting some fall, as it will, on the plate’s rim.

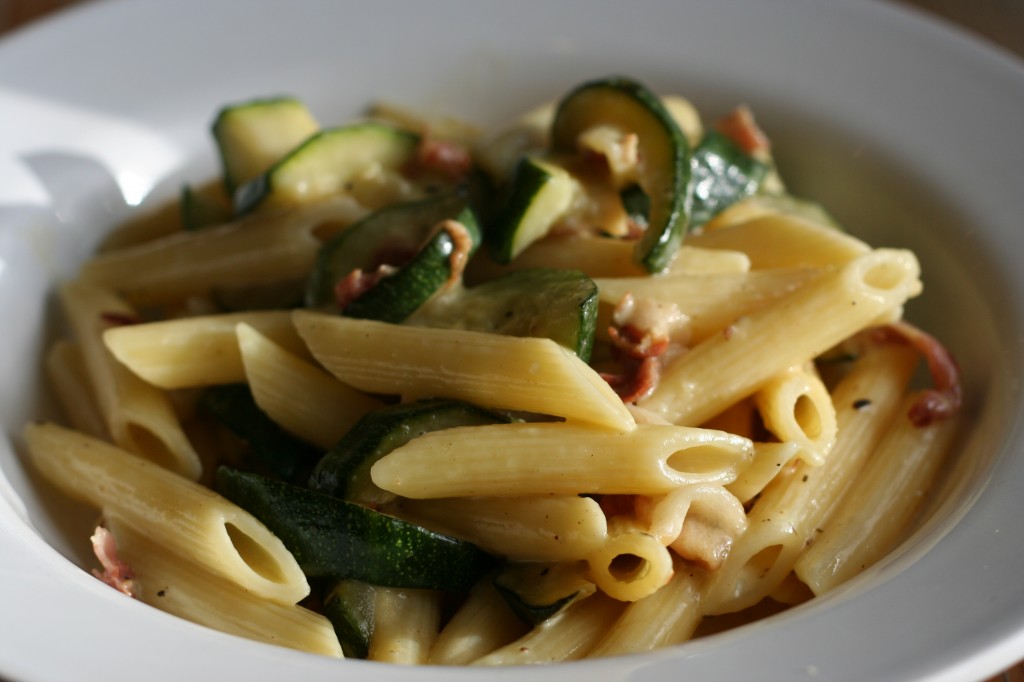
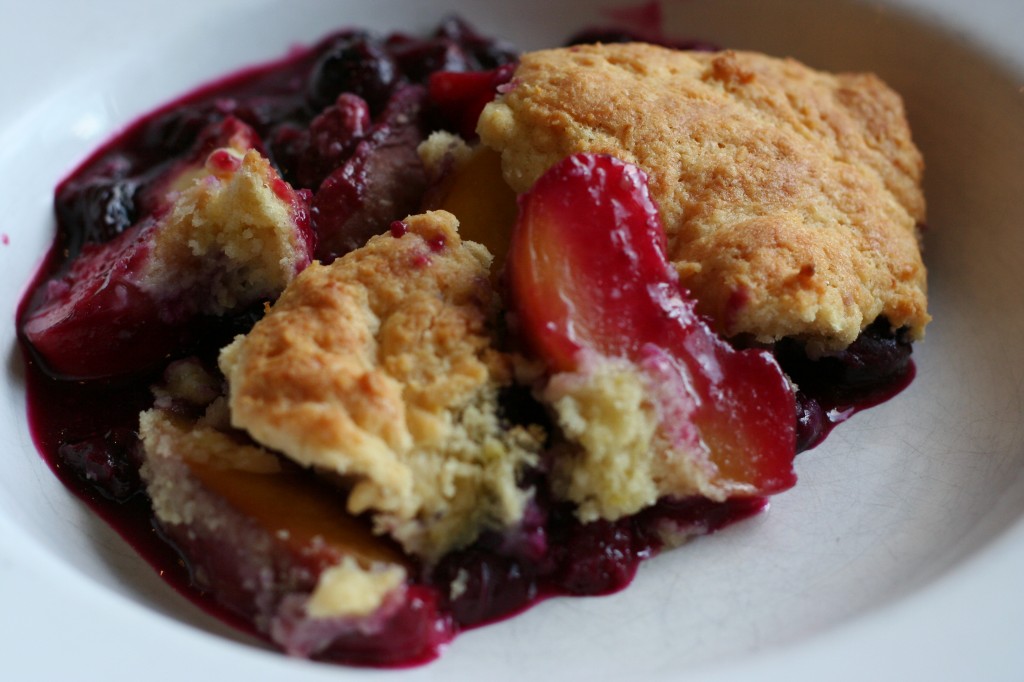
Zucchini Carbonara and Peach and Blueberry Sour Cream Cobbler

It turns out I’m not the only one around these parts with a weakness for American bacon. We’re having our house repainted at the moment, and today the painter was working inside to do the window frames. He spent 15 years living in America and only moved back about five years ago, and was chatting with us in the kitchen as I started to fry up the pancetta for this dish. “That’s not streaky bacon, is it?” he asked, streaky bacon being somewhat closer to American bacon than rashers, but still too thick cut to get as crispy as I like it to be. So he got the whole story of how much I’d missed bacon and then finding the pancetta at the grocery store. He told me how his oldest daughter prefers American bacon too, and how he’d have to get her some now that he knew about it. He was also eying up this cobbler as I made it and dropping hints about how good it looked, so he was pretty pleased when he was still around when it came out of the oven and I gave him some to have with his coffee.

It’s true that carbonara isn’t for the calorie-conscious, but even so, once you break it down per serving, there’s “only” one or two tablespoons of cream, one egg yolk, a couple tablespoons of cheese and a few slices of pancetta per serving, so for being a decadent dish, it’s not all that bad, though certainly not something you’d want to have every day. But as for the cobbler, there’s only two tablespoons of sugar in the entire dessert, making it the kind of treat I don’t at all mind giving my kids.

zucchini carbonara

Zucchini Carbonara
adapted from Jamie at Home by Jamie Oliver

Serves 4

6 medium green and yellow courgettes
1 lb (450 g) penne
4 large free-range or organic egg yolks
1/2 cup (120 ml) heavy cream
2 good handfuls of freshly grated Parmesan cheese
salt and freshly ground black pepper
olive oil
12 thick slices of pancetta or smoked streaky bacon, cut into chunky lardoons
a small bunch of fresh thyme, leaves picked and chopped (or 1/2 teaspoon dried)

Put a large pan of salted water on to boil. Halve and then quarter any larger courgettes lengthways. Cut out and discard any fluffy middle bits, and slice the courgettes at an angle into pieces roughly the same size and shape as the penne. Smaller courgettes can simply be sliced finely. When the water boils, add the penne to the pan and cook according to the packet instructions.

To make the carbonara sauce, put the egg yolks into a bowl, add the cream and half the Parmesan, and mix together with a fork. Season lightly and put to one side.

Heat a very large frying pan (one that will be able to hold all the sauce plus the pasta later on), add a good splash of olive oil and fry the pancetta or bacon until dark brown and crisp. Remove with a slotted spoon and to a plate lined with a paper towel to drain. Drain off all but 1 tablespoon or so of the bacon fat.

Add the courgette slices and 2 big pinches of black pepper, not just to season but to give it a bit of a kick. Sprinkle in the thyme leaves, give everything a stir, so the courgettes become coated with all the lovely bacon-flavoured oil, and fry until they start to turn lightly golden and have softened slightly. Crumble or chop the bacon and add it back to the pan.

It’s very important to get this next bit right or your carbonara could end up ruined. You need to work quickly. When the pasta is cooked, drain it, reserving a ladleful or two of the cooking water. Immediately toss the pasta in the pan with the courgettes and bacon, then remove from the heat and add a ladleful of the reserved cooking water and your creamy sauce. Stir together quickly. (No more cooking now, otherwise you’ll scramble the eggs.)

While you’re tossing the pasta and sauce, sprinkle in the rest of the Parmesan and a little more of the cooking water if needed, to give you a silky, shiny sauce. Taste quickly for seasoning. Serve and eat immediately, as the sauce can become thick and stodgy if left too long.

***

peach and blueberry sour cream cobbler

Peach and Blueberry Sour Cream Cobbler
adapted from The Kitchen Diaries by Nigel Slater

Serves 4

4 ripe peaches, sliced
about 3 cups (400 g) blueberries
juice of 1 lemon
1 tablespoon sugar
1 tablespoon flour

for the crust:
1 1/3 cups (150 g) flour
pinch of salt
2 teaspoons baking powder
1 heaped tablespoon sugar, plus extra for sprinkling
zest of 1 lemon
6 tablespoons (90 g) butter
1/2 cup (140 ml) sour cream
ice cream, cream or custard, to serve

Preheat the oven to 400°F (200°C).

For the cobbler crust, put the flour, salt, baking powder, sugar, lemon zest and butter in a food processor and blitz for a few seconds, until the mixture resembles breadcrumbs. Tip into a bowl and set aside.

Put the sliced peaches and blueberries into an ovenproof dish. Toss them with the lemon juice, sugar and flour.

Mix the sour cream into the crumb mixture to make a soft dough. Break off walnut-sized pieces and flatten them lightly. Lay them on top of the fruit. Sprinkle the rounds of dough with sugar, then bake for 25 minutes, till the cobbler is golden and the fruit is bubbling. Serve with ice cream, a drizzle of cream or some warm custard.

Ravioli and Tomato Salad and Honey Vanilla Poached Apricots

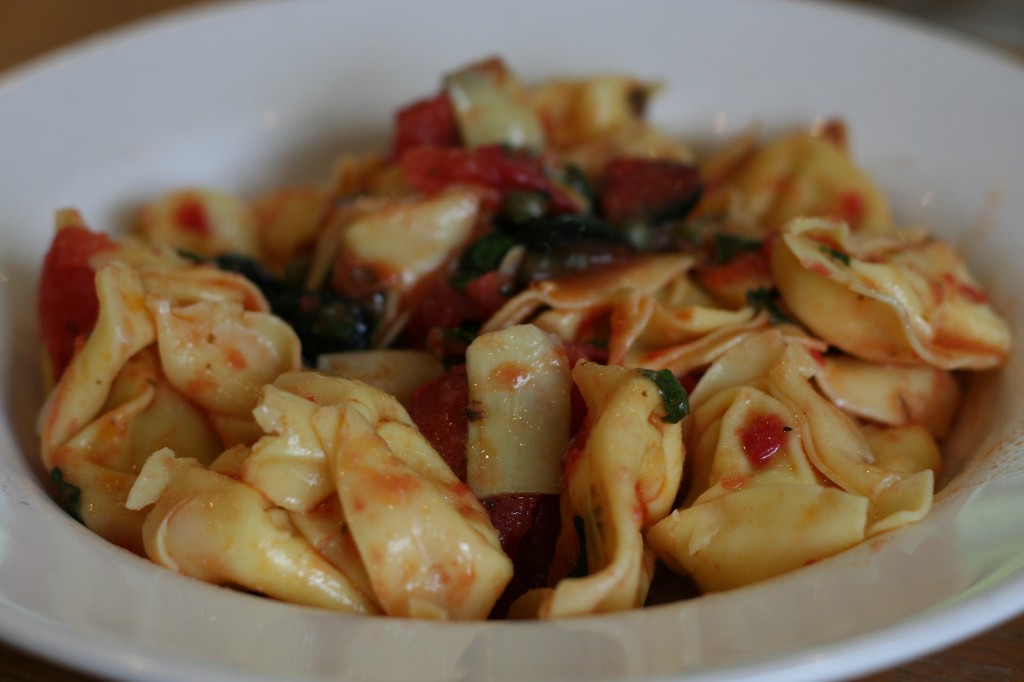
One of the quintessential smells of summer for me is a bunch of fresh basil — I’m sure I’m not alone in this. When I had gardens in the Midwest, it grew so quickly that I often couldn’t use it all fast enough. In Ireland, though, it’s so cool in the summer that it won’t grow outside at all, which means you either have to be content with whatever you can fit on your windowsill or grow it in a greenhouse or polytunnel. That’s been a huge disappointment for me, since having a nonstop supply of basil throughout the summer was one of the things I’d been looking forward to when we started our garden three years ago. I also couldn’t wait to grow tomatoes, but after losing all of our plants during the past two summers due to record-breaking rain, we didn’t even bother planting any this year (and good thing too, seeing as how this July was the wettest for 50 years). It’s just another thing that will have to wait until we get a tunnel, hopefully next year. In the meantime, I begrudgingly buy meager packets of fresh herbs, instead of the heaps I’d hoped to be growing myself. But for anyone with basil to spare, and tomatoes too (lucky you!), this recipe is for you.

IMG_8810

Still looking for more ways to use up tomatoes? Try Chicken Cacciatore, Tomato and Goat’s Cheese Tart, Oven-roasted Ratatouille, Spaghetti with Fresh Tomato Sauce or Spaghetti with Roast Cherry Tomatoes, Chili and Basil.

Ravioli and Tomato Salad with Masses of Basil
from Vegetarian Cooking for Everyone by Deborah Madison

Serves 4 to 6

This will be even better if you can make it ahead of time, giving the flavors plenty of time to blend together. It would be perfect for a picnic.

1 lb (450 g) cheese ravioli or tortellini
2 lb (900 g) ripe tomatoes
1 x 6‑oz (170‑g) jar artichoke hearts, drained and halved (optional)
1 bunch basil, leaves torn into pieces
1/2 cup (90 g) olives, pitted and halved
3 tablespoons capers, rinsed
1/4 cup (60 ml) extra virgin olive oil
salt and freshly ground black pepper
red wine vinegar

Bring a large pot of water to boil for the ravioli. Meanwhile, skin the tomatoes. (To do this, cut a shallow X in the bottom of each tomato with a sharp knife, then pour boiling water over them and leave until the skin around the X starts to curl away, about 1 to 2 minutes. Drain and allow to cool, then slip off their skins.) Deseed them and chop them into large pieces. Put the tomatoes and artichokes in a large bowl along with the basil, olives, capers, and oil.

Once the water is boiling, add the ravioli or tortellini and cook according to the package instructions, then drain well. Add the pasta to the tomato mixture in the bowl and toss gently with a rubber spatula. Taste for salt, season with pepper and sprinkle with vinegar to taste. Serve warm or at room temperature.

***

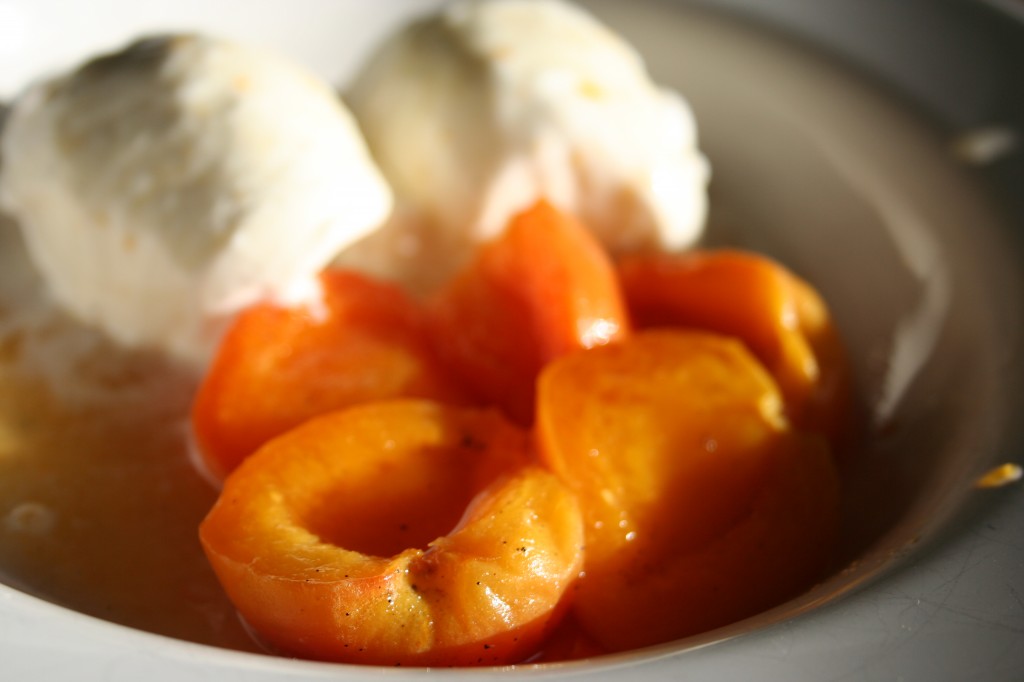
honey vanilla poached apricots

Honey Vanilla Poached Apricots
from Gourmet, June 1996

Serves 2

1 cup (240 ml) water
3 tablespoons honey
3 tablespoons sugar
1/2 vanilla bean, halved lengthwise
3/4 lb (340 g) fresh apricots (about 9 or 10 apricots), halved lengthwise and pitted
vanilla ice cream, to serve

In a 1 1/2‑quart saucepan, simmer the water, honey, sugar, and vanilla bean, covered, for 5 minutes. Add the apricots and simmer, covered, until just tender but not falling apart, 2 to 5 minutes (mine were done after 2 minutes), depending on how ripe the fruit is.

Transfer the apricots with a slotted spoon to a bowl and boil the syrup until it has reduced to about 1/2 cup (120 ml). Pour the syrup over the apricots and chill for 25 minutes. Serve with vanilla ice cream, with the syrup spooned over.