Tag Archives: Beans

Vegetarian Chili on Quinoa and Spicy Caramel Popcorn

Every year, my New Year’s resolutions are the same — be nicer and be healthier. This quick and easy menu won’t help with the “nicer” goal but sure helps with the “healthier” bit. We especially loved this dinner after a month of calorie-heavy holiday and birthday meals. Reuben’s recent discovery of the quinoa-filled menu at Protein Bar in the Chicago Loop was the inspiration for his chili and quinoa creation. For anyone else looking to lose weight or eat healthier this year, quinoa is a great dinner choice. It’s high protein, high fiber, and satisfying enough that you don’t miss the mashed potatoes or pasta that might otherwise be on your plate.

Even tonight’s dessert isn’t too decadent. Though drenched in caramel, the popcorn is relatively low in fat (only 3 tablespoons of butter!). The kicky cayenne has also been shown to increase metabolism. And, of course, it’s tasty, as in hide-it-or-I’ll-eat-the-whole-batch tasty.

Vegetarian Chili on Quinoa

2 teaspoons olive oil
1 onion, diced
1 teaspoon each of cumin, dried oregano, salt
2 stalks celery, diced
1 bell pepper, diced
4 cloves garlic, minced
1 jalapeno, minced (optional)
1 x 4‑oz (110‑g) can diced green chilies
1 x 14-oz (400‑g) can black beans, drained and rinsed
1 x 14-oz (400‑g) can kidney beans, drained and rinsed
1 x 28-oz (2 x 400‑g) can crushed tomatoes
1 tablespoon chili powder
1 cup (170 g) quinoa, rinsed and drained
1 1/2 cups (360 ml) water
2 cups (300 g) corn kernels, defrosted if frozen
garnishes: sour cream or plain yogurt, minced jalapeno, minced green onion, shredded cheddar cheese

In a Dutch oven or other large saucepan, heat the olive oil over a medium heat. Add the onion and saute for 2 minutes. Add the spices, salt, celery, bell pepper, garlic, and jalapeno and cook until the garlic becomes fragrant, about 2 minutes. Add the green chilies, beans, tomatoes and chili powder and simmer for at least 15 minutes.

Meanwhile, in a medium saucepan with a lid, combine the quinoa with the water. Bring to a boil, cover, and reduce the heat. Simmer for 15 minutes, until the quinoa is tender and the water is absorbed. Fluff the cooked quinoa with a fork and set aside (covered) until the chili is ready.

About 5 minutes before serving, mix the corn into the chili mixture. Continue cooking until the corn is heated through, about 5 minutes.

For each serving, spoon the chili over the cooked quinoa and garnish to taste with sour cream or plain yogurt, minced jalapeno, minced green onion, and cheddar cheese.

***

Spicy Caramel Popcorn
from Smitten Kitchen

Makes 4 quarts

nonstick cooking spray or vegetable oil
3 tablespoons vegetable oil
1/2 cup (100 g) popcorn kernels
2 cups (250 g) salted peanuts (optional)
1 1/2 teaspoons baking soda
1/4 teaspoon cayenne pepper
3 cups (600 g) sugar
3 tablespoons unsalted butter
1 tablespoon kosher or coarse sea salt

Lightly coat two large, heatproof rubber spatulas, a very large mixing bowl and two large baking sheets with nonstick cooking spray or a thin slick of oil.

In a large saucepan or pot with a lid, heat the oil over a medium-high heat. Add the popcorn kernels, cover and keep the saucepan moving until all of the kernels have popped, about 5 minutes. Transfer to the prepared bowl, removing any unpopped kernels. Toss with salted peanuts, if using.

In a small bowl, whisk together the baking soda and cayenne pepper.

Have the two large baking sheets ready. In a medium saucepan, combine the sugar, butter, salt and 1/2 cup (120 ml) water. Cook over a high heat, without stirring, until the mixture becomes a light golden-yellow caramel, 10 to 14 minutes. Remove from the heat and carefully whisk in the baking soda mixture (the mixture will bubble up).

Immediately pour the caramel mixture over the popcorn and don’t worry if it doesn’t all come out of the pot, you’ll have plenty. Working quickly and carefully, use the prepared spatulas to toss the caramel and popcorn together, as if you were tossing a salad, until the popcorn is well coated.

Spread the popcorn onto the baking sheets and quickly separate them into small pieces while still warm. Cool to room temperature, about 15 minutes. Once cool, store in an airtight container for up to 2 weeks.

Warm Butternut and Chickpea Salad with Tahini Dressing

I think Orangette was the first food blog I ever read. Kristin pointed me towards it years ago and I was hooked. Being the thoughtful friend that she is, Kristin sent me Molly Wizenberg’s (aka Orangette) book, A Homemade Life: Stories and Recipes from My Kitchen Table, last week for my birthday. I had already planned to make this salad, but the arrival of the book sealed the deal. It was fate. It was kismet. It was delicious.
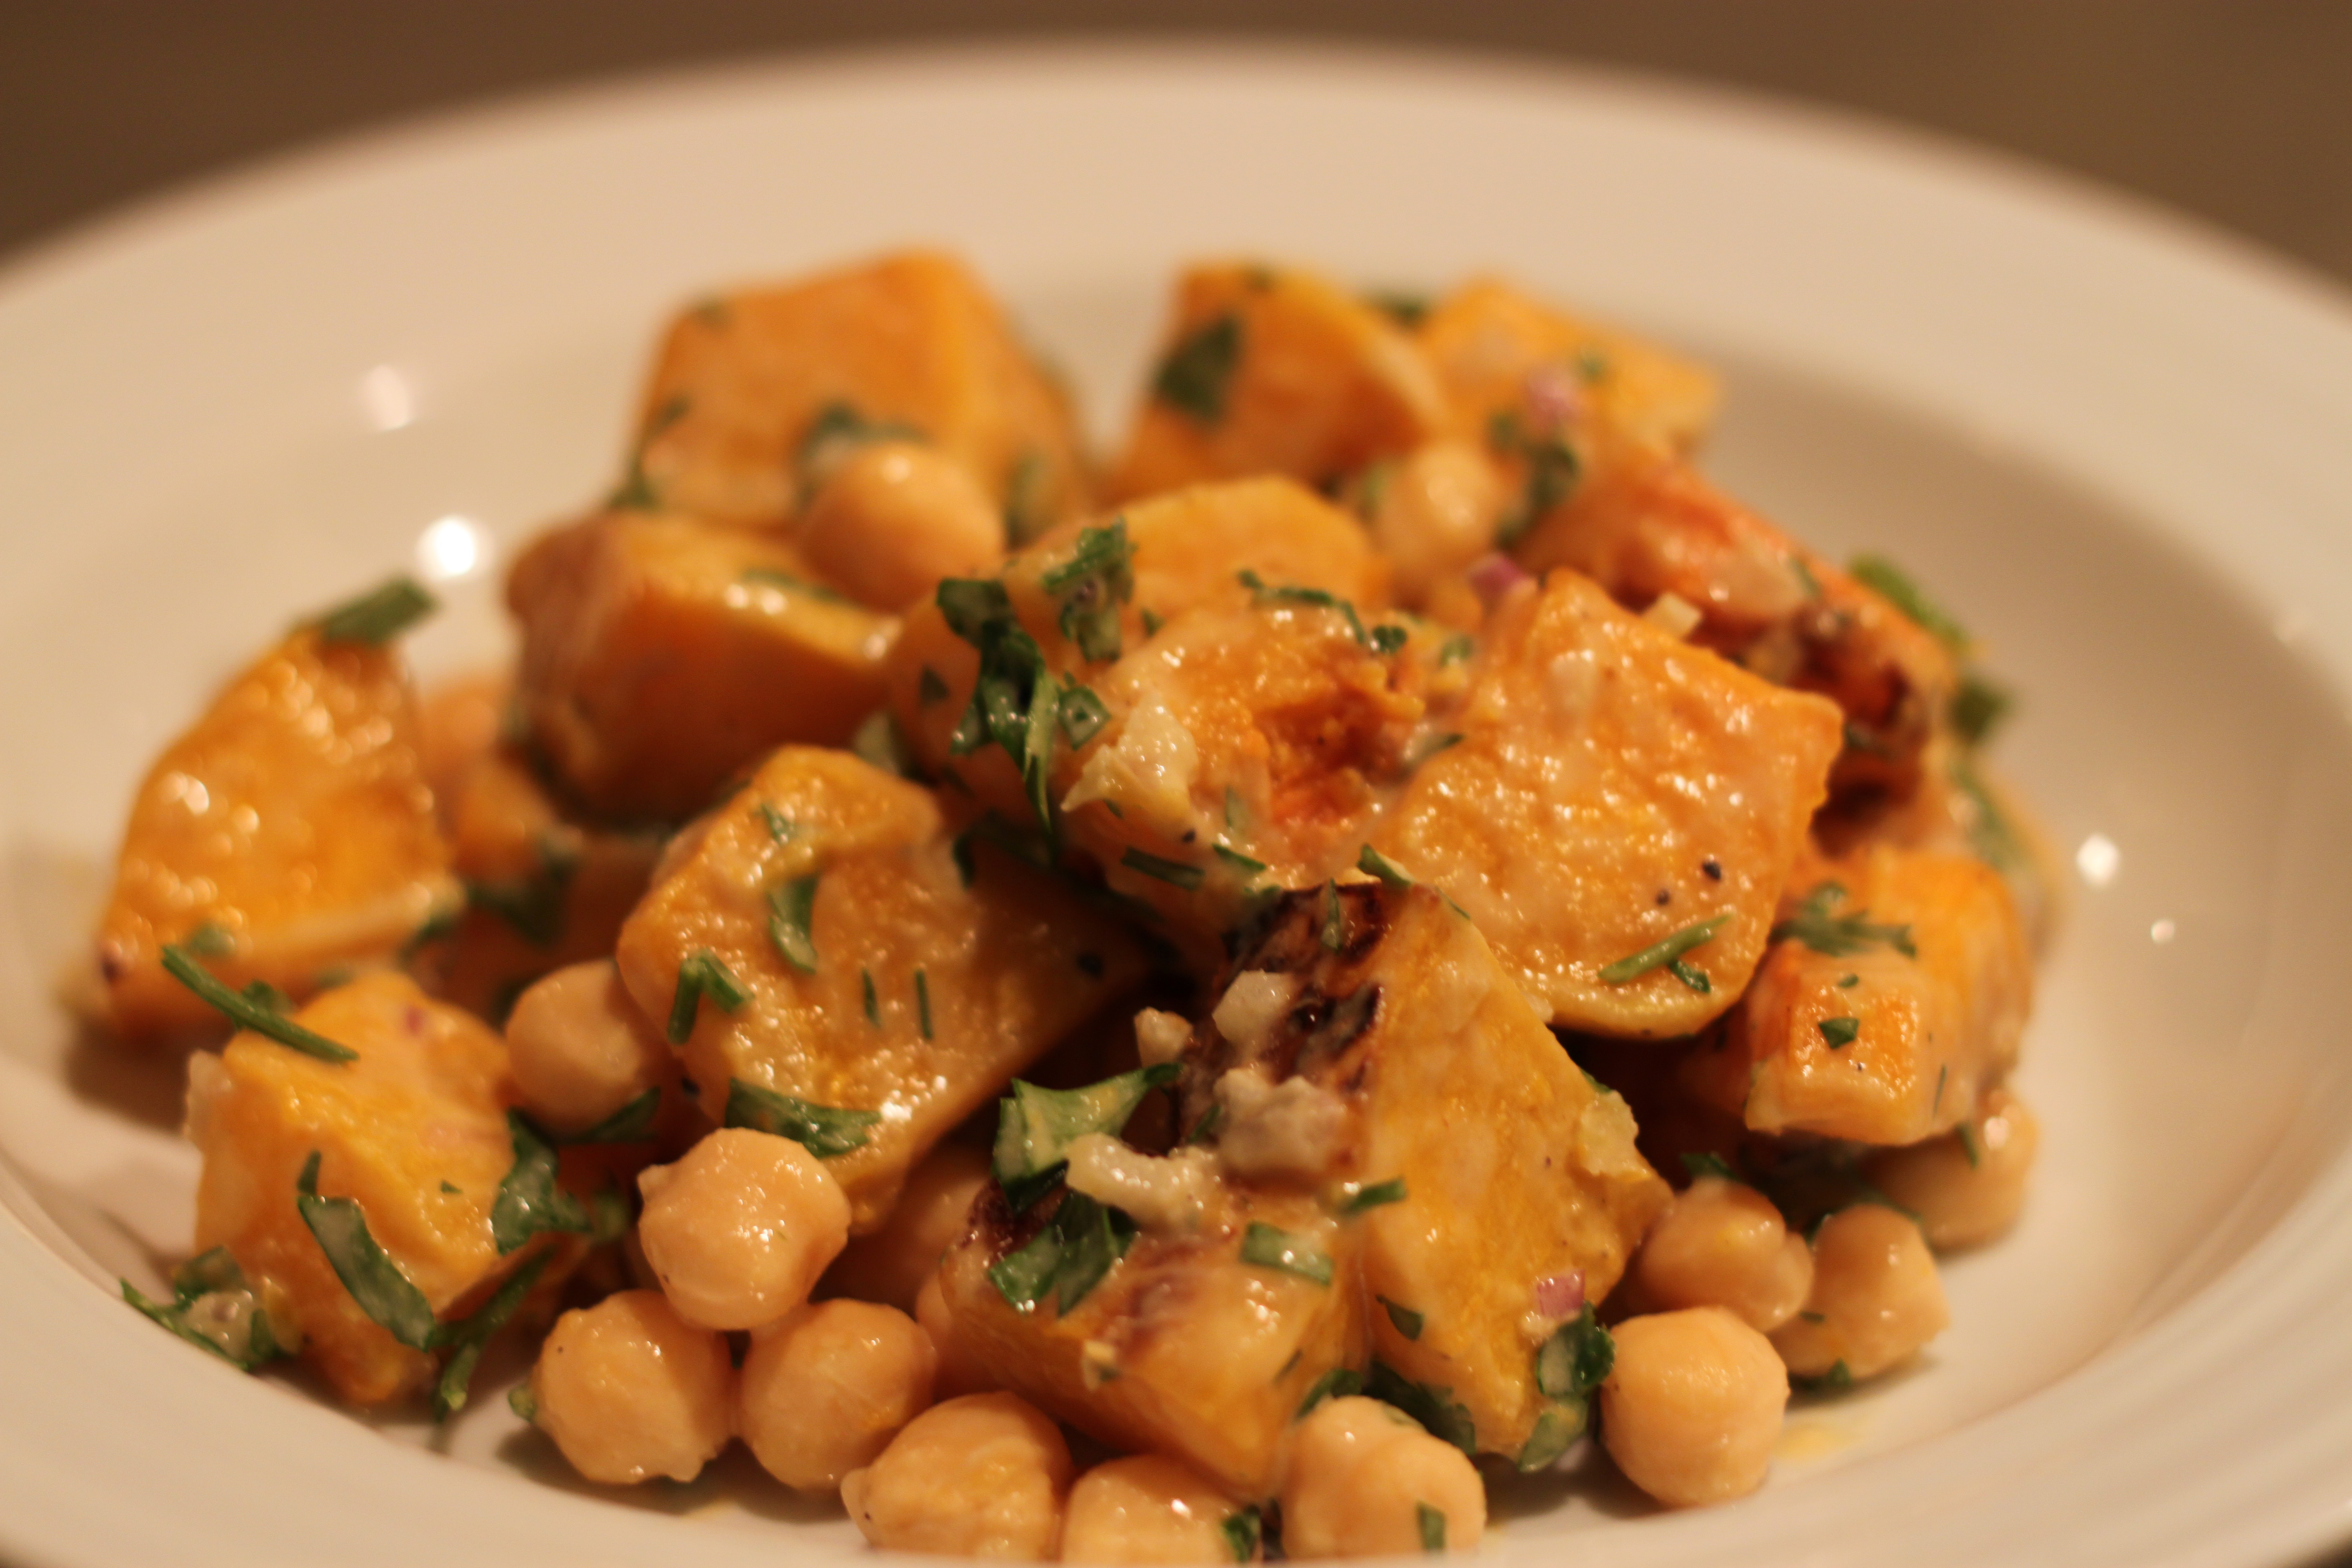
Warm butternut squash salad

Warm Butternut and Chickpea Salad with Tahini
adapted from Orangette

4 servings

For salad:
1 medium butternut squash, peeled, seeded, and cut into 1 ½‑inch pieces
1 medium garlic clove, pressed
½ teaspoon ground allspice
2 tablespoons olive oil
salt
1 x 15-oz (425 g) can chickpeas, drained and rinsed
1 or 2 shallots, finely chopped
¼ cup (10 g) coarsely chopped parsley or cilantro leaves

For tahini dressing:
1 medium garlic clove, finely minced with a pinch of salt
3 ½ tablespoons lemon juice
3 tablespoons well-stirred tahini (sesame paste)
2 tablespoons water
2 tablespoons olive oil, plus more to taste

Preheat the oven to 425°F (220°C).

In a large bowl, combine the butternut squash, garlic, allspice, olive oil, and a good pinch or two of salt. Using a large spoon or your hands, toss until the squash pieces are evenly coated. Turn them out onto a baking sheet, and bake for 15 to 25 minutes, or until soft. Remove from the oven and cool.

Meanwhile, make the tahini sauce. In a small bowl, whisk together the garlic and lemon juice. Add the tahini, and whisk to blend. Add the water and olive oil, whisk well, and taste for seasoning. The sauce should have plenty of nutty tahini flavor, but also a little kick of lemon. (I found that my tahini was a little bitter and that the lemon was a bit much, so I added additional olive oil to tame both.)

To assemble the salad, combine the squash, chickpeas, onion, and parsley in a mixing bowl. Add tahini sauce about 1/2 cup of dressing, and toss carefully. Serve, with the extra tahini dressing on the side and additional salt for sprinkling. This tastes great with a crusty piece of bread.

Note: This salad, lightly dressed, keeps beautifully in the fridge. Before serving, warm slightly with quick jolt in the microwave and serve with any extra tahini dressing.

Pasta with Greens, Garbanzo Beans and Ricotta Salata and Caramel-dipped Apples

I love one-pot meals that cover the four basic food groups. I love them even more if they can be prepared in less than 30 minutes, like this dish.  The only trouble with this dish was the cheese. I went to three stores before finding it at one of Milwaukee’s gems, Glorioso Brothers Company, an Italian grocer and specialty food shop on now-trendy Brady Street. If you can’t find ricotta salata, try substituting feta.

I’m still eating orchard apples (our CSA delivery included a couple more pounds!), but I’m not going to complain. We would have bought more if we needed to to make caramel-coated apples, a now annual tradition for us. Although you can decorate the apples with just about anything, I especially love the caramel paired with salted, roasted nuts.

IMG_7209

Pasta with Greens, Garbanzo Beans and Ricotta Salata
adapted from Food Network’s Giada at Home

Serves 4 to 6

1 lb (450 g) medium pasta shells, orecchiette or other short pasta
1/2 cup (120 ml) olive oil
2 garlic cloves, crushed
1/2 teaspoon red pepper flakes
12 oz (340 g) Swiss chard, stemmed and roughly chopped
12 oz (340 g) baby spinach leaves
1 x 15-oz (425‑g) can garbanzo beans, rinsed and drained
2 cups (280 g) small cherry or grape tomatoes
8 oz (225 g) ricotta salata cheese, crumbled
2 teaspoons lemon zest
salt and freshly ground black pepper

Bring a large pot of salted water to a boil over high heat. Add the pasta and cook until al dente, according to package directions. Drain and reserve about 1 cup (240 ml) of the pasta water.

In a large skillet over a medium-high heat, heat the oil. Add the garlic and cook until fragrant and lightly browned, about 4 minutes. Using a slotted spoon, remove the garlic and discard. Stir in the red pepper flakes to the oil. Add the chard and cook until wilted. Add the spinach and cook until wilted, stirring. Add the beans and tomatoes and cook for 5 minutes. Turn off the heat. Add the pasta, half the cheese, and lemon zest. Toss well and thin out the sauce with a little pasta water, if needed.

Transfer to a large serving bowl and season with salt and pepper. Sprinkle with the remaining cheese and serve.

***

Caramel-coated Apples
adapted from Kraft

Makes 5 caramel apples

5 apples, washed and well dried
14 oz (400 g) caramels, unwrapped
2 tablespoons water
toppings: chopped nuts, mini chocolate chips, shredded coconut, sprinkles

Insert wooden sticks (from the bag of caramels or popsicle sticks) into the stem ends of the apples. Cover a large cutting board with waxed paper and grease the paper with butter.

Cook the caramels and water in a large saucepan on a medium-low heat until the caramels are completely melted, stirring constantly.

Dip the apples in caramel. Spoon additional caramel over the apples if necessary to evenly coat them. Let excess caramel drip off. Scrape the bottoms of the apples to remove more excess caramel. Roll the apples in your topping(s) of choice. Place the apples on the prepared plate. Refrigerate for 1 hour (if you can wait). Remove from the refrigerator 15 minutes before serving; let stand at room temperature to soften slightly. Refrigerate leftovers.

Eight-layer Burritos with Slow Cooker Black Beans and Apple Bars

I’m back at work after a wonderful 16 weeks of maternity leave (probably shockingly short to our non‑U.S. readers). Life is hectic now, to say the least. There is less time for sleeping, cleaning, snuggling, and, of course, cooking. Family dinners together are still one of my top priorities though. I’d rather have a messy house than skip the half-hour table time with my husband and little ones. So, in an attempt to protect our family dinnertime, I’ve taken my Crock-Pot out of storage. I have a feeling I may need to clear a permanent space on the kitchen counter for it.

Beans are one of my favorite dishes to make in a Crock-Pot. Unlike a lot of other ingredients that tend to dissolve in the slow cooker, the texture of beans doesn’t suffer much after a full day of slow cooking. Since Reuben took care of the beans in the morning, dinner was a cinch to put together. I even had enough to energy to bake a cake when he mentioned that he “could go for some cake” after we finished our burritos. Thank you to my friend Lucinda for this bars/snack cake recipe. It’s quick and easy enough to throw together after dinner and I almost always have the ingredients in my house. Kristin also pointed out that this cake would be a great way to celebrate Apple Day, which is today.

Eight-layer Burritos with Slow Cooker Black Beans

Serves 6

1 lb (450 g) dry black beans, rinsed and picked over
1 onion, chopped
2 cloves garlic, minced
1/2 teaspoon red pepper flakes
1 teaspoon cumin
8 cups (2 liters) water
4 slices bacon, cooked and crumbled (optional)
salt
12 flour tortillas
2 to 3 cups (200 g to 300 g) cooked rice (white or brown)
toppings: shredded cheddar or Monterey jack cheese, salsa, sour cream, avocado, diced tomatoes, julienned bell pepper

Combine the beans, onion, garlic, red pepper flakes, cumin, water and bacon (if using) in a slow cooker. Cook on the low setting for 7 to 9 hours, until the beans are tender. Add salt to the cooked beans to taste, usually 1 to 2 teaspoons.

Toast the tortillas over an open flame on a gas burner for 10 to 20 seconds on each side. If you don’t have a gas stove, warm on a baking sheet in a preheated oven for 5 minutes.

Fill each tortilla with rice, beans and toppings, to taste.

***

Apple Bars

from allrecipes.com

Makes 16 bars

1/2 cup (110 g) butter, melted
1 cup (200 g) white sugar
1 egg
1 cup (120 g) all-purpose flour
1/2 teaspoon baking soda
1 teaspoon ground cinnamon
1 cup (110 g) apples, peeled, cored and finely diced
1 cup (100 g) chopped walnuts

Preheat the oven to 350°F (180°C). Grease and flour an 8 x 8‑inch baking pan.

In a large bowl, mix the melted butter with the sugar and egg. Mix in the flour, baking soda and cinnamon, and then stir in the apple and walnuts. Spread the batter into the prepared pan. Bake for approximately 40 minutes, or until a small knife inserted in the center comes out clean.

Chard Tacos with Sweet Potato and Black Bean Salad

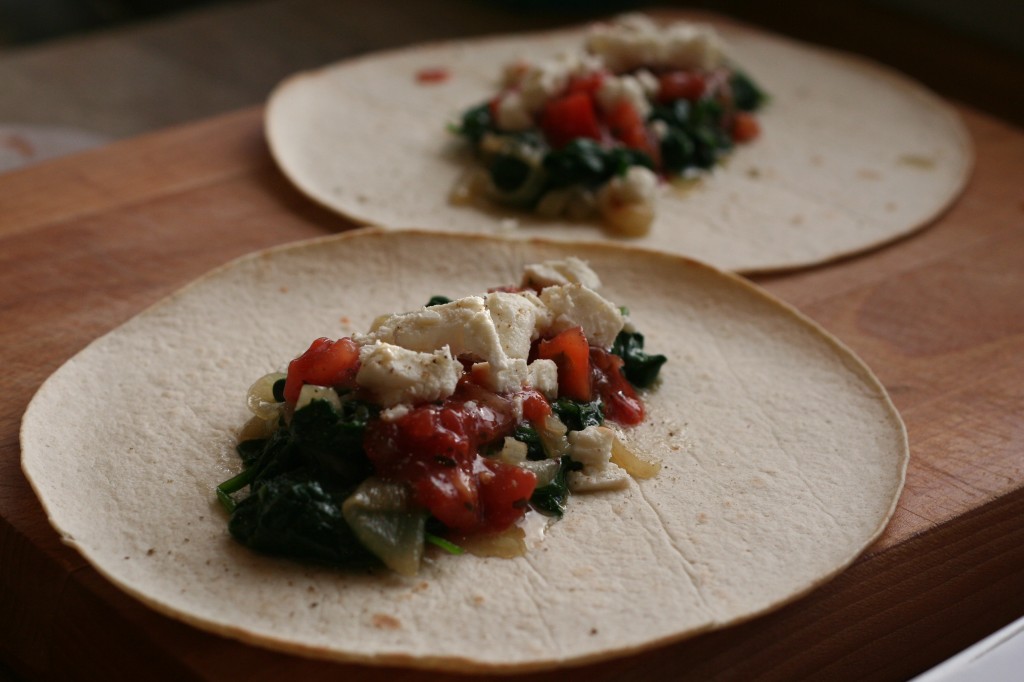
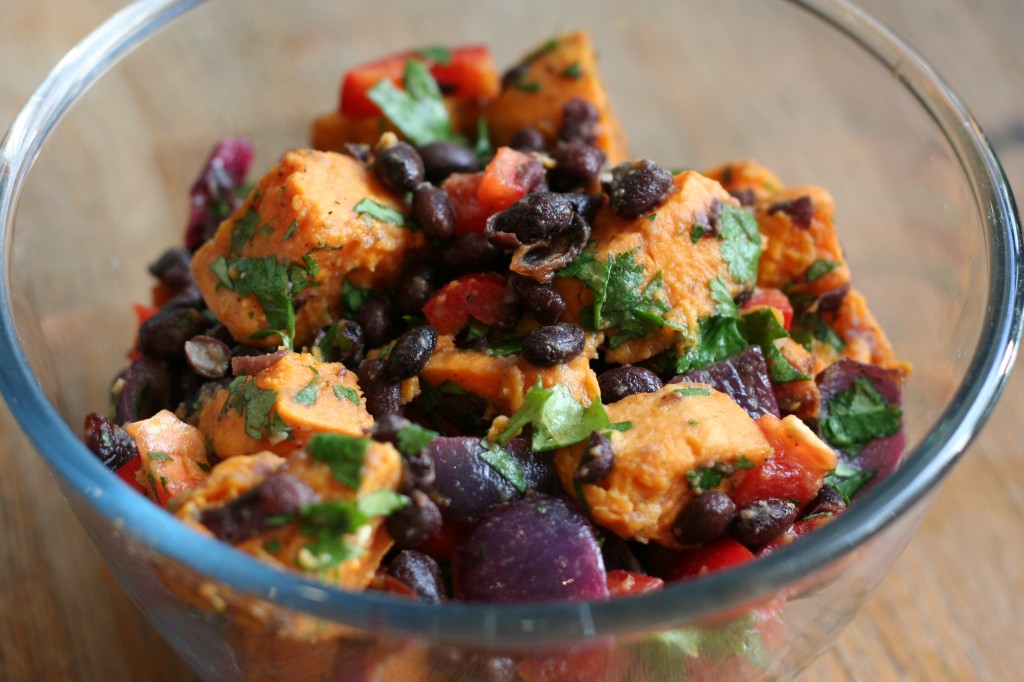
Remember how I was recently lamenting the fact that greens rarely get to be the star of the show at dinnertime? If you want to eat more greens but aren’t sure how to incorporate them, these chard tacos are another great recipe, and can use either chard or spinach. When paired with this sweet potato and black bean salad, it makes a fresh, filling dinner that still has an autumnal feel.

chard tacos

Chard Tacos
adapted from Mexican Everyday by Rick Bayless

Serves 2

Rick Bayless says that to make a heartier meal, you could add some shredded leftover chicken or steak to the greens during the final few minutes of cooking. Flaked tuna or smoked salmon is a nice add-in, but to keep it vegetarian, you could also try smoked firm tofu.

12 oz (340 g) Swiss chard, thick lower stems cut off, OR 10 oz (280 g) spinach, rinsed well
1 1/2 tablespoons vegetable oil or olive oil
1 large white or red onion, sliced 1/4‑inch thick
3 garlic cloves, finely chopped
pinch of red pepper flakes
1/2 cup (120 ml) chicken or vegetable broth or water
1/2 teaspoon salt
8 warm corn tortillas (though flour ones will also work fine, as you can see from the photo I used here; you may need fewer flour ones)
1 cup (100 g) crumbled Mexican queso fresco, feta or goat’s cheese
3/4 cup (175 ml) salsa

Cut the chard crosswise into 1/2‑inch slices (small spinach leaves can be left whole). In a large skillet, heat the oil over a medium-high heat. Add the onion and cook, stirring frequently, until golden brown but not entirely soft, about 4 to 5 minutes. Add the garlic and red pepper flakes and stir for a few seconds, then add the broth or water, salt and the greens. Reduce the heat to medium-low and cook until the greens are almost tender, anywhere from 2 minutes for baby spinach to 5 minutes for Swiss chard.

Uncover the pan, raise the heat to medium-high and cook, stirring continually, until the mixture is nearly dry. Taste and season with additional salt if you think it needs it. Serve with the warm tortillas, crumbled cheese and salsa.

***

sweet potato and black bean salad

Sweet Potato and Black Bean Salad
adapted from Mark Bittman at The New York Times

Serves 4 to 6

2 large sweet potatoes, peeled and cut into bite-sized chunks
1 large red onion, cut into large chunks
olive oil
salt and freshly ground black pepper
1 x 14-oz (400‑g) can of black beans, drained and rinsed
1 red pepper, deseeded and chopped
juice and zest of 1 lime
3 tablespoons olive oil
1 bunch fresh cilantro, chopped

Preheat the oven to 400°F (200°C).

Place the sweet potatoes and red onion on a baking tray. Drizzle with some olive oil and season with salt and pepper, tossing well to make sure all the vegetables are coated with oil. Roast in the hot oven for 20 to 30 minutes, until the sweet potatoes are just tender and taking care not to let the red onion burn.

When the potatoes and onion are done, transfer them to a large bowl. Add in the black beans and chopped red pepper. Whisk the lime juice and zest and olive oil together until emulsified (or shake to combine in a screw-top jar), then pour over the salad in the bowl, stirring gently to make sure everything is coated with the dressing. Add in the chopped cilantro and stir well again. Season to taste with salt and pepper. This can be served warm or at room temperature.

Salmon with Lime Butter Sauce, Summer Tomato Salad, and Quinoa and Kidney Beans

Summer’s over, but no one told my tomato plants. After a cool August and September, our tomatoes are finally ripe and in abundance. I feel like every year I struggle to use up our tomato harvest only to plant more tomato plants the following year. This year, in addition to our CSA tomatoes and backyard containers, we (and by “we” I mean my father-in-law) are working a community garden plot. Kristin’s already posted wonderful tomato recipes, but here’s another to add to the collection.

In addition to the refreshing tomato salad, I rounded off dinner with a tangy broiled salmon dish and a new recipe, which uses quinoa. I recently discovered quinoa and am still experimenting with its possibilities. It’s one of the most nutrient-rich ingredients I’ve eaten, with high protein and lots of fiber. Not a bad carbohydrate choice as I try to shed those last few pregnancy pounds.

Salmon with Lime Butter Sauce
adapted from Gourmet, July 2006

Serves 4

4 pieces center-cut salmon fillet (about 1 inch thick) with skin
1 garlic clove, chopped
1/4 cup (60 ml) fresh lime juice
1/2 teaspoon salt
1/4 teaspoon black pepper
1/4 stick (4 tablespoons/60 g) unsalted butter, melted

Prepare the broiler or grill for cooking over a medium heat. Season the salmon all over with salt and pepper, then broil or grill, skin side down, on a lightly oiled grill rack (if using a grill, keep the lid on) for 8 to 10 minutes, until just cooked through.

While the salmon cooks, puree the garlic with the lime juice, salt, and pepper in a blender until smooth. With the motor running, add the melted butter and blend until emulsified, about 30 seconds.

Remove the salmon from the rack. I usually (but not always) remove the skin before plating; the flesh should slide easily off the skin. Drizzle each fillet with 1 or 2 tablespoons of the lime butter sauce. Serve immediately.

***

Summer Tomato Salad

Summer Tomato Salad
adapted from The New Vegetarian Epicure by Anna Thomas

Serves 6 (salad servings)

3 or 4 big, juicy vine-ripened tomatoes
1/2 medium red onion
1 bunch flat-leaf parsley
2 tablespoons olive oil
a few drops of vinegar
salt and freshly ground black pepper, to taste

Wash the tomatoes and slice them thickly crosswise. Arrange them in a single layer on a large platter. Slice the onion crosswise, thinly but not paper thin. Scatter the onion rings over the tomatoes.

Wash the parsley leaves and spin them in a salad spinner. Arrange them in a wreath around the tomatoes. Drizzle the tomatoes with the olive oil and sprinkle them with a few drops of your favorite vinegar. Add salt to your taste, and grind on some black pepper. Serve within the hour. Do not refrigerate!

***

Quinoa and Kidney Beans
adapted from Feeding the Future Cookbook (American Pregnancy Association member recipes)

8 servings

1 teaspoon vegetable oil
1 onion, chopped
3 cloves garlic, minced
3/4 cup (140 g) uncooked quinoa
1 1/2 cups (360 ml) chicken or vegetable broth
1 teaspoon ground cumin
1/4 teaspoon cayenne
salt and freshly ground black pepper, to taste
kernels from 2 ears of corn
1 x 15-oz (425‑g) can kidney or black beans, rinsed and drained
1/2 cup (15 g) chopped fresh cilantro
juice of 1 lime
avocado and/or sour cream for garnish, if desired

Heat the oil in a medium saucepan over a medium heat. Stir in the onion and garlic and saute until lightly browned. Mix the quinoa into the pan and cover with the broth. Season with cumin, cayenne, salt, and pepper. Bring the mixture to a boil. Cover, reduce the heat and simmer for 20 minutes. Stir the corn into the saucepan and continue to simmer for about 5 minutes, until heated through. Mix in the beans and continue to cook over a low heat for 2 or 3 minutes more. Stir in the cilantro. Garnish with avocado and sour cream, if desired.

Chili Fried Mackerel with Spiced Chickpea Salad and Polenta

About two years ago, my husband, daughter and I went to Copenhagen for a long weekend. Our daughter was two and a half at the time, but already was a great eater. Put her in front of a selection of ice cream, and she won’t choose chocolate or vanilla — she’ll go for Turkish delight (though in all honesty, that might just be because it’s pink). Olives, radishes, salt and vinegar potato chips and Roquefort cheese are some of her favorite foods. So we might have known better than to order her a hamburger off the kids’ menu when we went to the Cap Horn restaurant one night. She wouldn’t touch it, and instead devoured almost all of the trout Matt had ordered for himself, simply pan fried in butter (poor Matt wound up eating the burger). When it comes to fish (and her tastes in general), it seems that the stronger the flavor, the more she likes it.

This past summer, I served mackerel to her for the first time, as well as my one-year-old son. They each gobbled up their entire fillet and ate most of ours to boot. We couldn’t get over it, since we thought it might be too strong-tasting for them compared to, say, white fish. The next time he was in getting fish, Matt mentioned to the fishmonger how much our kids had liked it, who wasn’t surprised. “Kids love mackerel,” he said. That’s good news to me, since it’s an oily fish and so is a good source of omegas, plus it’s cheap, about 1 euro per fillet.

Mackerel is still in season, so get some while you can and give this simple recipe a try, which only takes 5 minutes to cook. If you’re serving this to kids who don’t like spicy food, just fry their fish first and leave out the chili, then add it to the pan when you’re ready to fry the rest. Ask your fishmonger to debone the mackerel for you, especially if you’re serving it to children, because it has lots of them and some of them are pretty big.

Chili Fried Mackerel
from Fresh from the Sea by Clodagh McKenna

Serves 2

2 tablespoons (60 g) butter
1 red chili, deseeded and finely chopped
1 garlic clove, crushed
4 fresh mackerel fillets
sea salt and freshly ground black pepper
juice of 1 lemon

Heat a frying pan and drop in the butter, chili and garlic. Once the chili butter begins to foam, add the mackerel, skin side down, and fry for 2 minutes. Season with salt and pepper, turn the fish over, squeeze the lemon juice over the fish and cook for a further 2 minutes. Remove to a plate and drizzle the chili butter over the fillets.

***

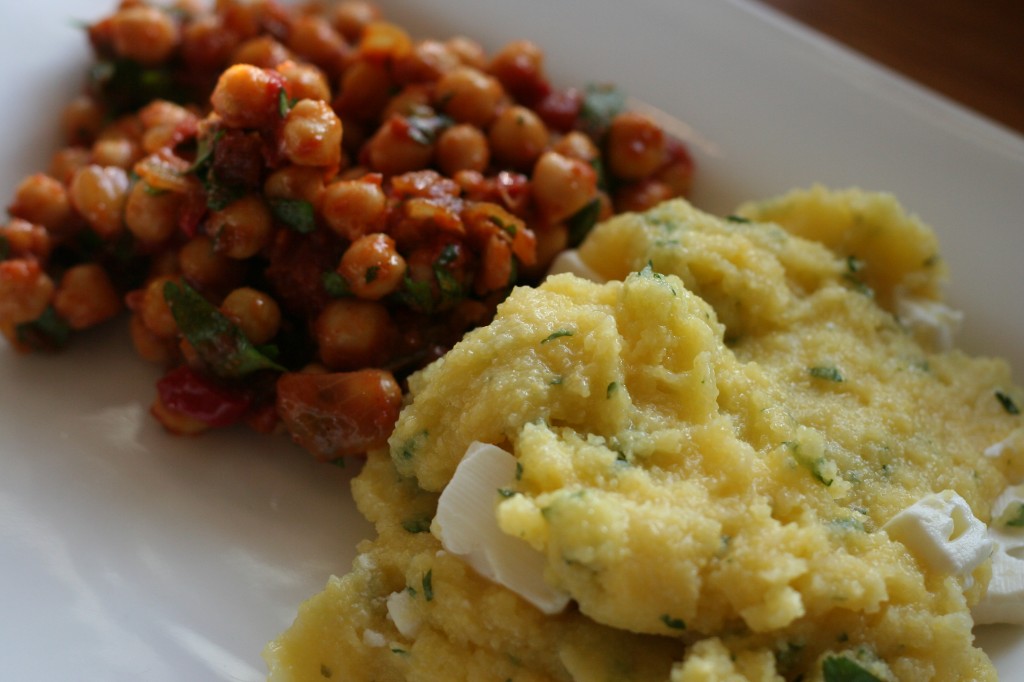
spiced chickpea salad and polenta with feta and cilantro

Spiced Chickpea Salad
adapted from Avoca Café Cookbook 2

Serves 6

1 onion, finely chopped
3 tablespoons olive oil
1‑inch piece of fresh root ginger, grated (or 1 teaspoon ground ginger)
1 red chili, deseeded and finely chopped
2 teaspoons curry powder
1 teaspoon ground cumin
1 teaspoon ground coriander
pinch of turmeric
4 garlic cloves, chopped
1 x 14-oz (400‑g) can of tomatoes
3 x 14-oz (400‑g) cans of chickpeas, rinsed and drained
1 bunch of fresh cilantro, roughly chopped
1 bunch of fresh flat-leaf parsley, roughly chopped

Gently saute the onion in the olive oil for 10 to 15 minutes without allowing it to color. Add all the spices, chili and the garlic and cook for 2 minutes. Add the tomatoes and reduce the heat to low. Continue to cook for 15 to 20 minutes, stirring occasionally, to allow it to reduce slightly. Dress the chickpeas in the tomato sauce while it’s still warm. Allow the chickpea mixture to cool slightly, then add the herbs (this stops them from discoloring). Serve warm or at room temperature. This salad is even better the next day.

***

Polenta with Feta and Cilantro
adapted from Vegetarian Cooking for Everyone by Deborah Madison

2 cups (340 g) coarse cornmeal
6 to 8 cups (about 1 1/2 to 2 liters) vegetable or chicken stock or water
2 to 6 tablespoons (30 to 90 g) butter (optional)
1 1/2 cups (250 g) feta cheese, cubed or crumbled
1 bunch fresh cilantro, chopped

Bring 6 cups (1 1/2 liters) of the stock (or water) to a boil in a large, heavy-based saucepan and add the cornmeal in a steady stream, whisking constantly to stop lumps from forming and to help prevent the maize from seizing up in the first few minutes. Lower the heat and cook, stirring almost constantly, for 30 to 45 minutes. If the polenta seizes up into a hard mass, add small amounts of the remaining 2 cups (480 ml) of stock or water while it cooks to smooth it out again. When done, season to taste with salt (you may not need any if your stock is salty). Stir in butter to taste.

Off the heat, stir in the cubed or crumbled feta cheese and chopped cilantro. Serve the soft polenta immediately or keep it warm over boiling water until ready to serve.

Late-summer Roast Beef Dinner and French Apple Tart

Nigella Lawson’s How to Eat: The Pleasures and Principles of Good Food is one of the bibles of modern-day cookbooks. It’s also one of the first cookbooks I bought in Ireland, and has taught me how to make things I’d never even heard of before moving abroad, like Yorkshire pudding and trifle. It also spells out the makings of something else that was completely foreign to me: a proper Sunday lunch. Nigella Lawson writes about it for four straight pages in How to Eat, but what sums it up rather romantically is this: “Sunday lunch … is about solidity, the family, the home.”

Sunday lunch is an institution in a lot of families, but it took me a long time to come around to its charms, especially since I’m the one doing all the cooking that goes into a big Sunday lunch, not my mother. In my case, I like to have our big meal as a late lunch at the weekends now simply because my kids are in better moods at that time of day, which not only means they’re more likely to eat what I put in front of them, but makes for a more pleasant dinner for all of us. Plus now that my daughter needs a packed lunch every day for school, a roast does double duty as Sunday’s dinner and Monday’s sandwich.

Strictly speaking, this menu isn’t a traditional Sunday lunch — there’s no roast potatoes, or the vegetables like carrots, parsnips or broccoli that you’d usually expect. But one of the things I love about How to Eat is that it contains lots of ready-to-go menus, not just stand-alone recipes, and this is Nigella’s late-summer roast beef menu from the “Weekend Lunch” chapter (though I made the French apple tart instead of the Yorkshire pudding with syrup and cream she calls for, and I also prefer Bon Appétit’s one-pot version of the cannellini beans with garlic and sage for being easier and more straightforward than Nigella’s recipe). After holding out all month, it’s finally time to embrace autumn, and this dinner seemed like a good compromise.

It’s National Organic Week in Ireland! Click here for a listing of events throughout the country.

Cold Roast Fillet of Beef 
from How to Eat by Nigella Lawson

Serves 8

fillet of beef — allow about 7 oz (200 g) per person
olive oil

Allow the beef to come to room temperature before you cook it (otherwise the cooking times here won’t be correct).

Preheat the oven to 480°F (250°C). If it’s possible to switch off the fan in your oven, do so in order to reduce evaporation (75% of lean meat is water, so fan ovens can make even good cuts of meat dry and tough).

Place the fillet in an ovenproof dish or roasting tray. Rub the beef all over with olive oil. (Nigella advises using a rosemary-infused oil for this menu, but plain olive oil works just fine too.)

Cook the beef for 15 minutes at the very high heat, then reduce the oven to 350°F (180°C). Cook the beef for 15 minutes per 18 oz (500 g) for rare; 18 minutes per 18 oz (500 g) for medium; and 25 minutes per 18 oz (500 g) for well done.

After the meat has had its advised cooking time, test it: either press it (if it feels soft it’s rare, bouncy it’s medium, hard it’s well-done) or pierce it with a knife to see. Always let any meat rest out of the oven for at least 10 minutes before carving.

If you’re cooking the beef ahead of time, take it out of the fridge 2 hours before you want to eat it. It should be cold, but not chilled. Or you could cook the fillet early enough in the day to simply allow it to cool to room temperature by the time you want to eat.

***

Rosemary and Anchovy Mayonnaise

1 cup (240 ml) mayonnaise
8 anchovy fillets in oil, drained and diced
1 sprig rosemary, finely chopped
1 tablespoon lemon juice
salt and freshly ground black pepper

Combine all the ingredients, mixing well. Chill until ready to serve. Serve alongside the beef. (This is also great to make sandwiches with the beef leftovers.)

***

Cannellini Beans with Garlic and Sage 
from Bon Appétit, October 2009

Makes about 6 cups

1 lb (450 g) dried cannellini beans
8 cups (2 liters) room-temperature water
2 tablespoons olive oil
1 large head of garlic, unpeeled, top 1/2 inch cut off to expose cloves
1 large sprig of fresh sage
1/4 teaspoon whole black peppercorns
1 teaspoon coarse kosher salt
extra virgin olive oil (for drizzling)

Place the beans in a large bowl. Cover with cold water (at least 6 cups/1 1/2 liters) and soak overnight.

Drain the beans and place in a heavy, large pot. Add the 8 cups (2 liters) of room-temperature water, olive oil, garlic, sage, and black peppercorns. Bring to a simmer over a medium-high heat. Reduce the heat to medium-low and simmer, uncovered, for 1 1/2 hours, stirring occasionally. Mix in the coarse salt. Continue to simmer until the beans are tender, adding more water if needed to keep beans covered, about 30 minutes longer. Cool the beans in the cooking liquid for 1 hour.

Using a slotted spoon, transfer the beans to a serving bowl, reserving the bean cooking liquid, if desired, but discarding the garlic, sage, and peppercorns. Season the beans to taste with pepper and more coarse salt. Drizzle with extra virgin olive oil and serve.

***

Tomato Salad
from How to Eat by Nigella Lawson

For this salad, simply slice some tomatoes (the best and ripest you can find) and arrange them on a plate. Sprinkle with salt, pepper and sugar (only if you think they need it, and even so, just a pinch), as well as some finely chopped spring onions or chives, a drop or two of balsamic or red wine vinegar, and a drizzle of extra virgin olive oil.

***

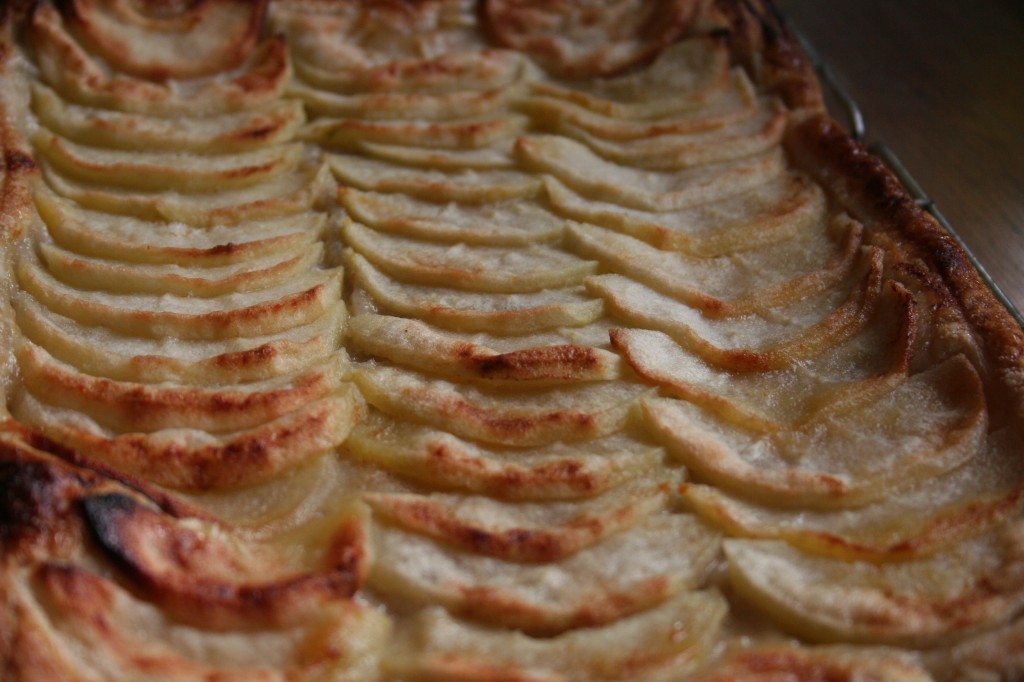
french apple tart

French Apple Tart (or Tarte Fine Aux Pommes, as Nigella Lawson calls it)
adapted from Barefoot Contessa Back to Basics by Ina Garten and Nigella Express by Nigella Lawson

Serves 4 to 6

This is mostly Nigella’s recipe, but the apricot jam and Calvados brushed on top is Ina’s touch from her version. The tart will still be delicious if you don’t add the jam mixture though. I pulled this together in 10 minutes, so it would also be a quick weeknight treat.

1 sheet shop-bought ready-rolled puff pastry, defrosted if frozen
2 large Granny Smith apples
2 tablespoons sugar
2 tablespoons (30 g) cold unsalted butter, small diced
1/4 cup (60 ml) apricot jam
2 tablespoons Calvados, rum, or water

Preheat the oven to 400°F (200°C). Line a sheet pan with parchment paper.

Lay the sheet of puff pastry on the lined baking sheet. Using the tip of a sharp knife, mark a 1/2‑inch border all the way around the edge of the rectangle. You need to score the lines on the pastry rather than cut all the way through it. This will allow a frame to rise above the apple filling. Refrigerate the dough while you prepare the apples.

Peel the apples and core them, then cut them in half. Slice the apples into 1/4‑inch-thick slices. Working from the inside edge, place the apple slices, closely overlapping, within the border of the pastry frame. Create neat lines of apple slices until the pastry is covered. Sprinkle with the sugar and dot with the butter.

Bake for 20 to 25 minutes, until the pastry is browned and the edges of the apples start to brown. Rotate the pan once during cooking. If the pastry puffs up in one area, cut a little slit with a knife to let the air out. And don’t worry if the apple juices burn in the pan, the tart will be fine. When the tart’s done, gently heat the apricot jam together with the Calvados, rum, or water and brush the apples and the pastry completely with the jam mixture. Loosen the tart with a spatula so it doesn’t stick to the paper. Allow to cool and serve warm or at room temperature, cut into squares or slices.