Category Archives: Cakes

Coq au Vin and Gâteau au Chocolat Fondant de Nathalie

Don’t be intimidated by this post’s fancy name — I could have just called it chicken in wine and chocolate mousse cake, but where’s the fun in that? I had a Francophile friend over for lunch the other day, so decided it was as good a time as any to make the Barefoot Contessa version of coq au vin that I’ve been wanting to try. And after being very good for all of January and not baking a single thing, I undid all my efforts and made this cake. But oh, such a cake. It’s one of my top two favorite cakes (Beatty’s chocolate cake is the other). Fudgy, smooth and intense, it was worth every previously forsaken calorie.

This is a great menu for entertaining because you can make both dishes in advance. In fact, the cake gets even better after a day or two. It’s also incredibly easy to make — just melt the chocolate and butter together, then stir in all the rest of the ingredients in the same bowl (you can watch Trish Deseine herself making it to see just how easy it is). You often hear that you should use the best-quality ingredients you can find, but it’s particularly true for this cake. I used Green & Black’s organic chocolate, organic eggs and Lurpak butter from Denmark.

Ina Garten suggests serving the coq au vin with garlic mashed potatoes, but I wanted to make things easier on myself and so just served it with a good store-bought crusty bread instead. I also served a green salad with balsamic vinaigrette and a plate of Brie and Roquefort. There are few better ways to spend an afternoon than with a good friend, good conversation and a table full of good food.

Coq au Vin
adapted from Back to Basics by Ina Garten

If you can’t find frozen small whole onions and don’t want to bother with peeling small shallots, just use 2 yellow onions instead of the 1 called for at the start of the recipe. And if you don’t have a Dutch oven, simmer the coq au vin on the stovetop for 45 minutes to 1 hour instead.

2 tablespoons olive oil
4 oz (110 g) bacon or pancetta, diced
1 x 3 to 4‑lb (1.4 to 1.8 kg) chicken, cut into eighths (or use an equal weight of chicken breasts and thighs)
kosher salt and freshly ground black pepper
1/2 lb (225 g) carrots, cut diagonally in 1‑inch pieces
1 yellow onion, sliced
2 teaspoons salt
1 teaspoon freshly ground black pepper
1 teaspoon chopped garlic
1/4 cup (60 ml) Cognac or good brandy
1/2 bottle (375 ml) good dry red wine such as Burgundy
1 cup (240 ml) good-quality chicken stock
10 fresh thyme sprigs
2 tablespoons unsalted butter, at room temperature, divided
1 1/2 tablespoons all-purpose flour
1/2 lb (225 g) frozen small whole onions (or small peeled shallots*)
1/2 lb (225 g) cremini mushrooms (button mushrooms will also work fine), stems removed and thickly sliced

*Note: To peel shallots easily, drop them into a pot of boiling water for less than 1 minute. Drain, then slip off the skins.

Preheat the oven to 250°F (120°C).

Heat the olive oil in a large Dutch oven. Add the bacon and cook over medium heat for 8 to 10 minutes, until lightly browned. Remove the bacon to a plate with a slotted spoon.

Meanwhile, lay the chicken out on paper towels and pat dry. Liberally sprinkle the chicken on both sides with salt and pepper. When the bacon is removed, brown the chicken pieces in batches in a single layer for about 5 minutes, turning to brown evenly. Remove the chicken to the plate with the bacon and continue to brown until all the chicken is done. Set aside.

Add the carrots, onions, salt and pepper to the pan and cook over medium heat for 10 to 12 minutes, stirring occasionally, until the onions are lightly browned. Add the garlic and cook for 1 more minute. Add the Cognac and put the bacon, chicken, and any juices that collected on the plate into the pot. Add the wine, chicken stock, and thyme and bring to a simmer. Cover the pot with a tight-fitting lid and place in the oven for 30 to 40 minutes, until the chicken is just not pink (or simmer on the stovetop for 45 minutes to 1 hour). Remove from the oven and place on top of the stove.

Mash 1 tablespoon of butter and the flour together and stir it into the stew to thicken it. Add the frozen onions (if using peeled shallots, saute them along with the mushrooms in the next step before adding to the stew). In a medium saute pan, add the remaining 1 tablespoon of butter and cook the mushrooms over a medium-low heat for 5 to 10 minutes, until browned. Add to the stew. Bring the stew to a simmer and cook for another 10 minutes. Season to taste and serve hot.

***

Gâteau au Chocolat Fondant de Nathalie
adapted from Je veux du chocolat! by Trish Deseine (recipe via Orangette and RTÉ)

This cake is even better on the second day, so consider making it the day before serving. Molly Wizenberg at Orangette says this cake is also suitable for freezing, and even improves in texture and flavor after a week or two in the freezer.

7 oz (200 g) best-quality dark chocolate
1 tablespoon double-strength espresso or 1 teaspoon instant espresso powder (optional)
7 oz (200 g) best-quality unsalted butter, cut into 1/2‑inch cubes
1 1/4 cups (250 g) sugar
5 large eggs
1 tablespoon all-purpose flour
confectioners’ (icing) sugar, to dust (optional) (or you could use Trish’s chocolate glaze, recipe here)

Preheat the oven to 375°F (190°C) and butter and flour an 8‑inch round cake pan or springform tin (which is what I prefer, since you don’t have to turn it out).

Finely chop the chocolate and place it, along with the coffee, in a double boiler or in the microwave, stirring regularly (every 30 seconds if using a microwave). Once the chocolate has melted, add the butter, stirring until it too has melted. Add the sugar to the chocolate-butter mixture, mixing well, and set aside to cool for a few moments. Add the eggs one by one, beating well with a wooden spoon after each addition, then add the flour. The batter should be smooth and dark. If you can see fat still floating on the surface or if the mixture looks at all grainy, switch to a whisk and beat lightly until smooth.

Pour the batter into the prepared cake pan and bake for 20 to 25 minutes, until the center of the cake barely trembles when the pan is shaken (the cake should be very moist in the middle) and the top is a bit crackly looking. Let the cake cool completely in the tin before you turn it out, then revert it so that the crackly side is facing upward. Dust with icing sugar or spread with the chocolate glaze and serve at room temperature.
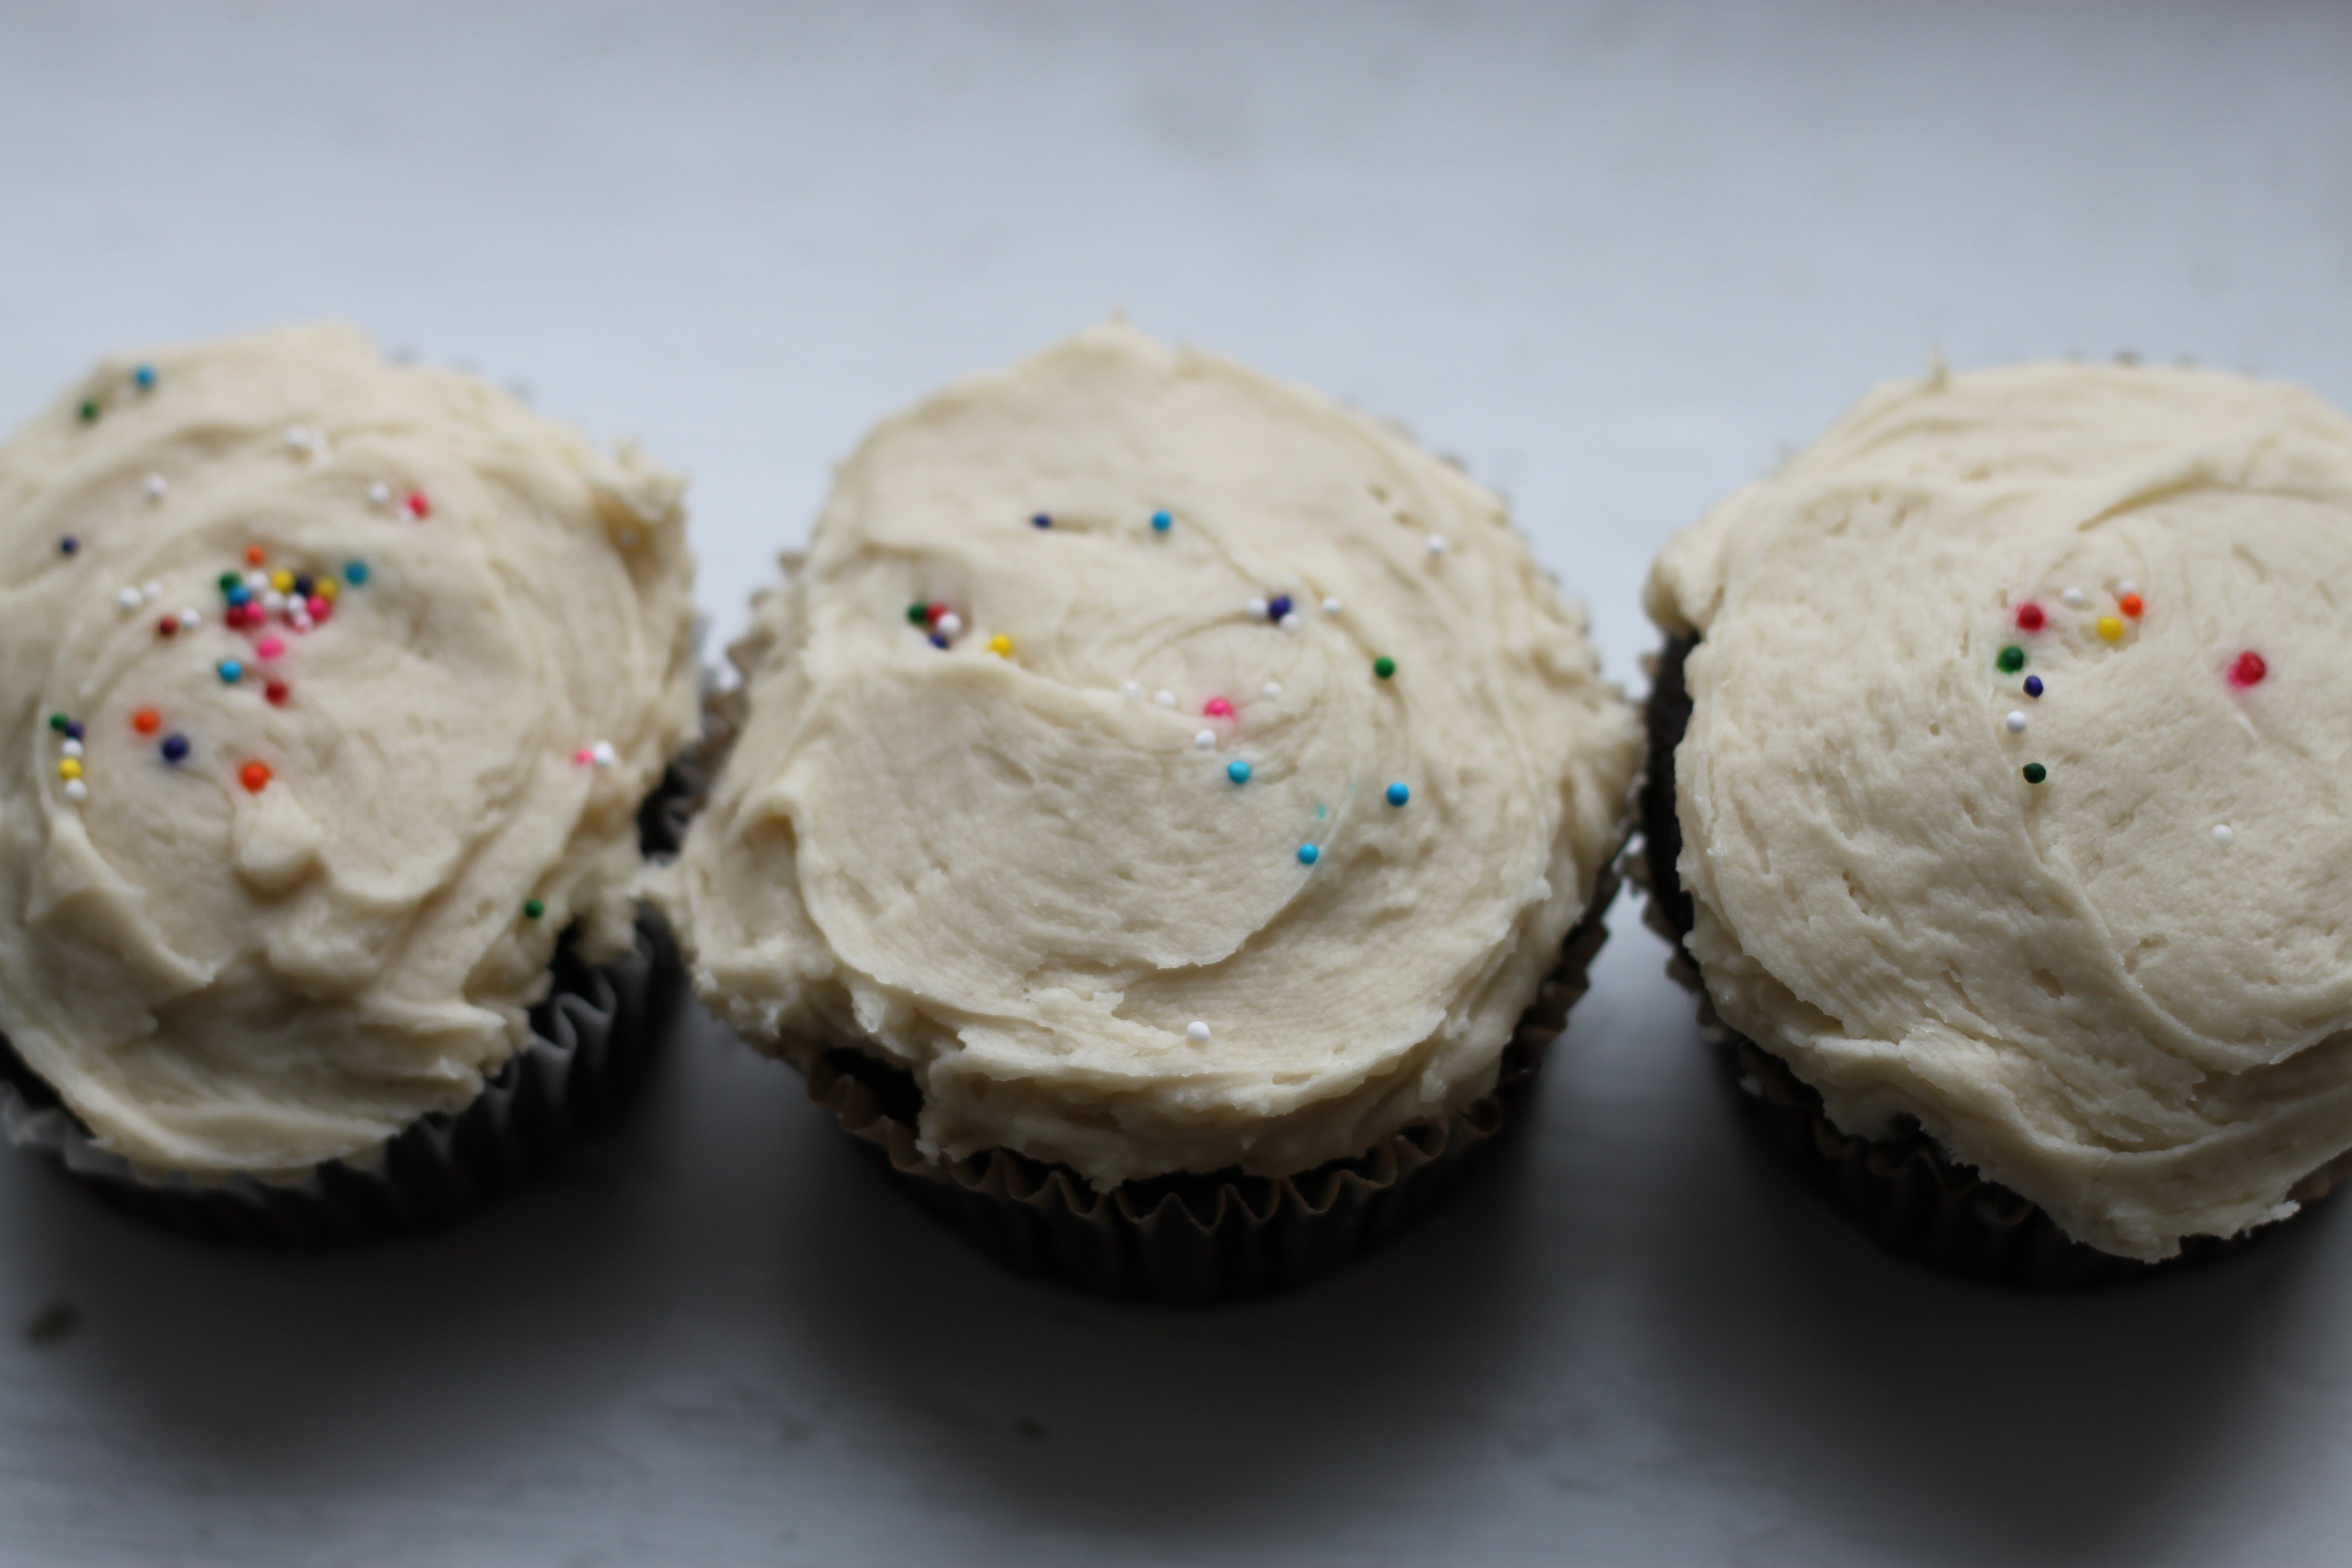
Green Chile Pork Tacos and Devil’s Food Cupcakes with Vanilla Buttercream Frosting

“I have a great idea, Mom.”

“What’s that, Sam?”

“I know, let’s make chocolate muffins. With whipped cream. And sprinkles.”

Some days, folks, that all the encouragement I need to grab the sugar from the cupboard and butter from the fridge. It didn’t hurt that our main course required little more than a few minutes of prep and the able assistance of my (er, Reuben’s) new slow cooker.

Green Chile Pork Tacos

Serves 6

3 lb (1.4 kg) pork shoulder, cut into 2‑inch cubes
2 tablespoons olive oil
1 large onion, chopped
1 teaspoon ground cumin
1 teaspoon dried oregano
1 cup (240 ml) chicken stock
1 x 4‑oz (110‑g) can diced green chilies
1 x 10-oz (280‑g) can Rotel tomatoes (or other diced tomatoes with green chilies)
3 cloves garlic, minced
1 teaspoon salt
1/2 teaspoon pepper
corn or flour tortillas
toppings: avocado, salsa, cheese, green onion, cilantro, pickled jalapenos, lime wedges

In a large frying pan, brown the pork cubes in the oil until they just begin to brown. Drain the meat and place into a slow cooker. Add the remaining ingredients through salt and pepper and cook on low until the pork is tender, about 8 hours. Gently shred the pork with a fork.

Warm the tortillas and serve the pork, taco-style, with desired toppings.

***

Devil’s Food Cupcakes
adapted from Alpineberry

Makes 1 dozen

1 1/2 cups (180 g) all-purpose flour
1 cup (200 g) granulated sugar
1/4 cup (30 g) unsweetened natural cocoa powder (don’t use Dutch-processed cocoa)
1 teaspoon baking soda
1/2 teaspoon salt
1 cup (240 ml) water
1/3 cup (80 ml) unflavored oil (canola, grapeseed, etc.)
1 tablespoon white or apple cider vinegar
1 teaspoon vanilla extract

Preheat the oven to 350°F (180°C). Line the wells of a standard muffin pan with paper liners.

Sift the flour, sugar, cocoa, baking soda and salt into a large mixing bowl. In another bowl, mix together the water, oil, vinegar and vanilla. Add the wet to the dry ingredients and mix until just combined and the batter is smooth. Be careful not to overmix.

Divide the cupcake batter evenly among the wells of your muffin pan. Bake for about 20 to 25 minutes, or until the cupcakes feel springy when gently pressed. Cool in the pan for 5 minutes, then gently remove the cupcakes from the pan and allow to cool fully on a wire rack.

Vanilla Buttercream Frosting
adapted from Magnolia Bakery

Makes enough for one 2‑layer 9‑inch cake or 2 dozen cupcakes [Note: I halved recipe for 1 dozen cupcakes]

1 cup (225 g) unsalted butter, softened
6 to 8 cups (720 g to 960 g) confectioners’ sugar (a.k.a. icing sugar)
1/2 cup (120 ml) milk
2 teaspoons vanilla extract

Place the butter in a large mixing bowl. Add 4 cups (480 g) of the sugar and then the milk and vanilla. On the medium speed of an electric mixer, beat until smooth and creamy, about 3 to 5 minutes. Gradually add the remaining sugar, 1 cup (120 g) at a time, beating well after each addition (about 2 minutes), until the icing is thick enough to be of good spreading consistency. You may not need to add all of the sugar. If desired, add a few drops of food coloring and mix thoroughly. Use and store the icing at room temperature because icing will set if chilled. Icing can be stored in an airtight container for up to 3 days.

Salmon Roasted with Herbs, Rice Pilaf with Onions, Almonds and Currants, Maple-glazed Carrots, and Icebox Cake

Today is Sam’s third birthday. We celebrated this weekend with a houseful of kids and a very patient though ultimately frazzled Kindermusic teacher. During our party planning, Sam asked for a whipped cream cake. Not knowing exactly what a whipped cream cake might entail, I turned to the trusted Smitten Kitchen. The resulting concoction, an icebox cake, is straight from the 1950s, piled high with freshly whipped cream, thin chocolate wafer cookies, a dusting of chocolate shavings, and eleven layers of deliciousness. Probably my favorite thing about the cake was the fact that it’s made the day before, leaving plenty of time in the morning to hang balloons and hide the household mess before company arrives. There was no cake left by the time we ate dinner, but it would have tasted just as good with our salmon dinner as it did with our Zaffiro’s pizza lunch.

Salmon Roasted with Herbs
adapted from How To Cook Everything: Simple Recipes for Great Food by Mark Bittman

Serves 4

2 tablespoons (30 g) butter
2 tablespoons olive oil
1 1/2 lb (680 g) salmon fillet
salt and freshly ground black pepper to taste
2 teaspoons fresh thyme
2 teaspoons fresh parsley
1 large shallot, minced

Preheat the oven to 475°F (240°C). Melt the butter until the foam subsides in a medium roasting pan in the oven as it preheats. Add the olive oil to the melted butter.

Season the salmon with salt and pepper, then sprinkle the flesh of the fillet with the herbs and shallot, pressing lightly. Carefully place the salmon in the butter and oil, flesh side down, and put the pan in the oven. Roast for about 5 minutes, then flip the salmon over and roast 4 to 6 minutes longer, until the salmon is done (peek between the flakes with a thin-bladed knife). Serve immediately.

***

Rice Pilaf with Onions, Almonds and Currants
adapted from How To Cook Everything: Simple Recipes for Great Food by Mark Bittman

Serves 4

2 tablespoons (30 g) butter or olive oil
1 small onion, chopped
1 1/2 cups (175 g) rice
salt and freshly ground black pepper
2 1/2 cups (600 ml) chicken broth, heated to the boiling point
1/2 cup (75 g) currants
1/2 cup (50 g) almond slivers
minced fresh parsley leaves, for garnish

Place the butter or oil in a large, deep skillet with a lid over a medium-high heat. When the butter melts or the oil is hot, add the onion. Cook, stirring, until the onion softens but does not brown, 5 to 8 minutes.

Add the rice all at once, turn the heat to medium, and stir until the rice is glossy and completely coated with butter or oil. Cook for 2 to 3 minutes, then stir in the almonds and cook 3 to 4 more minutes, until fragrant and starting to color lightly. Stir in the currants. Season well with salt and pepper, then turn the heat down to low and add the broth, all at once. Stir once and cover the pan.

Cook for 15 to 20 minutes, until nearly all of the liquid is absorbed. Turn off the heat and let rest for another 5 to 10 minutes. Check the seasoning, garnish and serve immediately.

***

Maple-glazed Carrots
inspired by my friend Lindsay

Serves 4

1 lb (450 g) carrots, peeled
4 tablespoons olive oil
2 tablespoons maple syrup
4 tablespoons fresh parsley, minced
salt and freshly ground black pepper to taste

Preheat the oven to 450°F (230°C).

Cut the carrots into 2‑inch-long pieces, halving or quartering large parts of the carrots so each piece is about 1/2 inch thick. Toss with olive oil, maple syrup, parsley, salt and pepper. Spread the carrots onto a large baking sheet in a single layer. Roast  for 15 to 25 minutes, until the carrots are tender, turning the carrots once or twice to prevent scorching.

***

Icebox Cake
from Smitten Kitchen

Serves 12

3 cups (700 ml) heavy cream
3 tablespoons sugar
1 tablespoon vanilla extract
2 x 9‑oz (250‑g) packages chocolate wafer cookies
unsweetened cocoa (or chocolate shavings)

In a large bowl, beat the cream, sugar and vanilla with an electric mixer on high speed until soft peaks form.

On a flat serving plate, arrange 7 cookies side by side in a circle, keeping 1 cookie in the center.

Spread with 1/2 cup (120 ml) whipped cream, making a 7‑inch circle. Repeat with the remaining cookies and cream, making 11 layers of cookies and ending with a layer of cream (there will be a few cookies left over). Cover with plastic wrap and refrigerate overnight. To serve, dust the top lightly with cocoa powder or chocolate shavings.

Pad Thai and Banana Walnut Muffins

I’ve been known to judge Thai restaurants by the quality of their pad thai and I don’t think I’m alone. Of all the Thai dishes we Westerners enjoy, pad thai is probably the best known (i.e., most ordered). Variations run the gamut, from peanut butter-based sauces to super spicy chili-flecked noodles. I’ve tried making pad thai in the past with disappointing results. It seemed almost too hard to wade through all the variations to find a good recipe. A few things seem to be universal (rice noodles, peanuts, lime), but the true taste of pad thai, or what I wanted pad thai to be, eluded me until Reuben found this Alton Brown version. The small quantities of some of the hard-to-find ingredients may lead you to believe you don’t really need them, but trust me, you do. Somehow a couple tablespoons of dried shrimp or a few shreds of salted cabbage really make the dish what it is. And these odd ingredients all freeze or refrigerate well for several months, so they won’t go to waste.

I’ve been making the banana walnut muffins for years. They’re moist and not too sweet, with a nearly crisp top thanks to all the butter. These freeze well too. To freeze, simply cool the muffins, then drop them into a Ziploc bag. They’ll keep for up to two months. I grab a couple frozen muffins when I wake up in the morning, then by the time the kids are dropped off at school, I can leisurely enjoy the now-defrosted muffins in the car on my way to work.

Pad Thai
adapted from Alton Brown

Serves 2

1 oz (30 g) tamarind paste
3/4 cup (180 ml) boiling water
2 tablespoons fish sauce
2 tablespoons brown sugar
1 tablespoon rice wine vinegar
4 oz (110 g) rice stick noodles
8 oz (225 g) tofu, pressed and then cut into 1/2‑inch-wide strips
2 tablespoons soy sauce
2 tablespoons peanut oil
1 bunch scallions, chopped, divided
2 teaspoons minced garlic
2 eggs, beaten
1 tablespoon salted cabbage
1 tablespoon dried shrimp
3 oz (90 g) bean sprouts, divided
1/2 cup (75 g) roasted salted peanuts, chopped, divided
freshly ground dried red chili peppers, to taste
1 lime, cut into wedges

Place the tamarind paste in the boiling water and set aside while preparing the other ingredients.

Combine the fish sauce, sugar, and rice wine vinegar in a small bowl and set aside.

Place the rice stick noodles in a mixing bowl and cover with hot water. Set aside while you prepare the remaining ingredients. Once the other ingredients are measured out into separate bowls, drain the water from the noodles and set them aside.

In a small bowl, toss the tofu with the soy sauce and let it marinate.

Press the tamarind paste through a fine mesh strainer and add to the sauce. Stir to combine.

Place a wok over a high heat. Once hot, add 1 tablespoon of the peanut oil. Heat the oil until it shimmers, then add the tofu. Cook the tofu until golden brown, moving constantly, for 1 to 2 minutes. Remove the tofu from the pan to a small bowl and set aside.

If necessary, add some more peanut oil to the pan and heat until shimmering. Add two-thirds of the scallions and then the garlic. Cook for 10 to 15 seconds. Add the eggs to the pan; once the eggs begin to set up, about 15 to 20 seconds, stir to scramble. Add the remaining ingredients in the following order and toss after each addition: noodles, sauce, cabbage, shrimp, and two-thirds of the bean sprouts and peanuts. Toss everything until heated through, but no longer than 1 to 2 minutes total. Transfer to a serving dish. Garnish with the remaining scallions, bean sprouts, and peanuts. Serve immediately with the ground chili peppers and lime wedges.

***

The Palace Cafe’s Banana Walnut Muffins
adapted from The Palace Cafe

Makes 1 dozen

1 1/2 cups (180 g) all-purpose flour
3/4 cup (150 g) sugar
3/4 cup (about 3 oz/90 g) chopped walnuts
1 1/2 teaspoon baking soda
1/4 teaspoon salt
3 ripe bananas, well mashed (about 1 1/4 cup)
1/2 cup (1 stick/110 g) unsalted butter, melted and cooled
1 egg
2 1/2 tablespoons milk

Preheat the oven to 350°F (180°C). Grease 12 (1/2 cup) muffin cups or line with paper or silicone muffin liners. Mix together the flour, sugar, chopped walnuts, baking soda and salt in a large bowl. Combine the bananas, butter, egg and milk in a medium bowl. Add the banana mixture to the dry ingredients, mixing until just combined. Divide the batter among the prepared muffin cups. Bake until a tester inserted into the center of a muffin comes out clean, about 25 minutes. Serve warm or at room temperature.

Fettuccine Alfredo with Shrimp and Peas, Tossed Salad, and Beatty’s Chocolate Cake

Last week our beloved 13-year-old cat, Miso, was hit and killed by a car. The shock of his death quickly wore off, replaced by a constant tearfulness and an intense longing to pet him just one more time. Reuben and I grew up with Miso, moving him from student apartments in Madison to slightly nicer apartments in Chicago and finally to our home in Milwaukee. He was as loyal and wise as a dog and as stately as any person I have met. It’s still hard to pull into our driveway and not expect to see him in the window or waiting on the porch for me. After a week of grieving, I’m now able to comfort myself with the understanding that he lived a good and full life. Chocolate cake helped too. I know, I know, we shouldn’t eat out of emotion. But in my defense, the deliberate measuring, mixing, baking, and frosting of the cake were just as therapeutic as sitting down and pondering Miso’s life as I polished off piece after piece of the best cake I’ve ever tasted. Comfort food is, in fact, comforting.

Fettuccine Alfredo with Shrimp and Peas

Serves 4

1 lb (450 g) fettuccine or linguine
3 tablespoons butter, divided
1 lb (450 g) raw shrimp
salt and freshly ground black pepper
1 1/2 cups (360 ml) half-and-half (or 3/4 cup (180 ml) milk + 3/4 cup (180 ml) cream)
1 cup (150 g) grated fresh Parmesan
1 cup (140 g) fresh or frozen peas, cooked

Cook the pasta in boiling, salted water according to package directions. While the pasta cooks, melt 1 tablespoon of the butter in a small saute pan. Add the shrimp to the melted butter and cook over a medium heat for 4 to 5 minutes, until just cooked through. Season with salt and pepper to taste and set aside.

Melt the remaining 2 tablespoons of butter in a large skillet over a medium heat. Add the half-and-half, cheese, and more salt and pepper, to taste. Cook for 2 to 3 minutes, stirring constantly. Do not boil. Reduce the heat and add the cooked pasta, shrimp, and peas, tossing gently to coat. Serve immediately in warm bowls.

***

chocolate cake

Beatty’s Chocolate Cake
adapted from Barefoot Contessa at Home by Ina Garten

Serves 8

butter, for greasing the pans
1 3/4 cups (210 g) all-purpose flour, plus more for pans
2 cups (400 g) sugar
3/4 cups (100 g) good-quality cocoa powder
2 teaspoons baking soda
1 teaspoon baking powder
1 teaspoon kosher salt
1 cup (240 ml) buttermilk, shaken
1/2 cup (120 ml) vegetable oil
2 extra-large eggs, at room temperature
1 teaspoon pure vanilla extract
1 cup (240 ml) freshly brewed hot coffee
chocolate buttercream (recipe follows)

Preheat the oven to 350°F (180°C). Butter 2 x 8‑inch round cake pans. Line with parchment paper, then butter and flour the pans.

Sift the flour, sugar, cocoa, baking soda, baking powder, and salt into the bowl of an electric mixer fitted with a paddle attachment and mix on low speed until combined. In another bowl, combine the buttermilk, oil, eggs, and vanilla. With the mixer on low speed, slowly add the wet ingredients to the dry. With the mixer still on low, add the coffee and stir just to combine, scraping the bottom of the bowl with a rubber spatula. Pour the batter into the prepared pans and bake for 35 to 40 minutes, until a cake tester comes out clean. Cool in the pans for 30 minutes, then turn them out onto a cooling rack and cool completely.

Place 1 layer, flat side up, on a flat plate or cake pedestal. With a knife or offset spatula, spread the top with frosting. Place the second layer on top, rounded side up, and spread the frosting evenly on the top and sides of the cake.

Chocolate Buttercream

6 oz (170 g) good-quality semisweet chocolate
1/2 lb (2 sticks/225 g) unsalted butter, at room temperature
1 extra-large egg yolk, at room temperature
1 teaspoon pure vanilla extract
1 1/4 cups (150 g) sifted confectioners’ sugar
1 tablespoon instant coffee powder

Chop the chocolate and place it in a heat-proof bowl set over a pan of simmering water. Stir until just melted and set aside until cooled to room temperature.

In the bowl of an electric mixer fitted with a paddle attachment, beat the butter on medium-high speed until light yellow and fluffy, about 3 minutes. Add the egg yolk and vanilla and continue beating for 3 minutes. Turn the mixer to low, gradually add the confectioners’ sugar, then beat at medium speed, scraping down the bowl as necessary, until smooth and creamy. Dissolve the coffee powder in 2 teaspoons of the hottest tap water. On low speed, add the chocolate and coffee to the butter mixture and mix until blended. Don’t whip! Spread immediately on the cooled cake.

Clay Pot Pork and Coconut Cupcakes with Coconut Cream Cheese Frosting

This is a great meal to serve when dinner for six suddenly turns into dinner for nine. Cousin Alais came to visit and our casual supper turned into a casual dinner party when old friends from California came into town. The braised pork dish doubles well and rice can stretch a long way when you need it to. An Asian-inspired salad rounds out the meal well. We also ate an asparagus and bean sprout salad that my in-laws made. If I can talk my mother-in-law out of the recipe, I’ll add it later.

I’ve been looking for these cupcakes for a long time, maybe my entire adult life. I love coconut; I love cake. So why is it so hard to find a good coconut cake? This cupcake recipe is exactly what it should be. Delicate, not too sweet, with a strong coconut flavor and a tangy frosting. I think the coconut milk and dessicated coconut made this recipe. If you’re looking for dessicated coconut (sweetened or unsweetened work fine), check out Whole Foods or your local health food store. Also, these make precious Halloween ghost cupcakes with the addition of mini-chocolate chip eyes. Sam insisted on adding noses, which also looked cute, if not exactly scary.

Clay Pot Pork
from Gourmet, May 2008

Serves 4

1/3 cup (75 g) sugar
3/4 cup (175 ml) water
1/3 cup (80 ml) Asian fish sauce, preferably Vietnamese
3 shallots, thinly sliced
2 garlic cloves, thinly sliced
3 scallions, thinly sliced diagonally, white and green parts kept separate
1 lb (450 g) trimmed boneless pork shoulder, cut into 1‑inch cubes
1 teaspoon finely ground black pepper
cooked rice, to serve

Cook the sugar in a dry 3‑quart heavy saucepan over a moderate heat, without stirring, until it begins to melt. Continue to cook, stirring occasionally with a fork, until the sugar has melted into a deep golden caramel. Carefully add the water and fish sauce (the caramel will harden and steam vigorously) and cook, stirring, until the caramel is dissolved. Add the shallots, garlic, and white part of the scallions and cook, uncovered, stirring occasionally, for 4 minutes.

Toss the pork with the pepper in a bowl and stir into the sauce. Bring to a simmer, then cover the pan, reduce the heat to low, and braise the pork, stirring once or twice, until very tender, 1 1/4 to 1 1/2 hours. Stir in the scallion greens and serve with rice.

***

Coconut Cupcake

Coconut Cupcakes with Coconut Cream Cheese Frosting
adapted from Simplyrecipes.com

Makes 18 cupcakes

for the cupcakes:
3/4 cup (165 g) unsalted butter, room temperature
1 1/4 cup (250 g) sugar
3 eggs, room temperature
2 1/4 cups (270 g) flour
1 teaspoon salt
1 teaspoon baking powder
1 cup (240 ml) canned coconut milk (regular, not light)
1 teaspoon vanilla extract
1/2 cup (40 g) desiccated coconut

for the frosting:
1/4 cup (55 g) butter, room temperature
8 oz (225 g) cream cheese, room temperature
3/4 to 1 cup (90 to 120 g) powdered sugar
1/4 cup (20 g) desiccated coconut, plus extra for sprinkling

Preheat the oven to 350°F (180°C).

Cream the butter until light and fluffy. Add the sugar and cream until light and fluffy again, scraping down the sides halfway through to ensure even mixing.

Add the eggs one at a time, beating for 30 seconds each to ensure they are well mixed. Be sure to scrape down the sides  to ensure even mixing.

Combine the flour, salt, and baking powder in one bowl. In another, add 1 cup (240 ml) of a well-shaken can of coconut milk and the vanilla. Add one-third of the dry ingredients to the butter and sugar mixture and mix, then add half of the wet ingredients. Continue alternating with the wet and dry mixtures, ending with the dry. Stop mixing just as the ingredients become incorporated; do not overbeat. Fold in the coconut.

Scoop the cupcake batter into cupcake papers about three-quarters of the way full. Bake for 18 to 22 minutes, rotating the pan after 15 minutes to ensure even baking. Be sure to check with a toothpick to see if the cupcakes are done. If the toothpick comes out of the cupcake clean, then they’re ready. Allow the cupcakes to cool for a minute or two in the pan, then transfer to a wire rack to cool completely.

To make the frosting, cream the butter and cream cheese together for about 3 minutes. Scrape down the sides and bottom of the bowl. Slowly add the powdered sugar — taste as you go, adding more sugar until you’ve reached the desired sweetness. Fold in the coconut. Spread about 2 tablespoons onto each cooled cupcake. Sprinkle a bit of extra shredded coconut on top and serve.

Eight-layer Burritos with Slow Cooker Black Beans and Apple Bars

I’m back at work after a wonderful 16 weeks of maternity leave (probably shockingly short to our non‑U.S. readers). Life is hectic now, to say the least. There is less time for sleeping, cleaning, snuggling, and, of course, cooking. Family dinners together are still one of my top priorities though. I’d rather have a messy house than skip the half-hour table time with my husband and little ones. So, in an attempt to protect our family dinnertime, I’ve taken my Crock-Pot out of storage. I have a feeling I may need to clear a permanent space on the kitchen counter for it.

Beans are one of my favorite dishes to make in a Crock-Pot. Unlike a lot of other ingredients that tend to dissolve in the slow cooker, the texture of beans doesn’t suffer much after a full day of slow cooking. Since Reuben took care of the beans in the morning, dinner was a cinch to put together. I even had enough to energy to bake a cake when he mentioned that he “could go for some cake” after we finished our burritos. Thank you to my friend Lucinda for this bars/snack cake recipe. It’s quick and easy enough to throw together after dinner and I almost always have the ingredients in my house. Kristin also pointed out that this cake would be a great way to celebrate Apple Day, which is today.

Eight-layer Burritos with Slow Cooker Black Beans

Serves 6

1 lb (450 g) dry black beans, rinsed and picked over
1 onion, chopped
2 cloves garlic, minced
1/2 teaspoon red pepper flakes
1 teaspoon cumin
8 cups (2 liters) water
4 slices bacon, cooked and crumbled (optional)
salt
12 flour tortillas
2 to 3 cups (200 g to 300 g) cooked rice (white or brown)
toppings: shredded cheddar or Monterey jack cheese, salsa, sour cream, avocado, diced tomatoes, julienned bell pepper

Combine the beans, onion, garlic, red pepper flakes, cumin, water and bacon (if using) in a slow cooker. Cook on the low setting for 7 to 9 hours, until the beans are tender. Add salt to the cooked beans to taste, usually 1 to 2 teaspoons.

Toast the tortillas over an open flame on a gas burner for 10 to 20 seconds on each side. If you don’t have a gas stove, warm on a baking sheet in a preheated oven for 5 minutes.

Fill each tortilla with rice, beans and toppings, to taste.

***

Apple Bars

from allrecipes.com

Makes 16 bars

1/2 cup (110 g) butter, melted
1 cup (200 g) white sugar
1 egg
1 cup (120 g) all-purpose flour
1/2 teaspoon baking soda
1 teaspoon ground cinnamon
1 cup (110 g) apples, peeled, cored and finely diced
1 cup (100 g) chopped walnuts

Preheat the oven to 350°F (180°C). Grease and flour an 8 x 8‑inch baking pan.

In a large bowl, mix the melted butter with the sugar and egg. Mix in the flour, baking soda and cinnamon, and then stir in the apple and walnuts. Spread the batter into the prepared pan. Bake for approximately 40 minutes, or until a small knife inserted in the center comes out clean.

Mapo Dofu and Angel Food Cake with Chocolate Whipped Cream Frosting

Iron Chef may be one of television’s finest creations. And lest you think I’m recommending Food Network’s knockoff show Iron Chef America, I’m not. I’m referring to the original Japanese Iron Chef with dubbed in voices, wacky commentary, and often grotesque dishes (which more often than not involve some poor animal’s liver or reproductive parts). I first saw Iron Chef in the 90s on my first trip to New York. I still remember randomly stumbling across the competitive cooking show while staying up late watching cable. Reuben and I were instantly addicted. Unfortunately, being poor college kids at the time, we didn’t get cable or access to Iron Chef until several years later. Now, we are the proud owners of a nearly complete set of dubbed Iron Chef episodes and a limited edition Iron Chef board game (how geeky!). Though Iron Chef is great entertainment, I wouldn’t want to eat everything that’s prepared on the show, such as cod roe ice cream. On the other hand, there are a few dishes that look too good not to try out, one of them being Iron Chef Chinese Chen Kenichi’s Mapo Dofu. Though Chen cooks this tofu dish regularly in competition, I’ve only seen it on the menu of a handful of Chinese restaurants. I made the mistake of ordering it once in Salt Lake City — not the best place for authentic Chinese. After eating that blander-than-bland version, I figured I couldn’t do much worse at home. Reuben did some research and came up with a fantastic recipe. I’m not sure how close it is to the Iron Chef’s dish, but we love it.

If you haven’t had homemade angel food cake, you’re really missing out. The Styrofoam-like store-bought versions can’t hold a candle to a fresh-baked angel food cake. Tonight’s cake was leftover from my father-in-law’s birthday party. I made two cakes for the party, one with chocolate whipped cream frosting and the other with a lemon glaze. Though both were good, the chocolate version looked prettier. Of course I forgot to take a picture, but you’ll have to take my word for it.

Mapo Tofu

Quick and Easy Mapo Dofu
adapted from About.com

Serves 4

1/2 lb (225 g) ground pork
1 tablespoon soy sauce
pinch of cornstarch
1 package firm tofu, drained
4 green onions
1 clove garlic
2 tablespoons oil, for stir-frying
1/4 teaspoon sambal or chili paste with garlic
2 tablespoons black bean sauce
2 tablespoons water
1 teaspoon Szechuan peppercorn or ground coriander
rice, to serve

Marinate the ground pork in the soy sauce and cornstarch for 15 to 20 minutes. While pork is marinating, cut the tofu into 1/2‑inch cubes, cut the green onions on the diagonal into 1‑inch pieces, and peel and mince the garlic.

Heat a wok or large skillet over a high heat and add the oil. When the oil is hot, add the chili paste and garlic. Stir-fry until aromatic, about 30 seconds. Add the ground pork and stir-fry until the pork is nearly cooked through.

Lower the heat to medium and add the black bean sauce, tofu and green onions. Cook, stirring frequently, until the tofu is browned (8 to 10 minutes). Add water as needed. Just before serving, sprinkle with the Szechuan peppercorn or ground coriander. Serve over rice.

***

Angel Food Supreme Cake
adapted from Betty Crocker’s Cookbook/40th Anniversary Edition

Serves 10

3/4 cup (150 g) sugar
1 cup (115 g) cake flour
1 1/2 cups egg whites (about 11 eggs’ worth)
1 1/2 teaspoons cream of tartar
3/4 cup (150 g) granulated sugar
1 teaspoons vanilla
1/2 teaspoon almond extract
1/4 teaspoon salt

Preheat the oven to 375°F (190°C). Whisk together 3/4 cup sugar and flour; set aside.

Beat the egg whites and cream of tartar in large bowl with an electric mixer on medium speed until foamy. Beat in the granulated sugar 2 tablespoons at a time on high speed, until the meringue holds stiff peaks. Fold in the vanilla, almond extract and salt. Sprinkle the sugar-flour mixture, 1/4 cup at a time, over the egg white mixture, folding in until the sugar-flour mixture disappears. Push the batter into a 10-inch ungreased angel food cake pan (tube pan). Cut gently through the batter with a butter knife to remove any air bubbles.

Bake for 30 to 35 minutes, or until the top is golden and springs back when touched lightly. Invert the pan onto a heatproof funnel or wine bottle. Let it hang until the cake is completely cool. Loosen the side of the cake with a knife and remove from the pan. Cut with a serrated knife to serve.

***

Chocolate Whipped Cream Frosting
from Bon Appétit, October 1991

1 cup (120 g) powdered sugar
1/2 cup (60 g) unsweetened cocoa powder
1/4 cup (60 ml) milk
pinch of cream of tartar
2 cups (480 ml) chilled whipping cream

Whisk the powdered sugar, cocoa powder, milk and cream of tartar in a large bowl until smooth. Cover and refrigerate until well chilled, about 1 hour. (Can be prepared 4 hours ahead.)

Using an electric mixer, gradually beat the cream into the chocolate mixture. Continue beating until stiff peaks form. Place the cake on a platter. Spread the top and sides of cake with icing. Slice into wedges and serve.